Java의 바이트 버퍼 클래스 데모
-
Java의
ByteBuffer클래스 -
Java에서
ByteBuffer클래스의 작동 범주 - Java의 바이트 버퍼 클래스 메서드
- Java에서 바이트 버퍼 구현
-
Java에서 바이트 버퍼 클래스의
getChar메서드 구현
이 기사는 Java Virtual Machine이 ByteBuffer 클래스를 처리하는 방법을 이해하는 데 도움이 됩니다. 또한 범위를 표시하고 주요 매개변수를 나열합니다.
마지막으로 논의한 내용을 시연하기 위해 두 개의 Java 프로그램을 실행합니다.
Java의 ByteBuffer 클래스
ByteBuffer 클래스는 일련의 정수 값을 포함하는 데 사용됩니다. 이러한 정수 값은 I/O 작업에 사용됩니다.
소스에서 대상으로 바이트를 전송하는 데 도움이 되는 버퍼입니다. 또한 버퍼 어레이와 같은 스토리지 외에도 현재 위치, 제한, 용량 등과 같은 추상화를 제공합니다.
Example1 및 Example2라는 두 가지 기본 Java 파일이 있습니다.첫 번째 예제를 사용하여 ByteBuffer를 할당하고 해당 개체를 사용하는 방법을 보여줍니다. 두 번째 예제에서는 주로 getChar() 및 rewind() 메서드를 사용합니다.
자세한 내용을 보려면 계속 읽으십시오.
Java에서 ByteBuffer 클래스의 작동 범주
get및put메소드(절대 및 상대)를 사용하여 단일 바이트를 읽고 쓸 수 있습니다.- 우리는 또한 이 버퍼에서 배열로 인접한 바이트 시퀀스 데이터를 전송하기 위해 (상대적인
대량 가져오기메서드)를 사용할 수 있습니다. - 바이트 버퍼를 압축, 복제 및 슬라이싱하는 방법도 사용할 수 있습니다(선택 사항).
- 다른 기본 유형의 값을 읽고 쓰기 위한 절대 및 상대
get및put메서드, 특정 바이트 순서로 바이트 시퀀스 간에 변환합니다.
ByteBuffer 클래스의 계층 구조:
java.lang.Object> java.nio.Buffer>java.nio.ByteBuffer`
바이트 버퍼는 직접 또는 간접일 수 있으며 비직접이라고도 합니다. JVM(Java Virtual Machine)은 직접 바이트 버퍼가 있는 경우 모든 작업을 수행합니다.
네이티브 I/O 작업을 직접 수행해 보십시오. 즉, JVM은 운영 체제의 기본 I/O 작업의 각 명령 이전(또는 이후)에 버퍼의 콘텐츠를 중간 버퍼로(또는 중간 버퍼에서) 복사하지 않으려고 합니다.
두 가지 간단한 방법으로 바이트 버퍼를 만들 수 있습니다.
-
allocate()- 버퍼 내용을 위한 공간을 할당할 수 있습니다.다음 코드 블록은 20바이트 용량의 빈 바이트 버퍼를 생성하는 방법을 보여줍니다.
통사론:
ByteBuffer xyz = ByteBuffer.allocate(20); -
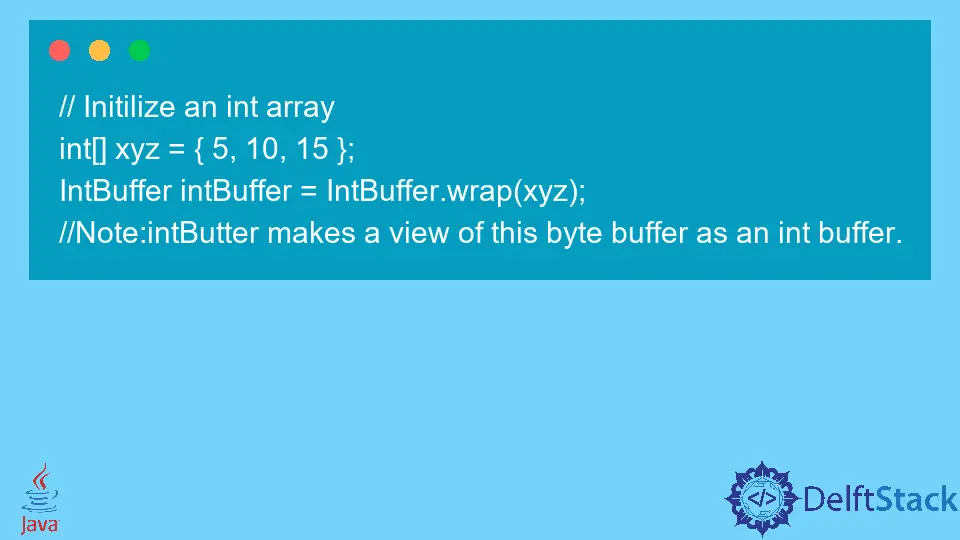
wrap()- 버퍼의 기존 바이트 배열로 래핑합니다.통사론:
// Initilize an int array
int[] xyz = {5, 10, 15};
IntBuffer intBuffer = IntBuffer.wrap(xyz);
// Note:intButter makes a view of this byte buffer as an int buffer.
Java의 바이트 버퍼 클래스 메서드
이 클래스에 포함될 수 있는 더 많은 메서드가 있습니다. 그러나 필요하다고 생각되는 항목만 강조 표시합니다.
둘째, 구현을 위해 아래 표의 각 방법을 사용하지 않습니다. 우리는 가장 중요한 몇 가지 방법과 사용법에 익숙해지는 것을 목표로 합니다.
자세한 내용을 보려면 Byte Buffer Class Oracle Docs를 참조하십시오.
| S.N | 방법 이름 | 요약 |
|---|---|---|
| 1 | 넣기(바이트 a) |
새로운 바이트 버퍼를 예약합니다. |
| 2 | get() |
상대 get 방법. |
| 삼 | 할당(int 용량) |
새 바이트 버퍼를 예약합니다. |
| 4 | order() |
이 버퍼의 현재 해시 코드를 제공합니다. |
| 5 | isDirect() |
이 바이트 버퍼가 직접인지 여부를 알려줍니다. |
| 6 | hashArray() |
해시 배열은 사용 가능한 바이트 배열이 이 버퍼를 지원하는지 여부를 알려줍니다. |
| 7 | getInt() |
int 값을 읽기 위해. |
| 8 | compact() |
이 버퍼를 압축합니다. |
| 9 | asIntBuffer() |
이것은 이 바이트 버퍼를 int 버퍼로 봅니다. |
| 10 | allocateDirect(int 용량) |
새로운 직접 바이트 버퍼를 할당합니다. |
| 11 | putInt(int 값) |
상대 put 방법입니다. |
| 12 | 넣기(정수, 바이트) |
이것은 절대적인 put 방법입니다. |
| 13 | getChar() |
문자 값을 읽는 방법을 얻기 위해 사용됩니다. |
Java에서 바이트 버퍼 구현
다음 프로그램은 표에 제공된 각 방법에 대한 예를 보여주지 않습니다. 그러나 가장 일반적인 것 중 일부를 다룰 것입니다.
또는 공식 문서를 참조할 수도 있습니다.
예:
-
용량 설정
ByteBuffer bfr = ByteBuffer.allocate(20); -
바이트 버퍼의 용량을 가져옵니다.
int capacity = bfr.capacity(); -
절대
put(int, byte)를 사용하여 위치를 설정합니다.참고: 이 방법은 위치에 영향을 주지 않습니다.
// position=2
bfr.put(2, (byte) 2xFF);
-
위치를 10으로 설정
bfr.position(10); -
테이블에 언급된 관련
put(byte)를 사용할 수도 있습니다.bfr.put((byte) 2xFF); // position 2 -
새로운 직위를 얻고 싶다면
int newposition = bfr.position(40); -
남은 바이트 수를 얻을 수 있습니다.
int remainingByteCount = bfr.remaining(); -
한도 설정
bfr.limit(10);
구현:
이 프로그램에서 바이트 버퍼 클래스를 시연합니다. 먼저 바이트 버퍼와 객체를 생성하고 크기를 할당합니다.
그런 다음 PuntInt() 함수를 사용하여 typecasting하여 int 데이터 유형을 바이트로 변환합니다.
암호:
package bytebuffer.delftstack.com.util;
/*We will demonstrate the byte buffer class in this program.
 *First of all, we will create a byte buffer and its object and allocate it a size.
 *Then, we will convert the int data type to the byte by typecasting with the help of PuntInt()
 *function */
import java.nio.*;
import java.util.*;
// main class
public class Example1 {
  // main function
  public static void main(String[] args) {
    // capacity declaration
    int allocCapac = 6;
    // Creating the ByteBuffer
    try {
      // creating object of ByteBuffer
      // and allocating size capacity
      ByteBuffer createOBJ = ByteBuffer.allocate(allocCapac);
      // putting the int to byte typecast value
      // in ByteBuffer using putInt() method
      createOBJ.put((byte) 20);
      createOBJ.put((byte) 40);
      createOBJ.put((byte) 60);
      createOBJ.put((byte) 80);
      createOBJ.put((byte) 100);
      createOBJ.put((byte) 120);
      createOBJ.rewind();
      // We will print the byter buffer now
      System.out.println("The byte buffer: " + Arrays.toString(createOBJ.array()));
    }
    // catch exception for error
    catch (IllegalArgumentException e) {
      System.out.println("IllegalArgumentException catched");
    } catch (ReadOnlyBufferException e) {
      System.out.println("ReadOnlyBufferException catched");
    }
  }
}
// class
출력:
The byte buffer: [20, 40, 60, 80, 100, 120]
Java에서 바이트 버퍼 클래스의 getChar 메서드 구현
이전 프로그램에서와 같이 이 코드 블록에서 int 대신 문자열을 사용합니다. 우선 바이트 버퍼의 용량을 100으로 선언합니다.
그런 다음 객체를 생성하고 int 값 대신 문자열을 넣은 다음 크기와 함께 할당합니다. 그런 다음 rewind()를 사용하여 이 버퍼를 되감고 while 루프에서 getChar 기능을 적용합니다.
자세한 내용은 다음 코드 블록을 확인하십시오.
package bytebuffer.delftstack.com.util;

/*In this code block, we will use string instead of int like the previous program.
First of all, we declare the capacity of the byte buffer to `100`.
Then, we create its object, put the string instead of the int value, and allocate it with size.
After that, we will use `rewind()` to rewind this buffer and in the while loop and finally apply the
getChar function. Please check out the following code block to learn more:*/

import java.nio.ByteBuffer;
public class Example2 {
  public static void main(String[] args) {
    // Declaring the capacity of the ByteBuffer
    int capacity = 100;
    // Creating the ByteBuffer
    // creating object of ByteBuffer
    // and allocating size capacity
    ByteBuffer bufferOBJ = ByteBuffer.allocate(capacity);
    // putting the string in the bytebuffer
    bufferOBJ.asCharBuffer().put("JAVA");
    // rewind the Bytebuffer
    bufferOBJ.rewind(); // The position is set to zero and the mark isdiscarded.
    // Declaring the variable
    char charr;
    // print the ByteBuffer
    System.out.println("This is the default byte buffer: ");
    while ((charr = bufferOBJ.getChar()) != 0) System.out.print(charr + "");
    // rewind the Bytebuffer
    bufferOBJ.rewind();
    // Reads the char at this buffer's current position
    // using getChar() method
    char FrstVal = bufferOBJ.getChar();
    // print the char FrstVal
    System.out.println("\n\n The first byte value is : " + FrstVal);
    // Reads the char at this buffer's next position
    // using getChar() method
    char NXTval = bufferOBJ.getChar();
    // print the char FrstVal
    System.out.print("The next byte value is : " + NXTval);
  }
}
출력:
This is the default byte buffer:
JAVA
The first byte value is : J
The next byte value is : A

Sarwan Soomro is a freelance software engineer and an expert technical writer who loves writing and coding. He has 5 years of web development and 3 years of professional writing experience, and an MSs in computer science. In addition, he has numerous professional qualifications in the cloud, database, desktop, and online technologies. And has developed multi-technology programming guides for beginners and published many tech articles.
LinkedIn