Demostración de la clase Byte Buffer en Java
-
Clase
ByteBufferen Java -
Categorías operativas de la clase
ByteBufferen Java - Métodos de la clase Byte Buffer en Java
- Implementación de Byte Buffer en Java
-
Implemente el método
getCharde la clase Byte Buffer en Java
Este artículo lo ayudará a comprender cómo una máquina virtual Java trata con una clase ByteBuffer. También indicaremos su alcance y enumeraremos sus principales parámetros.
Finalmente, ejecutaremos dos programas Java para demostrar lo que discutimos.
Clase ByteBuffer en Java
Se utiliza una clase ByteBuffer para contener una serie de valores enteros. Estos valores enteros se utilizan en las operaciones de E/S.
Es un búfer que ayuda a transferir bytes desde un origen a un destino. Además, proporciona abstracciones como la posición actual, el límite, la capacidad, etc., además del almacenamiento como una matriz de búfer.
Ejemplo1 y Ejemplo2.Usamos el primer ejemplo para demostrar cómo asignar un ByteBuffer y usar sus objetos. Usaremos principalmente los métodos getChar() y rewind() en el segundo ejemplo.
Por favor, sigue leyendo para aprender más.
Categorías operativas de la clase ByteBuffer en Java
- Podemos usar los métodos
getyput(absoluto y relativo) para leer y escribir bytes individuales. - También podemos usar (métodos de
obtención masivarelativos) para transferir datos de secuencia adyacentes de bytes desde este búfer a una matriz. - También podemos usar métodos para compactar, duplicar y dividir un búfer de bytes (opcional).
- Métodos
getyputabsolutos y relativos para leer y escribir valores de otros tipos primitivos, convirtiéndolos a y desde secuencias de bytes en un orden de bytes particular.
Jerarquía de la clase ByteBuffer:
java.lang.Object> java.nio.Buffer>java.nio.ByteBuffer`
Un búfer de bytes puede ser directo o indirecto, también denominado no directo. La máquina virtual de Java (JVM) hará todo si tenemos un búfer de byte directo.
Intente realizar operaciones de E/S nativas en él directamente. En otras palabras, JVM intenta evitar copiar el contenido del búfer a (o desde) un búfer intermedio antes (o después) de cada encantamiento de una operación de E/S nativa del sistema operativo.
Con dos métodos simples, podemos crear búferes de bytes:
-
allocate()- Podemos asignar espacio para el contenido del búfer.El siguiente bloque de código le muestra cómo crear un búfer de bytes vacío con una capacidad de 20 bytes.
Sintaxis:
ByteBuffer xyz = ByteBuffer.allocate(20); -
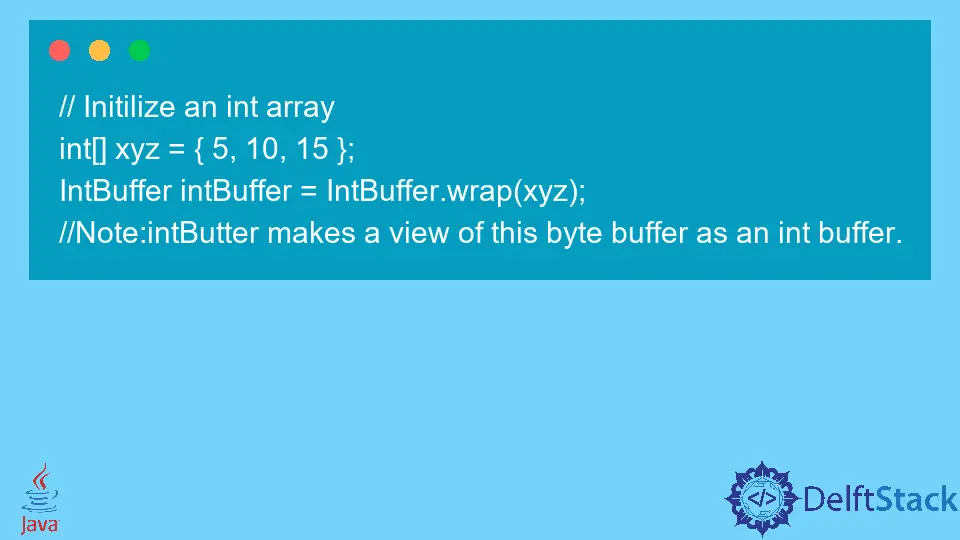
wrap(): envuélvalo en una matriz de bytes existente de un búfer.Sintaxis:
// Initilize an int array
int[] xyz = {5, 10, 15};
IntBuffer intBuffer = IntBuffer.wrap(xyz);
// Note:intButter makes a view of this byte buffer as an int buffer.
Métodos de la clase Byte Buffer en Java
Hay más métodos que esta clase puede contener. Sin embargo, destacaremos solo aquellos que creemos que son necesarios.
En segundo lugar, no utilizaremos cada método de la siguiente tabla para nuestra implementación. Nuestro objetivo es familiarizarlo con algunos de los métodos más significativos y su uso.
Si desea leer más: Byte Buffer Class Oracle Docs.
| S. N. | Nombre del método | Resumen |
|---|---|---|
| 1 | poner(byte a) |
Reserva un búfer de bytes nuevo. |
| 2 | get() |
Un método get relativo. |
| 3 | asignar(capacidad int) |
Reserva un nuevo búfer de bytes. |
| 4 | order() |
Proporciona el código hash actual de este búfer. |
| 5 | isDirect() |
Informar si este búfer de bytes es directo o no. |
| 6 | hashArray() |
La matriz hash indica si una matriz de bytes disponible respalda o no este búfer. |
| 7 | getInt() |
Para leer un valor int. |
| 8 | compact() |
Compacta este búfer |
| 9 | asIntBuffer() |
Esto ve este búfer de bytes como un búfer int. |
| 10 | allocateDirect(capacidad int) |
Asigna un nuevo búfer de byte directo. |
| 11 | putInt(valor int) |
Es un método relativo de poner. |
| 12 | poner(int, byte) |
Este es un método de put absoluto. |
| 13 | getChar() |
Se utiliza para obtener un método para leer un valor de carácter. |
Implementación de Byte Buffer en Java
El siguiente programa no le mostrará un ejemplo para cada método dado en la tabla. Pero, cubrirá algunos de los más comunes.
Alternativamente, también puede consultar la documentación oficial.
Ejemplos:
-
Establecer capacidad
ByteBuffer bfr = ByteBuffer.allocate(20); -
Obtenga la capacidad del búfer de bytes.
int capacity = bfr.capacity(); -
Establezca la posición utilizando
put(int, byte)absoluto.Nota: Este método no afecta la posición.
// position=2
bfr.put(2, (byte) 2xFF);
-
Establecer la posición a 10
bfr.position(10); -
También puede utilizar el relativo
put(byte)mencionado en la tabla.bfr.put((byte) 2xFF); // position 2 -
Si quieres conseguir el nuevo puesto
int newposition = bfr.position(40); -
Puede obtener el recuento de bytes restantes
int remainingByteCount = bfr.remaining(); -
Establecer el límite
bfr.limit(10);
Implementación:
Demostraremos la clase de búfer de bytes en este programa. Primero, crearemos un búfer de bytes y su objeto y le asignaremos un tamaño.
Luego, convertiremos el tipo de datos int al byte mediante el encasillado usando la función PuntInt().
Código:
package bytebuffer.delftstack.com.util;
/*We will demonstrate the byte buffer class in this program.
 *First of all, we will create a byte buffer and its object and allocate it a size.
 *Then, we will convert the int data type to the byte by typecasting with the help of PuntInt()
 *function */
import java.nio.*;
import java.util.*;
// main class
public class Example1 {
  // main function
  public static void main(String[] args) {
    // capacity declaration
    int allocCapac = 6;
    // Creating the ByteBuffer
    try {
      // creating object of ByteBuffer
      // and allocating size capacity
      ByteBuffer createOBJ = ByteBuffer.allocate(allocCapac);
      // putting the int to byte typecast value
      // in ByteBuffer using putInt() method
      createOBJ.put((byte) 20);
      createOBJ.put((byte) 40);
      createOBJ.put((byte) 60);
      createOBJ.put((byte) 80);
      createOBJ.put((byte) 100);
      createOBJ.put((byte) 120);
      createOBJ.rewind();
      // We will print the byter buffer now
      System.out.println("The byte buffer: " + Arrays.toString(createOBJ.array()));
    }
    // catch exception for error
    catch (IllegalArgumentException e) {
      System.out.println("IllegalArgumentException catched");
    } catch (ReadOnlyBufferException e) {
      System.out.println("ReadOnlyBufferException catched");
    }
  }
}
// class
Producción :
The byte buffer: [20, 40, 60, 80, 100, 120]
Implemente el método getChar de la clase Byte Buffer en Java
Usaremos string en lugar de int en este bloque de código como en el programa anterior. En primer lugar, declaramos que la capacidad del búfer de bytes es 100.
Luego, creamos su objeto, colocamos la cadena en lugar del valor int y le asignamos un tamaño. Después de eso, usaremos rewind() para rebobinar este búfer y en el bucle while y finalmente aplicaremos la función getChar.
Consulte el siguiente bloque de código para obtener más información.
package bytebuffer.delftstack.com.util;

/*In this code block, we will use string instead of int like the previous program.
First of all, we declare the capacity of the byte buffer to `100`.
Then, we create its object, put the string instead of the int value, and allocate it with size.
After that, we will use `rewind()` to rewind this buffer and in the while loop and finally apply the
getChar function. Please check out the following code block to learn more:*/

import java.nio.ByteBuffer;
public class Example2 {
  public static void main(String[] args) {
    // Declaring the capacity of the ByteBuffer
    int capacity = 100;
    // Creating the ByteBuffer
    // creating object of ByteBuffer
    // and allocating size capacity
    ByteBuffer bufferOBJ = ByteBuffer.allocate(capacity);
    // putting the string in the bytebuffer
    bufferOBJ.asCharBuffer().put("JAVA");
    // rewind the Bytebuffer
    bufferOBJ.rewind(); // The position is set to zero and the mark isdiscarded.
    // Declaring the variable
    char charr;
    // print the ByteBuffer
    System.out.println("This is the default byte buffer: ");
    while ((charr = bufferOBJ.getChar()) != 0) System.out.print(charr + "");
    // rewind the Bytebuffer
    bufferOBJ.rewind();
    // Reads the char at this buffer's current position
    // using getChar() method
    char FrstVal = bufferOBJ.getChar();
    // print the char FrstVal
    System.out.println("\n\n The first byte value is : " + FrstVal);
    // Reads the char at this buffer's next position
    // using getChar() method
    char NXTval = bufferOBJ.getChar();
    // print the char FrstVal
    System.out.print("The next byte value is : " + NXTval);
  }
}
Producción :
This is the default byte buffer:
JAVA
The first byte value is : J
The next byte value is : A

Sarwan Soomro is a freelance software engineer and an expert technical writer who loves writing and coding. He has 5 years of web development and 3 years of professional writing experience, and an MSs in computer science. In addition, he has numerous professional qualifications in the cloud, database, desktop, and online technologies. And has developed multi-technology programming guides for beginners and published many tech articles.
LinkedIn