HOWTO · Go
Go에서 Electron API를 사용하여 GUI 생성
이 튜토리얼은 GoLang에서 전자 API를 사용하여 GUI를 만드는 방법을 보여줍니다.
이 페이지의 내용
이 튜토리얼은 GoLang에서 전자 API를 사용하여 GUI를 만드는 방법을 보여줍니다.
Go에서 Electron API를 사용하여 GUI 생성
Electron API 또는 Astilelectron은 GoLang용 GUI를 만드는 데 사용됩니다. Astilelectron은 Electron으로 구동되는 패키지입니다. 이 API는 HTML, CSS, Javascript 및 GoLang을 사용하여 애플리케이션을 생성하는 Electron API 버전인 GitHub에서 제공됩니다.
Electron 패키지를 사용하기 전에 GitHub에서 가져와야 합니다. Electron 패키지의 공식 데모를 받아 실행해 봅시다.
Electron 패키지 받기 및 데모 실행
다음 단계에 따라 Astilelectron 데모를 설치하고 실행하십시오.
-
첫 번째 단계는 Astilelectron을 가져오는 것입니다. 프로젝트
src디렉터리의 cmd에서 다음 명령을 실행합니다.go get -u github.com/asticode/go-astilectron -
go-astylectron이 다운로드되면 다음 단계는 데모를 받는 것입니다. 데모를 얻으려면 다음 명령을 실행하십시오.go get -u github.com/asticode/go-astilectron-demo/...
-
전자 데모가 다운로드되면 다음 단계는
YourProject/src/github.com/asticode/go-astilelectron-demo/디렉토리에서bind.go파일을 제거하는 것입니다. 나중에 바인딩할 수 있도록 파일을 삭제합니다. -
다음 단계는
아스티클론 번들러를 설치하는 것입니다. 아래 명령을 실행하여 번들러를 다운로드하고 설치합니다.go get -u github.com/asticode/go-astilectron-bundler/... go install github.com/asticode/go-astilectron-bundler/astilectron-bundler
-
이제
C:\Users\Sheeraz\go\src\github.com\asticode\go-astilectron-demo디렉터리로 이동하여 다음 명령을 실행합니다.#go to the directory cd C:\Users\Sheeraz\go\src\github.com\asticode\go-astilectron-demo # astilectron-bundler command astilectron-bundler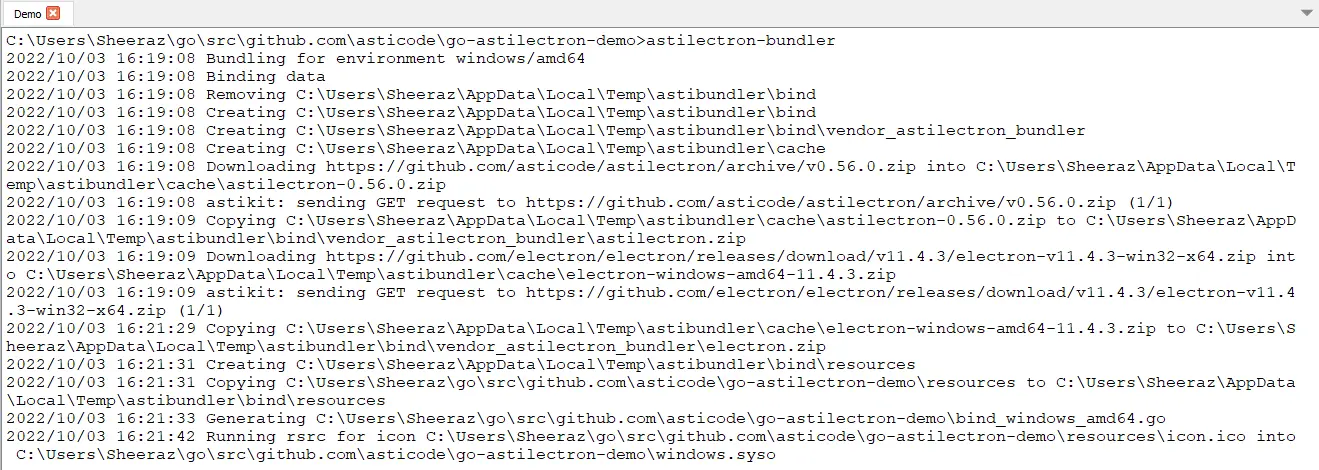
-
Bundler 명령이 성공하면 데모를 테스트할 수 있습니다.
C:\Users\Sheeraz\go\src\github.com\asticode\go-astillectron-demo\output\windows-amd64디렉터리로 이동하여Astillectron demo.exe파일을 실행합니다.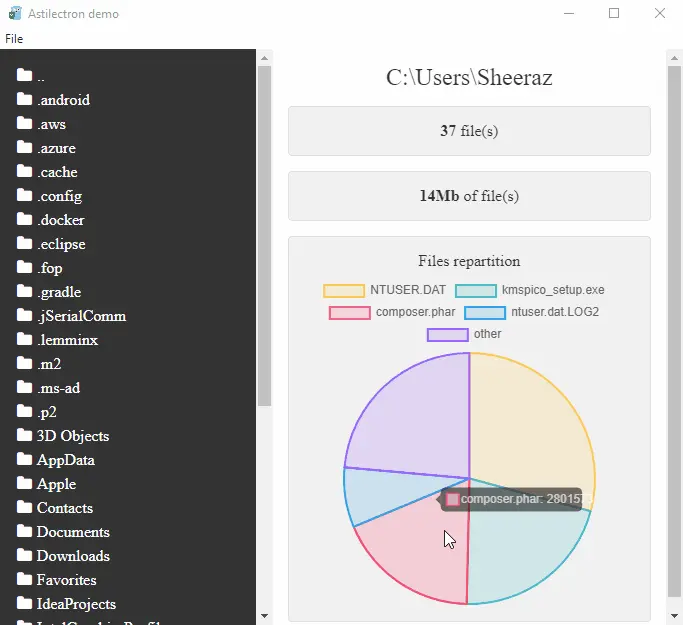
-
현재로서는 열린 폴더의 메모리 구조를 보여주는 Windows의 Astilelectron 데모를 볼 수 있지만 다른 운영 체제용 데모도 번들로 제공할 수 있습니다.
go-astillectron-demo디렉터리의bundler.json파일에 다음 부분을 추가합니다.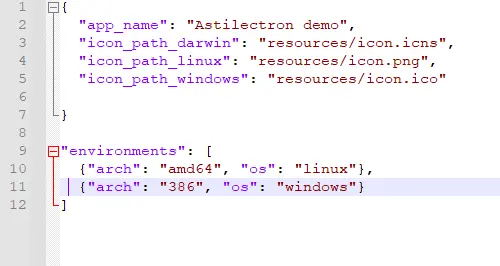
-
환경을 추가한 후 필요한 운영 체제에 대한 새
Astillectron demo.exe파일을 생성하는 프로세스를 반복해야 합니다.
Astilelectron을 사용한 HTML 예제
Astilelectron을 설치하는 위의 단계 후에 이제 응용 프로그램에 대한 고유한 GUI를 만들 수 있습니다. HTML 및 CSS를 사용하여 기본 예제를 시도해 보겠습니다.
HTML 앱을 빌드하고 실행하기 위한 GoLang 코드:
package main

import (
	"fmt"
	"log"

	"github.com/asticode/go-astikit"
	"github.com/asticode/go-astilectron"
)

func main() {
	// Set the logger
	demologger := log.New(log.Writer(), log.Prefix(), log.Flags())

	// Create astilectron with the application name and base directory
	demoastilectron, apperror := astilectron.New(demologger, astilectron.Options{
		AppName:           "Delftstack",
		BaseDirectoryPath: "Demo",
	})
	if apperror != nil {
		demologger.Fatal(fmt.Errorf("main: creating the astilectron is failed: %w", apperror))
	}
	defer demoastilectron.Close()

	// Handle the signals
	demoastilectron.HandleSignals()

	// Start Creating the app
	if apperror = demoastilectron.Start(); apperror != nil {
		demologger.Fatal(fmt.Errorf("main: starting the astilectron is failed: %w", apperror))
	}

	// Create a New Window
	var win *astilectron.Window
	if win, apperror = demoastilectron.NewWindow("index.html", &astilectron.WindowOptions{
		Center: astikit.BoolPtr(true),
		Height: astikit.IntPtr(800),
		Width:  astikit.IntPtr(800),
	}); apperror != nil {
		demologger.Fatal(fmt.Errorf("main: new window creation is failed: %w", apperror))
	}
	if apperror = win.Create(); apperror != nil {
		demologger.Fatal(fmt.Errorf("main: new window creation is failed: %w", apperror))
	}

	// Blocking pattern
	demoastilectron.Wait()
}
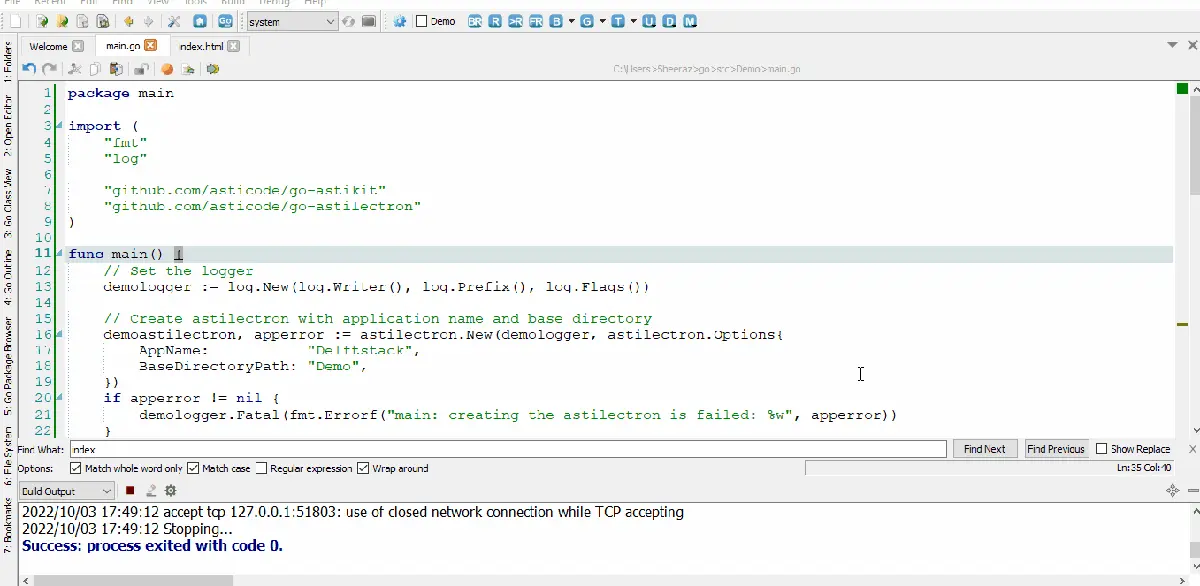
위의 코드는 앱을 실행하는 동안 IDE에서 다운로드하는 github.com/asticode/go-astikit도 사용합니다. HTML 코드는 다음과 같습니다.
<!DOCTYPE html>
<html lang="en" >
<head>
    <meta charset="UTF-8">
    <title>Delftstack Login Form</title>

<style>
body {
    background-color: lightgreen;
    font-size: 1.6rem;
    font-family: "Open Sans", sans-serif;
    color: #2b3e51;
}

h2 {
    font-weight: 300;
    text-align: center;
}

p {
    position: relative;
}

input {
    display: block;
    box-sizing: border-box;
    width: 100%;
    outline: none;
    height: 60px;
    line-height: 60px;
    border-radius: 4px;
}

input[type="text"],
input[type="email"] {
    width: 100%;
    padding: 0 0 0 10px;
    margin: 0;
    color: #8a8b8e;
    border: 1px solid #c2c0ca;
    font-style: normal;
    font-size: 16px;
    position: relative;
    display: inline-block;
    background: none;
}


input[type="submit"] {
    border: none;
    display: block;
    background-color: lightblue;
    color: #fff;
    font-weight: bold;
    text-transform: uppercase;
    font-size: 18px;
    text-align: center;
}
#login-form {
    background-color: #fff;
    width: 35%;
    margin: 30px auto;
    text-align: center;
    padding: 20px 0 0 0;
    border-radius: 4px;
    box-shadow: 0px 30px 50px 0px rgba(0, 0, 0, 0.2);
}

#create-account {
    background-color: #eeedf1;
    color: #8a8b8e;
    font-size: 14px;
    width: 100%;
    padding: 10px 0;
    border-radius: 0 0 4px 4px;
}
</style>
</head>
<body>

<div id="login-form">
    <h2>Delftstack.com Login</h2>
    <form >
        <p>
            <input type="text" id="username" name="username" placeholder="Username" required><i class="validation"><span></span><span></span></i>
        </p>
        <p>
            <input type="email" id="email" name="email" placeholder="Email Address" required><i class="validation"><span></span><span></span></i>
        </p>
        <p>
            <input type="submit" id="login" value="Login">
        </p>
    </form>
        <div id="create-account">
            <p>Don't have an account? <a href="#">Register Here</a><p>
        </div>
</div>
</body>
</html>
위의 Go 코드는 go-astylectron 창에서 주어진 HTML 코드를 실행합니다. 출력을 참조하십시오.