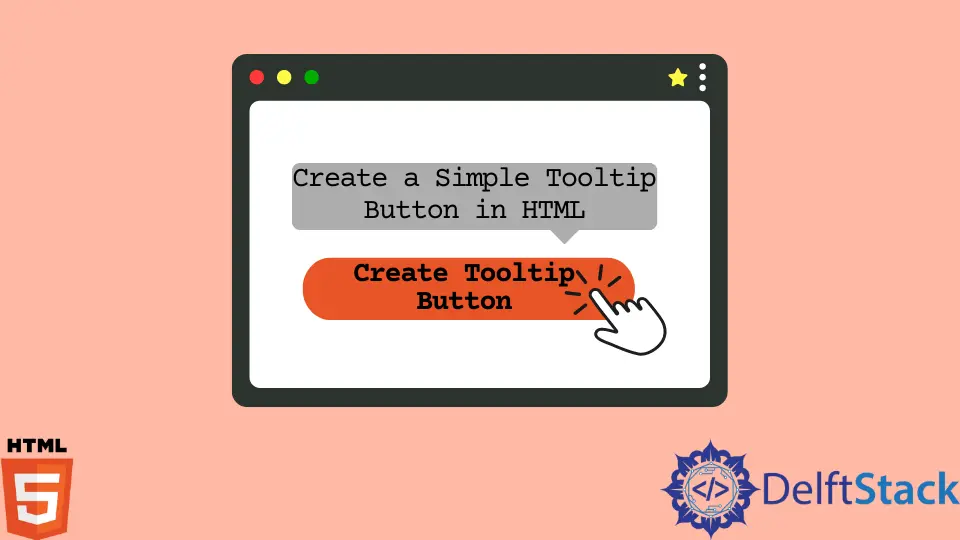
HTML で簡単なツールヒント ボタンを作成する
HTML とも呼ばれる HyperText Markup Language は、Web ページの作成に使用される標準のマークアップ言語です。 テキスト、画像、およびその他のマルチメディアを Web ページに表示する方法に関する Web ブラウザーのコマンドは、HTML 要素によって提供されます。
HTML のツールチップ
HTML では、選択した要素に関する詳細情報を提供するためにツールチップが使用されます。 ボタンまたは単語の場合があります。 ユーザーがツールチップを使用して要素の上にマウスを移動すると、その要素に関する特定の情報が表示されます。これは、マウス ホバー効果で実行できます。
ボタンにツールチップを追加する方法を見てみましょう。
button 要素に title 属性を使用して、ボタンにツールチップを追加できます。 ユーザーがマウスを動かしたときに表示する詳細を title 属性のコンマ内に入力します。
<button title="Click Here"> Button </button>
HTML を使用したボタンの基本ツールチップ
HTML でボタンを作成します。 次に、title 属性を button 要素に追加します。
サンプルコードは以下の通りです。
<!DOCTYPE html>
<html lang="en">
    <head>
        <meta charset="UTF-8">
        <title>Tooltip</title>
    </head>
    <body>
        <!-- creating a simple button & Adding a tooltip to button -->
            <button title="Click Here">Button</button>
    </body>
</html>
ご覧のとおり、マウスをボタンの上に移動すると、ツールチップが表示されます。
HTML と CCS を使用したボタンの高度なツールチップ
ボタンの他の高度なツールチップの例を見てみましょう。
まず、コンテナ要素 (<div>) を使用してボタンを作成し、tooltip クラスを追加します。 この <div> は、ユーザーがマウスをその上に置いたときにツールチップ テキストを表示します。
class="tooltiptext" を持つ <span> スタイルのインライン要素は、ツールチップ テキストを含めるために使用されます。
<!DOCTYPE html>
<html lang="en">
    <head>
        <meta charset="UTF-8">
        <link rel="stylesheet" href="style.css">
        <title>Tooltip</title>
    </head>
    <body>
        <!-- creating a button -->
        <div class="tooltip">
            <button class="button">Button
                <span class="tooltiptext"> Click Me </span>
            </button>
        </div>
    </body>
</html>
CSS ファイルを作成する
style.css という名前の CSS ファイルを作成し、HTML の <head> タグの間に以下の構文を含めて、HTML ファイルにリンクします。
<link rel="stylesheet" href="style.css">
CSS を使用してツールチップ ボタンのスタイルを設定しましょう。 ボタンのスタイルは、.button クラスに含まれています。
/* Style for button*/
.button {
    position: relative;
    background: #151a5f;
    padding: 10px;
    border-radius: 4px;
    border: none;
    text-transform: uppercase;
    font-weight: bold;
    color: white;
 }
.tooltip クラスは、ツールチップの位置を表示するために使用されます。
.tooltip {
    position: relative;
    display: inline-block;
}
ツールチップ テキストは、.tooltiptext クラスに保存されます。 通常は非表示ですが、ホバーすると表示されます。
さらに、以下のようにいくつかの基本的なスタイルを追加しました。
- 幅120px
- 黄色の背景
- 白い文字色
- テキストを中央に配置する機能
- 5px の上下パディング
CSS の border-radius 機能により、ツールチップのテキストの端が丸くなっています。
ユーザーが tooltip クラスの <div> 要素にカーソルをドラッグすると、ホバー セレクターを使用してツールヒント テキストが表示されます。
  /* Tooltip text */
.tooltip .tooltiptext {
    visibility: hidden;
    width: 120px;
    background-color: rgb(235, 182, 38);
    color: #fff;
    text-align: center;
    padding: 5px 0;
    border-radius: 6px;

    /* Position the tooltip text */
    position: absolute;
    z-index: 1;
}

  /* When you mouse over the tooltip container, the tooltip text is displayed. */
.tooltip:hover .tooltiptext {
    visibility: visible;
}
<!DOCTYPE html>
<html lang="en">
    <head>
        <meta charset="UTF-8">
        <link rel="stylesheet" href="style.css">
        <title>Tooltip</title>
    </head>
    <body>
        <!-- creating a button -->
        <div class="tooltip">
            <button class="button">Button
                <span class="tooltiptext"> Click Me </span>
            </button>
        </div>
    </body>
</html>
/* Style for button*/
.button {
    position: relative;
    background: #151a5f;
    padding: 10px;
    border-radius: 4px;
    border: none;
    text-transform: uppercase;
    font-weight: bold;
    color: white;
 }
ツールチップの配置
ツールチップは、ボタンの右、左、下、および上に表示できます。 それを行う方法を見てみましょう。
以下の例は、左または右にツールチップを表示する方法を示しています。 top プロパティの値はマイナス 5 ピクセルです。
値はパディングを考慮して計算されます。 パディングを増やしたい場合は、top プロパティを増やします。
右ツールチップ
.tooltip .tooltiptext {

  /* Position the tooltip text */
    position: absolute;
    z-index: 1;
    top: -5px;
    left: 105%;
}
  /* Tooltip text */
.tooltip .tooltiptext {
    visibility: hidden;
    width: 120px;
    background-color: rgb(235, 182, 38);
    color: #fff;
    text-align: center;
    padding: 5px 0;
    border-radius: 6px;

    /* Position the tooltip text */
    position: absolute;
    z-index: 1;
}

  /* When you mouse over the tooltip container, the tooltip text is displayed. */
.tooltip:hover .tooltiptext {
    visibility: visible;
}
<!DOCTYPE html>
<html lang="en">
    <head>
        <meta charset="UTF-8">
        <link rel="stylesheet" href="style.css">
        <title>Tooltip</title>
    </head>
    <body>
        <!-- creating a button -->
        <div class="tooltip">
            <button class="button">Button
                <span class="tooltiptext"> Click Me </span>
            </button>
        </div>
    </body>
</html>
/* Style for button*/
.button {
    position: relative;
    background: #151a5f;
    padding: 10px;
    border-radius: 4px;
    border: none;
    text-transform: uppercase;
    font-weight: bold;
    color: white;
 }
ご覧のとおり、マウスが任意の方向に移動すると、ツールチップは右側にのみ表示されます。
左のツールチップ
.tooltip .tooltiptext {

  /* Position the tooltip text */
    position: absolute;
    z-index: 1;
    top: -5px;
    right: 105%;
}
  /* Tooltip text */
.tooltip .tooltiptext {
    visibility: hidden;
    width: 120px;
    background-color: rgb(235, 182, 38);
    color: #fff;
    text-align: center;
    padding: 5px 0;
    border-radius: 6px;

    /* Position the tooltip text */
    position: absolute;
    z-index: 1;
}

  /* When you mouse over the tooltip container, the tooltip text is displayed. */
.tooltip:hover .tooltiptext {
    visibility: visible;
}
<!DOCTYPE html>
<html lang="en">
    <head>
        <meta charset="UTF-8">
        <link rel="stylesheet" href="style.css">
        <title>Tooltip</title>
    </head>
    <body>
        <!-- creating a button -->
        <div class="tooltip">
            <button class="button">Button
                <span class="tooltiptext"> Click Me </span>
            </button>
        </div>
    </body>
</html>
/* Style for button*/
.button {
    position: relative;
    background: #151a5f;
    padding: 10px;
    border-radius: 4px;
    border: none;
    text-transform: uppercase;
    font-weight: bold;
    color: white;
    margin-left: 120px;
 }
ご覧のとおり、マウスが任意の方向に移動すると、ツールチップは左側にのみ表示されます。
以下の例は、上部または下部にツールチップを表示する方法を示しています。 margin-left プロパティの値はマイナス 60 ピクセルです。
値は、ツールチップの幅の半分 (120/2 = 60) で計算されます。
上部のツールチップ
.tooltip .tooltiptext {
     /* Position the tooltip text */
  position: absolute;
  z-index: 1;
  width: 120px;
  bottom: 100%;
  left: 50%;
  margin-left: -60px;
}
  /* Tooltip text */
.tooltip .tooltiptext {
    visibility: hidden;
    width: 120px;
    background-color: rgb(235, 182, 38);
    color: #fff;
    text-align: center;
    padding: 5px 0;
    border-radius: 6px;

    /* Position the tooltip text */
    position: absolute;
    z-index: 1;
}

  /* When you mouse over the tooltip container, the tooltip text is displayed. */
.tooltip:hover .tooltiptext {
    visibility: visible;
}
<!DOCTYPE html>
<html lang="en">
    <head>
        <meta charset="UTF-8">
        <link rel="stylesheet" href="style.css">
        <title>Tooltip</title>
    </head>
    <body>
        <!-- creating a button -->
        <div class="tooltip">
            <button class="button">Button
                <span class="tooltiptext"> Click Me </span>
            </button>
        </div>
    </body>
</html>
/* Style for button*/
.button {
    position: relative;
    background: #151a5f;
    padding: 10px;
    border-radius: 4px;
    border: none;
    text-transform: uppercase;
    font-weight: bold;
    color: white;
    margin-top: 40px;
    margin-left: 120px;
 }
ご覧のとおり、マウスが任意の方向に移動すると、ツールチップは上部にのみ表示されます。
下部のツールチップ
.tooltip .tooltiptext {
 /* Position the tooltip text */
  position: absolute;
  z-index: 1;
  width: 120px;
  top: 100%;
  left: 50%;
  margin-left: -60px;
}
  /* Tooltip text */
.tooltip .tooltiptext {
    visibility: hidden;
    width: 120px;
    background-color: rgb(235, 182, 38);
    color: #fff;
    text-align: center;
    padding: 5px 0;
    border-radius: 6px;

    /* Position the tooltip text */
    position: absolute;
    z-index: 1;
}

  /* When you mouse over the tooltip container, the tooltip text is displayed. */
.tooltip:hover .tooltiptext {
    visibility: visible;
}
<!DOCTYPE html>
<html lang="en">
    <head>
        <meta charset="UTF-8">
        <link rel="stylesheet" href="style.css">
        <title>Tooltip</title>
    </head>
    <body>
        <!-- creating a button -->
        <div class="tooltip">
            <button class="button">Button
                <span class="tooltiptext"> Click Me </span>
            </button>
        </div>
    </body>
</html>
/* Style for button*/
.button {
    position: relative;
    background: #151a5f;
    padding: 10px;
    border-radius: 4px;
    border: none;
    text-transform: uppercase;
    font-weight: bold;
    color: white;
    margin-left: 120px;
 }
ご覧のとおり、マウスが任意の方向に移動すると、ツールチップは下部にのみ表示されます。
まとめ
この記事では、HTML を使用して簡単なツールヒント ボタンを作成する方法について説明しました。 次に、HTML と CSS を使用して高度なツールヒント ボタンを作成し、ボタンの上下左右にツールヒントを表示する方法について説明しました。

Nimesha is a Full-stack Software Engineer for more than five years, he loves technology, as technology has the power to solve our many problems within just a minute. He have been contributing to various projects over the last 5+ years and working with almost all the so-called 03 tiers(DB, M-Tier, and Client). Recently, he has started working with DevOps technologies such as Azure administration, Kubernetes, Terraform automation, and Bash scripting as well.