Angular の WebSocket
例を挙げて、Angular で WebSockets を紹介します。
Angular の WebSocket
WebSocket は、クライアントとサーバー間の永続的な接続です。これは、HTTP を介して動作する双方向の全二重チャネルを提供します。
この操作は、単一の TCP/IP ソケット接続を介して行われます。WebSocket の使用法の最良の例は、チャットアプリケーションです。
チャットアプリケーションは WebSocket で動作し、リアルタイムでメッセージを送受信するリアルタイム接続を提供します。
このチュートリアルでは、Angular アプリケーションで WebSocket を使用する方法を示します。Angular アプリケーションで WebSocket を使用する最良の方法は、WebSocket とイベントをサービスでカプセル化することです。
そして、そのサービスは、使用したい任意のコンポーネントで使用できます。
新しい Angular アプリケーションを作成して、Angular アプリケーションで WebSocket の操作を開始しましょう。次のコマンドを使用して、新しい Angular アプリケーションを作成できます。
# angular
ng new my_app
アプリケーションが作成されたら、次のコマンドを使用してアプリケーションフォルダー内に移動します。
# angular
cd my_app
以下に示すように、次のコマンドを使用してアプリケーションを実行します。
# angular
ng serve
Angular で RxJS を使用して WebSocket を実装する
開始するには、特定の URL に接続し、RxJS サブジェクトを返す非常に単純なサービスを作成する必要があります。この RxJS サブジェクトは、接続されたソケットからの新しい着信メッセージをリッスンするサービスまたはコンポーネントにサブスクライブされます。
以下に示すように、次のコマンドを使用して新しいサービスを作成できます。
# angular
ng g service websocketchat
新しいサービスを作成したら、サービスの rxjs ライブラリから*をインポートします。これにより、オブザーバーとオブザーバブルの両方として機能できるサブジェクトを作成できます。
サブジェクトは着信メッセージを監視し、そのサブジェクトにサブスクライブしているコンポーネントにメッセージをブロードキャストします。
サービスのコードは次のようになります。
import { Injectable } from '@angular/core';
import * as Rj from 'rxjs';

@Injectable()
export class WebsocketChatService {
  constructor() {}

  private subject: Rj.Subject<MessageEvent>;

  public connect(url): Rj.Subject<MessageEvent> {
    if (!this.subject) {
      this.subject = this.create(url);
      console.log('Successfully connected To: ' + url);
    }
    return this.subject;
  }

  private create(url): Rj.Subject<MessageEvent> {
    let wsc = new WebSocket(url);

    let observable = Rj.Observable.create((obs: Rj.Observer<MessageEvent>) => {
      wsc.onmessage = obs.next.bind(obs);
      wsc.onerror = obs.error.bind(obs);
      wsc.onclose = obs.complete.bind(obs);
      return wsc.close.bind(wsc);
    });
    let observer = {
      next: (data: Object) => {
        if (wsc.readyState === WebSocket.OPEN) {
          wsc.send(JSON.stringify(data));
        }
      },
    };
    return Rj.Subject.create(observer, observable);
  }
}
websocketchat サービスを作成したので、WebSocket とインターフェイスし、アダプターとして機能する別のサービスが必要です。WebSocket からの出力を、フロントエンドで簡単に使用できる形式に適合させます。
以下のコマンドを使用して簡単に作成できるサービスに chatservice という名前を付けます。
# angular
ng g service chatservice
新しいサービスを作成したら、websocketchat サービスと observable を rxjs ライブラリからインポートします。チャットの URL も定義します。
以下に示すように、メッセージの user と messageContent を定義するメッセージインターフェイスを作成します。
import { Injectable } from '@angular/core';
import { Observable, Subject } from 'rxjs';
import { map } from 'rxjs/operators';

import { WebsocketChatService } from './websocketchat.service';

const CHAT_URL = 'wss://echo.websocket.org/';

export interface Message {
  user: string;
  messageContent: string;
}

@Injectable()
export class ChatService {
  public messages: Subject<Message>;

  constructor(wscService: WebsocketChatService) {
    this.messages = <Subject<Message>>(
      wscService.connect(CHAT_URL).pipe(map((response: MessageEvent): Message => {
        let content = JSON.parse(response.data);
        return {
          user: content.user,
          messageContent: content.messageContent,
        };
      }))
    );
  }
}
両方のサービスをコンポーネントにインポートして、app.component.ts ファイルを更新します。以下のようにメッセージを送信します。
import { Component } from '@angular/core';
import { WebsocketChatService } from './websocketchat.service';
import { ChatService } from './chatservice.service';

@Component({
  selector: 'my-app',
  templateUrl: './app.component.html',
  styleUrls: ['./app.component.css'],
  providers: [WebsocketChatService, ChatService],
})
export class AppComponent {
  constructor(private chatService: ChatService) {
    chatService.messages.subscribe((msg) => {
      console.log('Response recieved from websocket: ' + msg);
    });
  }

  private message = {
    user: 'Husnain',
    messageContent: 'Hello World!',
  };

  sendMessage() {
    console.log('new message from the client: ', this.message);
    this.chatService.messages.next(this.message);
    this.message.messageContent = '';
  }
}
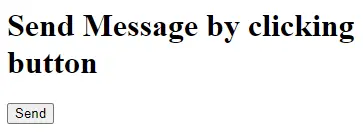
次に、アプリケーションのフロントエンドを作成します。このフロントエンドでは、以下に示すように、クリックするたびにメッセージを送信するボタンを作成します。
<h1>Send Message by clicking button</h1>
<button (click)="sendMessage()">Send</button>
それでは、それがどのように機能するかを確認してみましょう。
送信ボタンをクリックすると、コンソールに次のメッセージが送信されます。
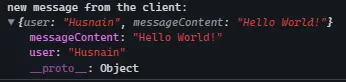
上記の例からわかるように、rxjs を使用して WebSockets を実装するのは非常に簡単です。

Rana is a computer science graduate passionate about helping people to build and diagnose scalable web application problems and problems developers face across the full-stack.
LinkedIn