Angular でナビゲーションバーを作成する

このチュートリアルでは、Angular でナビゲーションバーを作成し、それを Angular アプリケーションのナビゲーションに使用する方法を紹介します。
Angular のナビゲーションバー
Navbar は、Web アプリケーションの重要な部分の 1つです。1 ページだけで異なるセクションで構成されるシングルページアプリケーション(SPA)を構築する場合でも、ナビゲーションバーを使用して 1つのセクションから別のセクションに移動します。
Navbar を使用すると、ユーザーは Web アプリケーションで探しているものを簡単に見つけることができます。
単純なルーティングから複雑なルーティングを実現するためのナビゲーションには多くの方法があります。Angular は、Web アプリケーションでナビゲーションバーを作成してナビゲーションに使用するのに役立つ個別のモジュールを提供します。
プログラムでユーザーをあるページから別のページにナビゲートする場合は、ルーターの navigate() メソッドを使用できます。つまり、正確なリンクを使用せずにコンポーネントをナビゲートします。代わりにコンポーネント名を使用します。
Angular でナビゲーションバーを作成する
ナビゲーションバーを作成し、それを使用して navigate() を使用してさまざまなコンポーネントをナビゲートする例を見てみましょう。それでは、次のコマンドを使用して新しいアプリケーションを作成しましょう。
# angular
ng new my-app
新しいアプリケーションを作成したら、このコマンドを使用してアプリケーションディレクトリに移動します。
# angular
cd my-app
それでは、アプリを実行して、すべての依存関係が正しくインストールされていることを確認しましょう。
# angular
ng serve --open
Angular で Navbar コンポーネントを生成する
それでは、ナビゲーションバーコンポーネントを生成しましょう。まず、アプリケーションのホームコンポーネントとして機能するインデックスコンポーネントを生成します。
# angular
ng generate component index
次に、about us コンポーネントを生成します。
# angular
ng generate component aboutUs
最後に、次のコマンドを使用して products コンポーネントを生成します。
# angular
ng generate component products
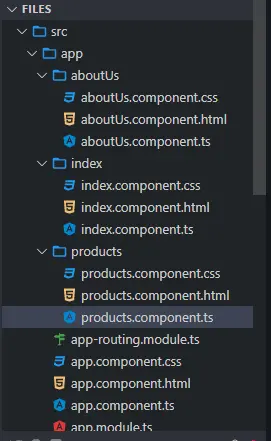
以下に示すように、3つのファイルを含む別々のフォルダーに 3つのコンポーネントがあります。
出力:
コンポーネントのビューを作成する
次に、コンポーネントのビューを作成します。まず、about フォルダから aboutUs.component.html を開き、次のコードを追加します。
# angular
<div class="container" >
  <h1> This is about Us Component </h1>
  <h3> This is the content of About Us </h3>
</div>
次に、home フォルダから index.component.html ファイルを開き、次のコードを追加します。
# angular
<div class="container">
 <h1> This is index component </h1>
  <h3> This is the content of Index </h3>
</div>
services フォルダーから products.component.html ファイルを開き、次のコードを追加します。
# angular
<div class="container">
 <h1> This is products component </h1>
  <h3> This is the content of Products </h3>
</div>
コンポーネントルートを定義する
コンポーネントとビューを作成したら、app-routing.module.ts でルートを定義します。
ngModule をインポートします。また、ルーターから Routes と RouterModule をインポートします。最後に、作成したコンポーネントをインポートします。
# angular
import { NgModule } from '@angular/core';
import { Routes, RouterModule } from '@angular/router';
import { AboutUsComponent}  from './aboutUs/aboutUs.component';
import { IndexComponent} from './index/index.component';
import { ProductsComponent } from './products/products.component';

@NgModule({
  imports: [RouterModule.forRoot(routes)],
  exports: [RouterModule]
})
export class AppRoutingModule { }
インポート後、以下に示すように、コンポーネントのルートを定義します。
# angular
const routes: Routes = [

    { path: 'aboutUs', component: AboutUsComponent },
    { path: 'index', component: IndexComponent},
    { path: 'products', component: ProductsComponent },
 ];
ナビゲーションメニューを作成する
次に、app.component.html でナビゲーションメニューを作成します。各リンクは、(click) メソッドを使用して関数を呼び出します。
以下に示すように、router-outlet を使用してコンポーネントデータを表示します。
# angular
<ul class="nav navbar-nav">
  <li>
    <a (click)="goToIndex()">Home</a>
  </li>
  <li>
    <a (click)="goToAboutUs()">About Us</a>
  </li>
  <li>
    <a (click)="goToProducts()">Products</a>
  </li>
</ul>

<router-outlet> </router-outlet>
コンポーネント間を移動する関数を作成する
次に、関数 goToIndex()、goToAboutUs()、および goToProducts() を作成します。app.component.ts を開き、Router をインポートします。
router.navigate() を使用して、コンポーネント間を移動するためのこれらの関数を作成します。
# angular
import { Component } from '@angular/core';
import { Router } from '@angular/router';


@Component({
  selector: 'my-app',
  templateUrl: './app.component.html',
  styleUrls: [ './app.component.css' ]
})
export class AppComponent  {
  constructor(private router: Router) {
  }

  goToIndex() {
    this.router.navigate(['/', 'index']);
  }
  goToAboutUs() {
    this.router.navigate(['/', 'aboutUs']);
  }
  goToProducts() {
    this.router.navigate(['/', 'products']);
  }
}
出力:
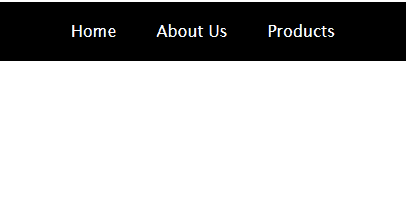
例からわかるように、Angular アプリケーションでナビゲーションバーを簡単に作成し、それを使用して navigate() とルートの定義を使用してコンポーネント間を移動できます。
このチュートリアルで使用されている完全なコードにアクセスできます。

Rana is a computer science graduate passionate about helping people to build and diagnose scalable web application problems and problems developers face across the full-stack.
LinkedIn