Angular로 Navbar 만들기

이 자습서에서는 Angular에서 탐색 모음을 만들고 Angular 응용 프로그램에서 탐색에 사용하는 방법을 소개합니다.
Angular의 Navbar
Navbar는 웹 애플리케이션의 필수 요소 중 하나입니다. 한 페이지만 다른 섹션으로 구성된 단일 페이지 애플리케이션(SPA)을 구축할 때에도 여전히 탐색 모음을 사용하여 한 섹션에서 다른 섹션으로 이동합니다.
Navbar를 사용하면 사용자가 웹 애플리케이션에서 원하는 것을 쉽게 찾을 수 있습니다.
단순에서 복잡한 라우팅을 달성하기 위한 탐색 방법에는 여러 가지가 있습니다. Angular는 웹 애플리케이션에서 탐색 모음을 만들고 탐색에 사용하는 데 도움이 되는 별도의 모듈을 제공합니다.
프로그래밍 방식으로 사용자를 한 페이지에서 다른 페이지로 이동하려는 경우 라우터 navigate() 메서드를 사용할 수 있습니다. 즉, 정확한 링크를 사용하지 않고 구성 요소를 탐색합니다. 대신 구성 요소 이름을 사용합니다.
Angular로 Navbar 만들기
탐색 모음을 만들고 navigate()를 사용하여 다른 구성 요소를 탐색하는 데 사용하는 예를 살펴보겠습니다. 따라서 다음 명령어를 사용하여 새로운 애플리케이션을 만들어 봅시다.
# angular
ng new my-app
새 응용 프로그램을 만든 후 이 명령을 사용하여 응용 프로그램 디렉터리로 이동합니다.
# angular
cd my-app
이제 모든 종속 항목이 올바르게 설치되었는지 확인하기 위해 앱을 실행해 보겠습니다.
# angular
ng serve --open
Angular에서 Navbar 구성 요소 생성
이제 navbar 구성 요소를 생성해 보겠습니다. 먼저 애플리케이션의 home 구성 요소 역할을 하는 index 구성 요소를 생성합니다.
# angular
ng generate component index
그런 다음 about us 구성 요소를 생성합니다.
# angular
ng generate component aboutUs
마지막으로 다음 명령을 사용하여 products 구성 요소를 생성합니다.
# angular
ng generate component products
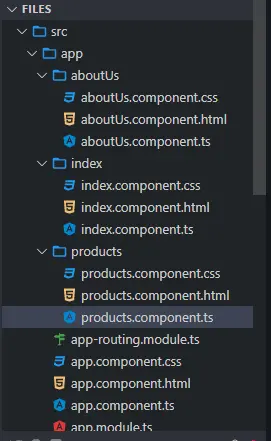
아래에서 볼 수 있는 3개의 파일이 있는 별도의 폴더에 3개의 구성 요소가 있습니다.
출력:
구성 요소에 대한 보기 만들기
이제 구성 요소에 대한 뷰를 생성합니다. 먼저 about 폴더에서 aboutUs.component.html을 열고 다음 코드를 추가합니다.
# angular
<div class="container" >
  <h1> This is about Us Component </h1>
  <h3> This is the content of About Us </h3>
</div>
다음으로 home 폴더에서 index.component.html 파일을 열고 다음 코드를 추가합니다.
# angular
<div class="container">
 <h1> This is index component </h1>
  <h3> This is the content of Index </h3>
</div>
services 폴더에서 products.component.html 파일을 열고 다음 코드를 추가합니다.
# angular
<div class="container">
 <h1> This is products component </h1>
  <h3> This is the content of Products </h3>
</div>
구성 요소 경로 정의
구성 요소와 보기를 생성했으면 app-routing.module.ts에서 경로를 정의합니다.
ngModule을 가져올 것입니다. 라우터에서 Routes 및 RouterModule도 가져오고 마지막으로 방금 만든 구성 요소도 가져옵니다.
# angular
import { NgModule } from '@angular/core';
import { Routes, RouterModule } from '@angular/router';
import { AboutUsComponent}  from './aboutUs/aboutUs.component';
import { IndexComponent} from './index/index.component';
import { ProductsComponent } from './products/products.component';

@NgModule({
  imports: [RouterModule.forRoot(routes)],
  exports: [RouterModule]
})
export class AppRoutingModule { }
가져온 후 아래와 같이 구성 요소의 경로를 정의합니다.
# angular
const routes: Routes = [

    { path: 'aboutUs', component: AboutUsComponent },
    { path: 'index', component: IndexComponent},
    { path: 'products', component: ProductsComponent },
 ];
탐색 메뉴 만들기
그런 다음 app.component.html에 탐색 메뉴를 만듭니다. 각 링크는 (클릭) 메서드를 사용하여 함수를 호출합니다.
아래와 같이 router-outlet을 사용하여 구성 요소 데이터를 표시합니다.
# angular
<ul class="nav navbar-nav">
  <li>
    <a (click)="goToIndex()">Home</a>
  </li>
  <li>
    <a (click)="goToAboutUs()">About Us</a>
  </li>
  <li>
    <a (click)="goToProducts()">Products</a>
  </li>
</ul>

<router-outlet> </router-outlet>
구성 요소 간 탐색을 위한 함수 생성
다음으로 goToIndex(), goToAboutUs() 및 goToProducts() 함수를 만듭니다. app.component.ts를 열고 Router를 가져옵니다.
router.navigate()를 사용하여 구성 요소 사이를 탐색하는 이러한 함수를 만듭니다.
# angular
import { Component } from '@angular/core';
import { Router } from '@angular/router';


@Component({
  selector: 'my-app',
  templateUrl: './app.component.html',
  styleUrls: [ './app.component.css' ]
})
export class AppComponent  {
  constructor(private router: Router) {
  }

  goToIndex() {
    this.router.navigate(['/', 'index']);
  }
  goToAboutUs() {
    this.router.navigate(['/', 'aboutUs']);
  }
  goToProducts() {
    this.router.navigate(['/', 'products']);
  }
}
출력:
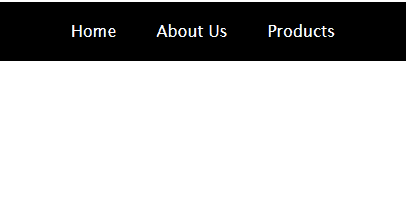
예에서 볼 수 있듯이 Angular 응용 프로그램에서 탐색 모음을 쉽게 만들고 navigate()를 사용하고 경로를 정의하여 구성 요소 사이를 탐색하는 데 사용할 수 있습니다.
이 튜토리얼에서 사용된 전체 코드에 액세스할 수 있습니다.

Rana is a computer science graduate passionate about helping people to build and diagnose scalable web application problems and problems developers face across the full-stack.
LinkedIn