Tkinter Tutorial - Checkbutton
- Tkinter Checkbutton Esempio di base
- Tkinter Checkbutton Seleziona/Deseleziona
- Tkinter Checkbutton State Toggle
- Tkinter Checkbutton Callback Funzione Binding
- Cambiare il valore predefinito del Checkbutton di Tkinter

Il widget Checkbutton è un widget con un valore. I checkbutton possono contenere sia testo che immagini. Potrebbe anche collegare la funzione di richiamata da chiamare quando il checkbutton viene cliccato.
Per creare un widget checkbutton in una finestra genitore esistente, utilizzare
tk.Checkbutton(parent, option, ...)
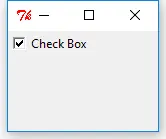
Tkinter Checkbutton Esempio di base
import tkinter as tk

app = tk.Tk()
app.geometry("150x100")

chkValue = tk.BooleanVar()
chkValue.set(True)

chkExample = tk.Checkbutton(app, text="Check Box", var=chkValue)
chkExample.grid(column=0, row=0)

app.mainloop()
chkValue = tk.BooleanVar()
Ogni checkbutton deve essere associato ad una variabile. Il tipo di dati della variabile è determinato dal pulsante di controllo quando è selezionato/deselezionato.
chkValue.set(True)
Esso imposta il valore originale del checkbutton. Essendo appena assegnato con il tipo di dati Boolean, si hanno solo due opzioni, True o False.
chkExample = tk.Checkbutton(app, text="Check Box", var=chkValue)
Ora l’istanza del checkbutton viene alla fine creata con la variabile chkValue che abbiamo fatto sopra.
chkExample.grid(column=0, row=0)
grid è un altro tipo di manger di layout di Tkinter oltre a pack introdotto nella sezione Tkinter Label.
Tkinter ha tre gestori di layout/geometria,
packgridplace
Introdurremo questi manager del layout/geometria in una sezione di questo tutorial.
Tkinter Checkbutton Seleziona/Deseleziona
L’utente può cliccare sul pulsante di controllo nell’interfaccia grafica per selezionare o deselezionare il pulsante. Si può anche selezionare o deselezionare il checkbutton usando il metodo select() e deselect().
chkExample.select()
print "The checkbutton value when selected is {}".format(chkValue.get())
chkExample.select()
print "The checkbutton value when deselected is {}".format(chkValue.get())
The checkbutton value when selected is True
The checkbutton value when deselected is False
Qui, il valore del checkbutton si ottiene con il metodo get().
Tkinter Checkbutton State Toggle
Lo stato del pulsante di controllo può essere modificato con select() e deselect(), e può anche essere attivato usando il metodo toggle().
import tkinter as tk

app = tk.Tk()
app.geometry("150x100")

chkValue = tk.BooleanVar()
chkValue.set(True)

chkExample = tk.Checkbutton(app, text="Check Box", var=chkValue)
chkExample.grid(column=0, row=0)


print "The checkbutton original value is {}".format(chkValue.get())
chkExample.toggle()
print "The checkbutton value after toggled is {}".format(chkValue.get())
chkExample.toggle()
print "The checkbutton value after toggled twice is {}".format(chkValue.get())

app.mainloop()
The checkbutton original value is True
The checkbutton value after toggled is False
The checkbutton value after toggled twice is True
Tkinter Checkbutton Callback Funzione Binding
Il widget checkbutton è utilizzato per selezionare gli stati e potrebbe anche vincolare la funzione di richiamo all’evento quando viene selezionato/deselezionato, o più semplicemente, attivato. Ogni volta che lo stato del pulsante di controllo viene commutato, la funzione di richiamo viene attivata.
import tkinter as tk
from _cffi_backend import callback


def callBackFunc():
    print "Oh. I'm clicked"


app = tk.Tk()
app.geometry("150x100")

chkValue = tk.BooleanVar()
chkValue.set(True)

chkExample = tk.Checkbutton(app, text="Check Box", var=chkValue, command=callBackFunc)
chkExample.grid(column=0, row=0)

app.mainloop()
Ogni volta che si preme il pulsante di controllo, si può vedere che stampa Oh. I'm clicked nella console.
L’opzione command nella classe Checkbutton class ha lo scopo di vincolare la funzione o il metodo di richiamo quando il pulsante viene premuto.
Cambiare il valore predefinito del Checkbutton di Tkinter
Il valore di default corrispondente al checkbutton non selezionato è 0, e il valore di default del checkbutton selezionato è 1. E si possono anche cambiare i valori di default dei checkbutton e il loro tipo di dati associati con l’altro valore e/o tipo di dati.
import tkinter as tk

app = tk.Tk()
app.geometry("150x100")

chkValue = tk.StringVar()

chkExample = tk.Checkbutton(
    app, text="Check Box", var=chkValue, onvalue="RGB", offvalue="YCbCr"
)
chkExample.grid(column=0, row=0)

chkExample.select()
print "The checkbutton value when selected is {}".format(chkValue.get())
chkExample.deselect()
print "The checkbutton value when deselected is {}".format(chkValue.get())

app.mainloop()
The checkbutton value when selected is RGB
The checkbutton value when deselected is YCbCr
chkExample = tk.Checkbutton(
    app, text="Check Box", var=chkValue, onvalue="RGB", offvalue="YCbCr"
)
I valori “onvalue” e “offvalue” sono opzioni per cambiare i valori degli stati selezionati e non selezionati. Potrebbero avere tipi di dati come Int, String, Float o altri.
_tkinter.TclError.
Founder of DelftStack.com. Jinku has worked in the robotics and automotive industries for over 8 years. He sharpened his coding skills when he needed to do the automatic testing, data collection from remote servers and report creation from the endurance test. He is from an electrical/electronics engineering background but has expanded his interest to embedded electronics, embedded programming and front-/back-end programming.
LinkedIn Facebook