Tutorial de Tkinter - Botón de control
- Ejemplo básico de Tkinter Checkbutton
- Botón de control de Tkinter Seleccionar/Deseleccionar
- Tkinter Checkbutton State Toggle
- Vinculación de la función de devolución de llamada del botón de control de Tkinter
- Cambiar el valor por defecto del botón de control Tkinter

El widget Checkbutton es un widget que contiene un valor. Los checkbuttons pueden contener texto o imágenes. También puede enlazar la función de devolución de llamada que se llamará cuando se haga clic en el botón de verificación.
Para crear un widget de botón de control en una ventana padre existente, utilice
tk.Checkbutton(parent, option, ...)
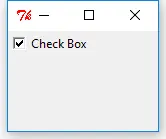
Ejemplo básico de Tkinter Checkbutton
import tkinter as tk

app = tk.Tk()
app.geometry("150x100")

chkValue = tk.BooleanVar()
chkValue.set(True)

chkExample = tk.Checkbutton(app, text="Check Box", var=chkValue)
chkExample.grid(column=0, row=0)

app.mainloop()
chkValue = tk.BooleanVar()
Cada botón de control debe estar asociado a una variable. El tipo de datos de la variable se determina por el botón de verificación cuando se selecciona/deselecciona.
chkValue.set(True)
Establece el valor original del botón de verificación. Como sólo está asignado con el tipo de datos Boolean, sólo tienes dos opciones aquí, True o False.
chkExample = tk.Checkbutton(app, text="Check Box", var=chkValue)
Ahora la instancia del botón de control se crea eventualmente con la variable chkValue que hicimos anteriormente.
chkExample.grid(column=0, row=0)
grid es otro tipo de gestor de diseño de Tkinter además de pack introducido en la sección Tkinter Label.
Tkinter tiene tres gestores de layout/geometría,
packgridplace
Presentaremos estos gestores de diseño/geometría en una sección de este tutorial.
Botón de control de Tkinter Seleccionar/Deseleccionar
El usuario puede hacer clic en el botón de control en la interfaz gráfica de usuario para seleccionar o deseleccionar el botón. También puede seleccionar o deseleccionar el botón usando el método select() y deselect().
chkExample.select()
print "The checkbutton value when selected is {}".format(chkValue.get())
chkExample.select()
print "The checkbutton value when deselected is {}".format(chkValue.get())
The checkbutton value when selected is True
The checkbutton value when deselected is False
Aquí, el valor del botón de control se obtiene por el método get().
Tkinter Checkbutton State Toggle
El estado del botón de comprobación puede ser modificado por select() y deselect(), y también puede ser cambiado usando el método toggle().
import tkinter as tk

app = tk.Tk()
app.geometry("150x100")

chkValue = tk.BooleanVar()
chkValue.set(True)

chkExample = tk.Checkbutton(app, text="Check Box", var=chkValue)
chkExample.grid(column=0, row=0)


print "The checkbutton original value is {}".format(chkValue.get())
chkExample.toggle()
print "The checkbutton value after toggled is {}".format(chkValue.get())
chkExample.toggle()
print "The checkbutton value after toggled twice is {}".format(chkValue.get())

app.mainloop()
The checkbutton original value is True
The checkbutton value after toggled is False
The checkbutton value after toggled twice is True
Vinculación de la función de devolución de llamada del botón de control de Tkinter
El widget del botón de control se usa para seleccionar los estados y también podría vincular la función de devolución de llamada al evento cuando se selecciona/deselecciona, o más directamente, se conmuta. Siempre que se conmuta el estado del botón de control, se activa la función de rellamada.
import tkinter as tk
from _cffi_backend import callback


def callBackFunc():
    print "Oh. I'm clicked"


app = tk.Tk()
app.geometry("150x100")

chkValue = tk.BooleanVar()
chkValue.set(True)

chkExample = tk.Checkbutton(app, text="Check Box", var=chkValue, command=callBackFunc)
chkExample.grid(column=0, row=0)

app.mainloop()
Cada vez que se pulsa el botón de comprobación, se puede ver que imprime Oh. I'm clicked en la consola.
La opción command en la clase de botones de control está pensada para vincular la función o el método de devolución de llamada cuando se presiona el botón.
Cambiar el valor por defecto del botón de control Tkinter
El valor por defecto correspondiente al botón de control no seleccionado es 0, y el valor por defecto del botón de control seleccionado es 1. Y también puede cambiar los valores por defecto del botón de control y su tipo de datos asociado al otro valor y/o tipo de datos.
import tkinter as tk

app = tk.Tk()
app.geometry("150x100")

chkValue = tk.StringVar()

chkExample = tk.Checkbutton(
    app, text="Check Box", var=chkValue, onvalue="RGB", offvalue="YCbCr"
)
chkExample.grid(column=0, row=0)

chkExample.select()
print "The checkbutton value when selected is {}".format(chkValue.get())
chkExample.deselect()
print "The checkbutton value when deselected is {}".format(chkValue.get())

app.mainloop()
The checkbutton value when selected is RGB
The checkbutton value when deselected is YCbCr
chkExample = tk.Checkbutton(
    app, text="Check Box", var=chkValue, onvalue="RGB", offvalue="YCbCr"
)
Los valores onvalue y offvalue son opciones para cambiar los valores de los estados seleccionado y no seleccionado. Podrían tener tipos de datos como Int, String, Float u otros.
_tkinter.TclError.
Founder of DelftStack.com. Jinku has worked in the robotics and automotive industries for over 8 years. He sharpened his coding skills when he needed to do the automatic testing, data collection from remote servers and report creation from the endurance test. He is from an electrical/electronics engineering background but has expanded his interest to embedded electronics, embedded programming and front-/back-end programming.
LinkedIn Facebook