How to Create an X.509 Certificate Using Java

X.509 is a standard that defines the public key certificates’ format. It is widely used in SSL/TLS certificates to secure online communications, digital signatures, and encryption.
This article will teach us how to create an X.509 certificate using Java.
Requirements:
- Java Development Kit (JDK)
- Bouncy Castle Crypto API for Java
Steps to Create an X.509 Certificate Using Java
-
Download the Bouncy Castle Crypto API
The Bouncy Castle Crypto API is a Java implementation of cryptographic algorithms. It provides a collection of lightweight cryptography APIs that can be used to develop security-enabled Java applications.
To download the Bouncy Castle Crypto API, go to the official website and download the latest version.
-
Add the Bouncy Castle Crypto API to Your Java Project
After downloading the Bouncy Castle Crypto API, add the library to your Java project. The library can be added as a dependency in your build system or your
classpath. -
Generate a Key Pair
To create an X.509 certificate, you need to generate a key pair. A key pair consists of a private and a public key.
The private key is used to sign the certificate, and the public key is used to verify the signature. You can use the
KeyPairGeneratorclass to generate a key pair in Java.KeyPairGenerator keyGen = KeyPairGenerator.getInstance("RSA"); keyGen.initialize(2048); KeyPair keyPair = keyGen.generateKeyPair(); -
Create a Self-Signed Certificate
A self-signed certificate is a certificate signed by its creator rather than a trusted third party. You can use the
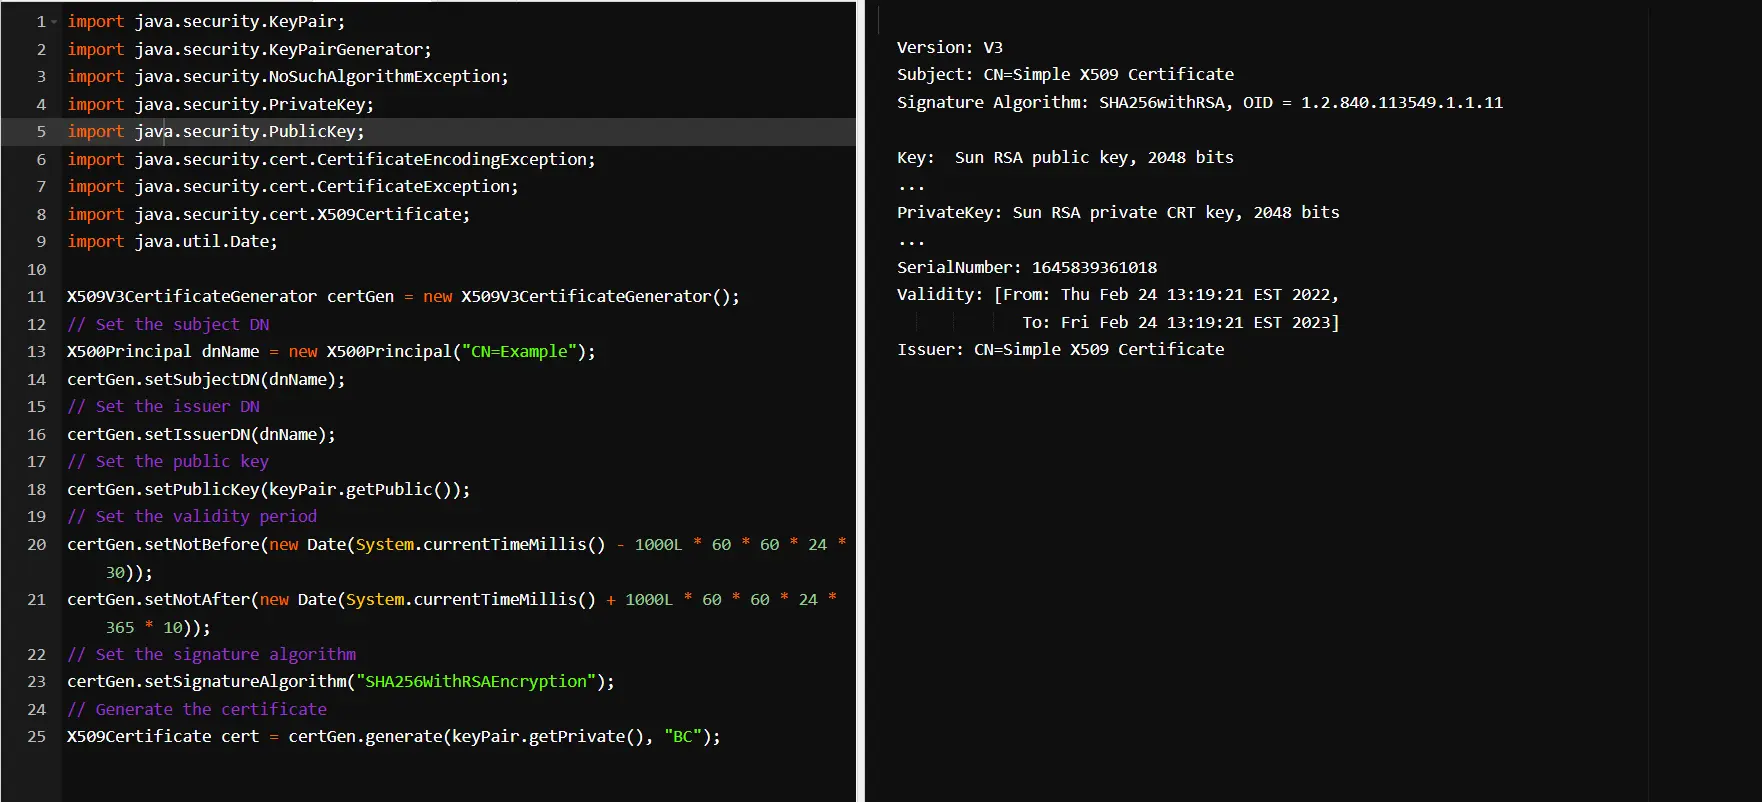
X509V3CertificateGeneratorclass to create a self-signed certificate in Java.X509V3CertificateGenerator certGen = new X509V3CertificateGenerator(); // Set the subject DN X500Principal dnName = new X500Principal("CN=Example"); certGen.setSubjectDN(dnName); // Set the issuer DN certGen.setIssuerDN(dnName); // Set the public key certGen.setPublicKey(keyPair.getPublic()); // Set the validity period certGen.setNotBefore(new Date(System.currentTimeMillis() - 1000L * 60 * 60 * 24 * 30)); certGen.setNotAfter(new Date(System.currentTimeMillis() + 1000L * 60 * 60 * 24 * 365 * 10)); // Set the signature algorithm certGen.setSignatureAlgorithm("SHA256WithRSAEncryption"); // Generate the certificate X509Certificate cert = certGen.generate(keyPair.getPrivate(), "BC"); -
Save the Certificate to a File
Finally, you can save the certificate to a file in PEM format, a standard format for storing X.509 certificates and private keys.
FileOutputStream fos = new FileOutputStream("example.pem");
fos.write("-----BEGIN CERTIFICATE-----\n".getBytes());
fos.write(Base64.getEncoder().encode(cert.getEncoded()));
fos.write("\n-----END CERTIFICATE-----\n".getBytes());
fos.close();
Note: This code cannot run on any online compiler because of some packages. You can use this example as a starting point for your projects and customize it to meet your specific requirements.
Output:

Muhammad Adil is a seasoned programmer and writer who has experience in various fields. He has been programming for over 5 years and have always loved the thrill of solving complex problems. He has skilled in PHP, Python, C++, Java, JavaScript, Ruby on Rails, AngularJS, ReactJS, HTML5 and CSS3. He enjoys putting his experience and knowledge into words.
Facebook