How to Use the Docker Network Host Command
-
Create an
NginxProject - Run a Container in the Default Network Driver
- Run a Container in the Host Network
- Conclusion
Docker containers work by leveraging network drivers created during the installation of Docker. The default drivers available to us include the bridge and the host networks.
When we create containers without specifying the network, they are added to the bridge network, and if we want to add a network command to the host network or a custom network, we use the --network command.
In this tutorial, we will learn how to add a container to the host network using the --network command. We will also learn how containers are added to the default network if we do not specify a network using this command.
Create an Nginx Project
Open WebStorm IDEA and select File > New > Project. On the window that opens, select Empty Project and change the project name from untitled to docker-network-host or use any name preferred.
Finally, press the button labeled Create to generate the project.
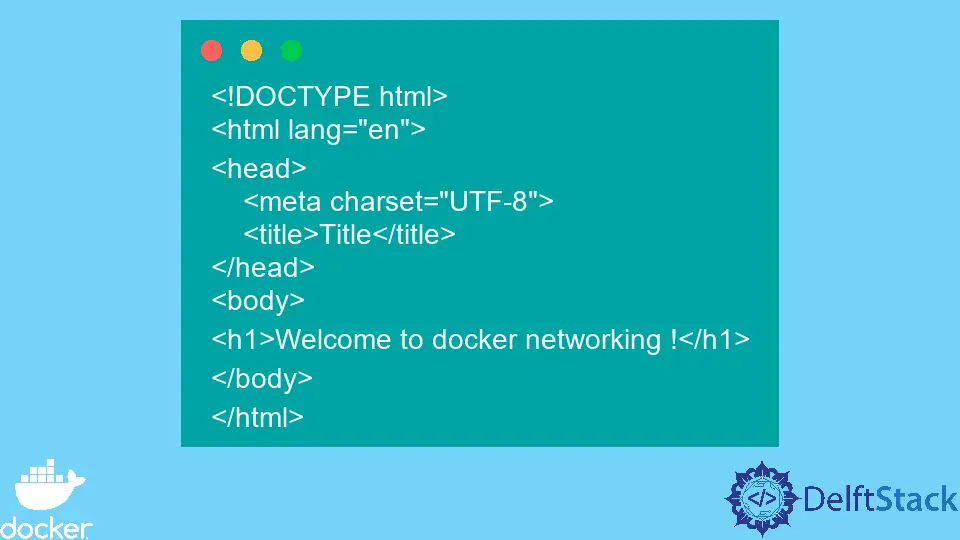
Create a file named index.html in the current folder and copy and paste the following code into the file.
<!DOCTYPE html>
<html lang="en">
<head>
    <meta charset="UTF-8">
    <title>Title</title>
</head>
<body>
<h1>Welcome to docker networking !</h1>
</body>
</html>
In this file, we have created a simple web page that displays a heading when we access the application running in our container. This will help to verify that our container is running the Nginx application.
Define an Image
Create a file named Dockerfile and copy and paste the following instruction into the file. Note that we usually use a file with this name to create our custom image from existing images.
FROM nginx:alpine
ADD . /usr/share/nginx/html
FROM- Sets the base image on which to create our custom image using the subsequent instructions.ADD- Copies the files and folders in the current folder to the images file system destination/usr/share/nginx/html.
Build an Image
To build our custom image using the Dockerfile defined above. Open a new terminal window using the keyboard shortcut ALT+F12, and use this command to build the image.
~/WebstormProjects/docker-network-host$ docker build --tag docker-network-host:latest .
This command executes the Dockerfile sequentially to create an image with the tag, and we can view each of the instructions being run on the terminal window, as shown below.
=> [1/2] FROM docker.io/library/nginx:alpine@sha256:082f8c10bd47b6acc8ef15ae61ae45dd8fde0e9f389a8b5cb23c37408642bf5d               0.1s
 => => resolve docker.io/library/nginx:alpine@sha256:082f8c10bd47b6acc8ef15ae61ae45dd8fde0e9f389a8b5cb23c37408642bf5d               0.1s
 => CACHED [2/2] ADD . /usr/share/nginx/html
Run a Container in the Default Network Driver
To run a container of our application in the default network, execute the command below on the terminal window. Note that this container will be added to the bridge network.
~/WebstormProjects/docker-network-host$ docker run --name docker-network-bridge-test -d -p 8000:80 docker-network-host:latest
This command runs a container named docker-network-bridge-test that listens on port 80 in the container and exposes port 8000 on the host. To verify that this container was added to the bridge network, execute the command below to inspect the bridge network.
~/WebstormProjects/docker-network-host$ docker network inspect bridge
Output:
[
    {
        "Name": "bridge",
        "Id": "45773c7633cf28baa742ceca9c054a8dd6b4ea609dd9944d7ae12bdb57e86bcd",
        "Created": "2022-10-06T07:53:45.935633743Z",
        "Scope": "local",
        "Driver": "bridge",
        "EnableIPv6": false,
        "IPAM": {
            "Driver": "default",
            "Options": null,
            "Config": [
                {
                    "Subnet": "172.17.0.0/16",
                    "Gateway": "172.17.0.1"
                }
            ]
        },
        "Internal": false,
        "Attachable": false,
        "Ingress": false,
        "ConfigFrom": {
            "Network": ""
        },
        "ConfigOnly": false,
        "Containers": {
            "5e452da9b047ce94ff23b4841d1cb3358f34b037ef566c2f12a9eb57012a5f85": {
                "Name": "docker-network-bridge-test",
                "EndpointID": "d3491eb0c518d91be71b170e8ca0a077e07781bffbe20f3e1a1fd415eef9c288",
                "MacAddress": "02:42:ac:11:00:02",
                "IPv4Address": "172.17.0.2/16",
                "IPv6Address": ""
            }
        },
        "Options": {
            "com.docker.network.bridge.default_bridge": "true",
            "com.docker.network.bridge.enable_icc": "true",
            "com.docker.network.bridge.enable_ip_masquerade": "true",
            "com.docker.network.bridge.host_binding_ipv4": "0.0.0.0",
            "com.docker.network.bridge.name": "docker0",
            "com.docker.network.driver.mtu": "1500"
        },
        "Labels": {}
    }
]
On the JSON returned, the Containers property has a container named docker-network-bridge-test and is assigned a MacAddress and an IPv4Address. This is the same container created at the start of this section.
To serve this application on the browser, issue a request to localhost:8000 (http://localhost:8000/) and ensure that it returns a heading containing the text Welcome to docker networking !.
Run a Container in the Host Network
The term host network means that the container runs on the network of our host machine as the host network cannot containerize the container networking. To run the container in the host network, execute the following command on the terminal window.
~/WebstormProjects/docker-network-host$ docker run --rm -d --network host --name docker-network-host-test docker-network-host:latest
This command uses the --network command with a value of host to run a container named docker-network-host-test in the host network. To verify that this container was added to the host network, execute the following command on the terminal window.
~/WebstormProjects/docker-network-host$ docker network inspect host
Output:
[
    {
        "Name": "host",
        "Id": "4ce9d3806cd88f9d9ea446272f4338f7b1f5e7098d4d0bc2a11090c1759d1880",
        "Created": "2022-09-19T07:51:50.247290701Z",
        "Scope": "local",
        "Driver": "host",
        "EnableIPv6": false,
        "IPAM": {
            "Driver": "default",
            "Options": null,
            "Config": []
        },
        "Internal": false,
        "Attachable": false,
        "Ingress": false,
        "ConfigFrom": {
            "Network": ""
        },
        "ConfigOnly": false,
        "Containers": {
            "22d15c7eee861ec7fdfd22936c30dfe1d17b2dde52ada93256f3e30943a3ed80": {
                "Name": "docker-network-host-test",
                "EndpointID": "7bd01907c8b86a881b86ae9e9c8ad8c1d3aa9f0583adebb7d41ae15bd565fabe",
                "MacAddress": "",
                "IPv4Address": "",
                "IPv6Address": ""
            }
        },
        "Options": {},
        "Labels": {}
    }
]
On the JSON returned, the Containers property has a container named docker-network-host-test and note that in this case, the container has not been assigned a MacAddress or an IPv4Adress because it is running on the host network. This is the same container created at the start of this section.
To serve this application on the browser, issue a request to localhost:80 (http://localhost:80/) and ensure that it returns a heading containing the text Welcome to docker networking !. However, ensure that port 80 on the host network is open to accept requests.
Conclusion
In this tutorial, we have learned how to run containers on both the default network driver bridge and host network driver. Note that we use the --network command to add a container on a different network other than the default network.
To ensure your application is working on the new network, ensure that the port used is open for connections and that another process is not using the port.

David is a back end developer with a major in computer science. He loves to solve problems using technology, learning new things, and making new friends. David is currently a technical writer who enjoys making hard concepts easier for other developers to understand and his work has been published on multiple sites.
LinkedIn GitHub