How to Copy a Directory From the Host to a Docker Image
- Create an Express Application
-
Use the
ADDInstruction -
Use the
COPYInstruction -
Use an Alternative to the
ADDInstruction
The Docker documentation defines Docker as an infrastructure-independent tool that helps developers to develop, ship, and run applications in the fastest way possible.
Apart from these benefits, DevOps developers also use Docker in continuous integration, delivery, and deployment. This development approach is usually called CI/CD, and developers use containers to develop, test, and deploy changes or features to production.
The bugs in an application are fixed in the development environment. Once this is done, automation tests are executed in the test environment. Finally, the image with new changes is deployed to production when all the tests have passed.
This tutorial will teach us how to copy a directory from the host machine to a docker image. We will use an express application that returns an API to realize this.
Create an Express Application
Open Intellij IDEA. Select File -> New -> Project. On a window that opens, select Node.js on the left side and change the project name from untitled to employee-api. Finally, hit the Create button to generate a project.
To install Express in our application, open a new terminal window on Intellij IDEA by selecting View > Tool Windows > Terminal and use the following command to install Express.
~/WebstormProjects/employee-api$ npm install express
After installing express, create a folder named main-app in the folder employee-api. Then, to create our API, create a file named index.js in the folder main-app and copy & paste the following code fence into the file.
const express = require('express')
const app = express()
const port = 3000

app.get('/', (req, res) => {
    res.json(
        [{
            name: 'Bob',
            email: "bob@gmail.com"
        },
            {
                name: 'Alice',
                email: 'alice@gmail.com'
            },
        ])
})

app.listen(port, () => {
    console.log(`Example app listening on port ${port}`)
})
In this file, we have created an express application that exposes port 3000, and any request to the path / returns an array of employees. We will use this application in all the examples we cover in the following sections.
Use the ADD Instruction
Create a file named Dockerfile in our base folder employee-api and copy and paste the following code into the file.
FROM node:16.17.0-alpine
WORKDIR /com/employee
ADD package*.json ./
RUN npm install
ADD main-app /com/employee/main-app
CMD node main-app/index.js
To create a custom image of our application, we usually use a file named Dockerfile, as shown in this example. The following section defines the meaning of each of the commands used in the file. Our concern is the ADD command on the second last line.
All the commands used in the previous code example are briefly explained below:
FROM- The first command that is declared in aDockerfile, and its primary purpose is to declare the base image that we will use to build our image. Note that the base image is pulled from the public repositories.WORKDIR- Sets the working directory, and the working directory is created even if we do not set it in the other instructions.ADD- Copies files or folders from the source to the destination. The source is usually the host machine, and the destination is the container’s file system.RUN- Executes the provided command on top of the existing image and returns a new image that contains the execution results. In this case, the command installs the dependencies on the current image. And the resulting image is equipped with the dependencies.CMD- When we spin up a container, this instruction provides the container’s defaults, including executables or an entry point instruction. In this case, we have used the shell form of the instruction. Further, we provided an executable as the default for our container.
Note that we have used the ADD instruction to copy the main-app directory from our host machine to a new directory created in our working directory, /com/employee/main-app. To see this in action, use the following command to create an image with the tag employee-api.
~/WebstormProjects/employee-api$ docker build --tag employee-api:latest.
Observe the first five instructions on the console until the build is successful. Then, ensure you can see the instructions being executed as shown below.
 => [1/5] FROM docker.io/library/node:16.17.0-alpine@sha256:2c405ed42fc0fd6aacbe5730042640450e5ec030bada7617beac88f742b6997b                         0.0s
 => [internal] load build context                                                                                                                    0.1s
 => => transferring context: 137B                                                                                                                    0.0s
 => CACHED [2/5] WORKDIR /com/employee                                                                                                               0.0s
 => CACHED [3/5] ADD package*.json ./                                                                                                                0.0s
 => CACHED [4/5] RUN npm install                                                                                                                     0.0s
 => CACHED [5/5] ADD main-app /com/employee/main-app
The last instruction is executed when we run a container from our image. For example, use the following command to run a container from our image.
~/WebstormProjects/employee-api$ docker run --name employee-service -d -p 3000:3000 employee-api:latest
This command runs a container named employee-service using our image employee-api in detached mode -d and maps port -p 3000 to port 3000 on the localhost.
To verify whether our application is working as expected, go to localhost:3000 (http://localhost:3000/) to fetch the employee data. The following is the JSON array returned from the request.
[
    {
    "name": "Bob",
    "email": "bob@gmail.com"
    },
    {
    "name": "Alice",
    "email": "alice@gmail.com"
    }
]
Use the COPY Instruction
Comment on the instructions in the file named Dockerfile and copy and paste the following code into the file after the comment.
FROM node:16.17.0-alpine
WORKDIR /com/employee
ADD package*.json ./
RUN npm install
COPY main-app /com/employee/main-app
CMD node main-app/index.js
Note that these instructions are the same as those in the previous example. The only change we have made is replacing the ADD instruction in the second last line with the COPY instruction.
COPY - Copies files or folders from the source to the destination. The source is usually the host machine, and the destination is the container’s file system.
Note that the COPY instruction is similar to the ADD instruction as they achieve the same objective. To see this in action, use the commands we used in the previous example to create an image & run a container from the image.
We can create a new image or recreate the existing image. To recreate the existing image, we need to stop the running container, remove the container, and remove the image. Use the following commands to execute the steps respectively.
~/WebstormProjects/employee-api$ docker stop employee-service
~/WebstormProjects/employee-api$ docker rm -f employee-service
~/WebstormProjects/employee-api$ docker rmi -f employee-api:latest
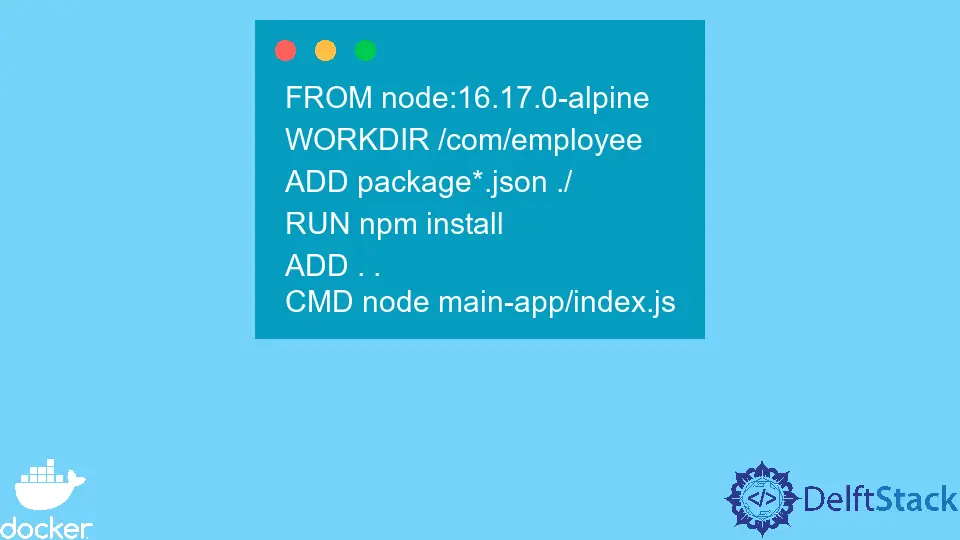
Use an Alternative to the ADD Instruction
Comment on the instructions in the file named Dockerfile and copy and paste the following code into the file after the comment.
FROM node:16.17.0-alpine
WORKDIR /com/employee
ADD package*.json ./
RUN npm install
ADD . .
CMD node main-app/index.js
Note that this example is similar to the previous example, and the only change we have made is replacing the COPY instruction with the ADD instruction. The ADD instruction in this example uses two dots . . to specify the source and the destination.
It indicates that we want to copy all the contents in the current directory to the working directory. So, for example, with this command, we can add the main-app folder and its contents to the working directory /com/employee in our image, which is much easier than the other examples.
We can use the .dockerignore file to add the files and folders that we do not want to be added to our image. Then, use the commands we used in the previous examples to build an image and run a container from the image.
The output is still the same since we have not changed any code in our express application.
So, we’ve learned how to copy a directory from a host machine to a file system of our image. We can also use ADD and COPY instructions to copy one directory to another.
We can also use the COPY instruction with two dots COPY . . and it will still have the same effect.

David is a back end developer with a major in computer science. He loves to solve problems using technology, learning new things, and making new friends. David is currently a technical writer who enjoys making hard concepts easier for other developers to understand and his work has been published on multiple sites.
LinkedIn GitHub