HOWTO · Python
Python-PPTX 库
安装 python-pptx,并使用 Python 创建 PowerPoint 演示文稿、将幻灯片文本提取到文本文件,以及向幻灯片添加图片。
本页内容
python-pptx 包可以在 Python 代码中创建和编辑 PowerPoint 文件。本指南涵盖安装该包、构建包含标题幻灯片的演示文稿、将幻灯片文本提取到 .txt 文件,以及在幻灯片上放置图片。
python-pptx 能做什么
python-pptx 读写 .pptx 文件,即自 Office 2007 以来 PowerPoint 使用的演示文稿格式。它不能读写更旧的二进制 .ppt 格式。
常见用途包括从零生成演示文稿、基于内置版式添加幻灯片、填充标题和正文占位符、插入图片、表格和图表,以及打开现有文件修改其内容。由于一切都在 Python 中运行,该库适合报表自动化和批量任务,无需安装 PowerPoint。
.pptx 文件是由 XML 部件组成的 ZIP 包,幻灯片文本存储在 ppt/slides/slideN.xml 中。下面这个标准库示例组装了一个最小的包并打印它在幻灯片上找到的文本,因此它可以在任何能运行 Python 的环境中运行:
本节中的代码以及显示的标签或输出仍为英文。
import tempfile
import zipfile
import xml.etree.ElementTree as ET
from pathlib import Path

work = Path(tempfile.mkdtemp())
deck = work / "hello.pptx"

parts = {
    "[Content_Types].xml": (
        '<Types xmlns="http://schemas.openxmlformats.org/package/2006/content-types">'
        '<Default Extension="rels" ContentType="application/vnd.openxmlformats-package.relationships+xml"/>'
        '<Default Extension="xml" ContentType="application/xml"/>'
        '<Override PartName="/ppt/presentation.xml" ContentType="application/vnd.openxmlformats-officedocument.presentationml.presentation.main+xml"/>'
        '<Override PartName="/ppt/slides/slide1.xml" ContentType="application/vnd.openxmlformats-officedocument.presentationml.slide+xml"/>'
        "</Types>"
    ),
    "_rels/.rels": (
        '<Relationships xmlns="http://schemas.openxmlformats.org/package/2006/relationships">'
        '<Relationship Id="rId1" Type="http://schemas.openxmlformats.org/officeDocument/2006/relationships/officeDocument" Target="ppt/presentation.xml"/>'
        "</Relationships>"
    ),
    "ppt/presentation.xml": (
        '<p:presentation xmlns:p="http://schemas.openxmlformats.org/presentationml/2006/main" '
        'xmlns:r="http://schemas.openxmlformats.org/officeDocument/2006/relationships">'
        '<p:sldIdLst><p:sldId id="256" r:id="rId1"/></p:sldIdLst></p:presentation>'
    ),
    "ppt/_rels/presentation.xml.rels": (
        '<Relationships xmlns="http://schemas.openxmlformats.org/package/2006/relationships">'
        '<Relationship Id="rId1" Type="http://schemas.openxmlformats.org/officeDocument/2006/relationships/slide" Target="slides/slide1.xml"/>'
        "</Relationships>"
    ),
    "ppt/slides/slide1.xml": (
        '<p:sld xmlns:p="http://schemas.openxmlformats.org/presentationml/2006/main" '
        'xmlns:a="http://schemas.openxmlformats.org/drawingml/2006/main">'
        '<p:cSld><p:spTree><p:sp><p:txBody><a:p><a:r><a:t>Hello DelftStack</a:t></a:r></a:p>'
        "</p:txBody></p:sp></p:spTree></p:cSld></p:sld>"
    ),
}

with zipfile.ZipFile(deck, "w", zipfile.ZIP_DEFLATED) as zf:
    for name, data in parts.items():
        zf.writestr(name, data)

with zipfile.ZipFile(deck) as zf:
    slide_xml = zf.read("ppt/slides/slide1.xml")

root = ET.fromstring(slide_xml)
for node in root.iter("{http://schemas.openxmlformats.org/drawingml/2006/main}t"):
    print(node.text)
Hello DelftStack
python-pptx 将所有这些 XML 隐藏在一个由演示文稿、幻灯片和形状构成的简单对象模型之后,本指南的其余部分使用的就是这个模型。
安装 python-pptx
在终端或命令提示符中使用 pip install python-pptx 安装该包。发行名称是 python-pptx,但导入名称是 pptx,因此脚本以 from pptx import Presentation 开头。下面每个示例开头都有一个小的 find_spec 检查:当无法导入 pptx 时,脚本会打印一条提示并停止,而不是以 ModuleNotFoundError 失败,因此代码在安装之前或之后运行都是安全的。用于核对本指南的环境未安装该包,所以该检查之后的库调用均以未执行的参考代码形式展示。
创建 PowerPoint 演示文稿
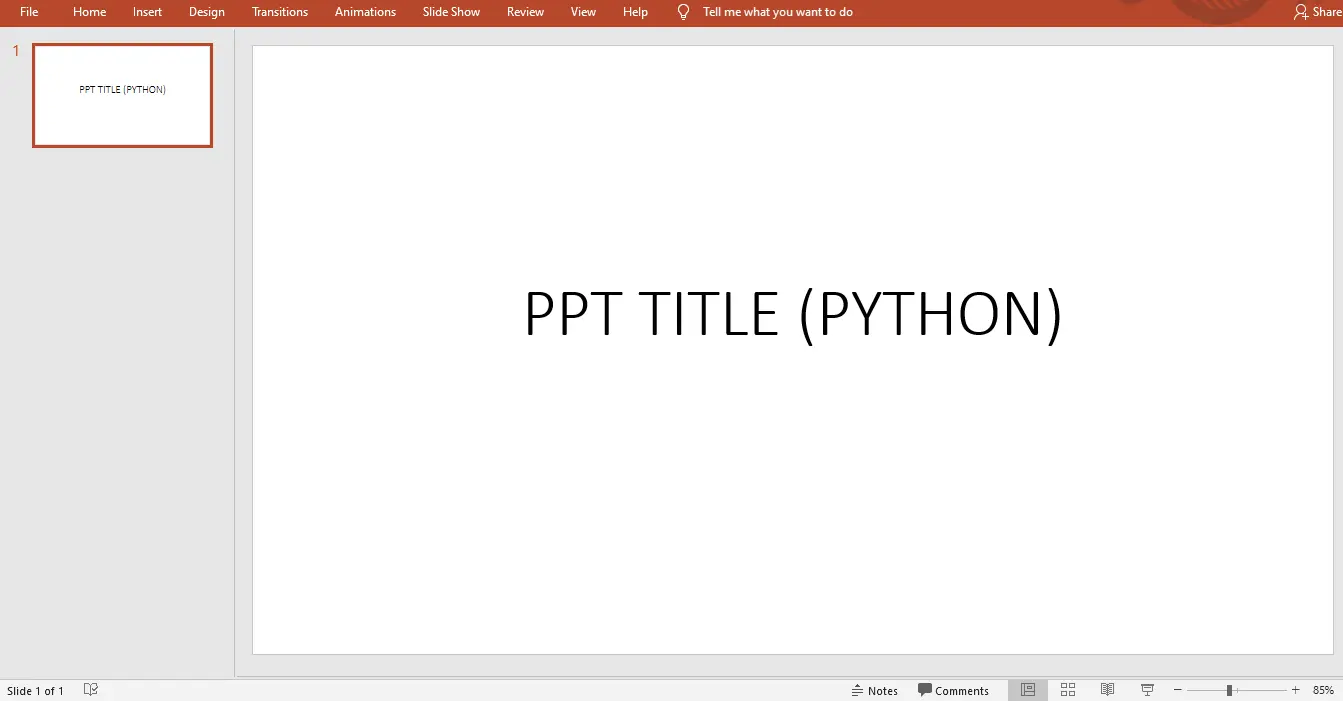
Presentation() 使用 python-pptx 自带的模板构建一个演示文稿。prs.slide_layouts[0] 是标题幻灯片版式,它为新幻灯片提供一个标题占位符和一个副标题占位符。下面的示例只填充标题;如果需要副标题,可以通过 slide.placeholders[1].text 以同样方式填充。save 会写入 .pptx 文件。
本节中的代码以及显示的标签或输出仍为英文。
import importlib.util
import sys

if importlib.util.find_spec("pptx") is None:
    print("python-pptx is not installed; run: pip install python-pptx")
    sys.exit(0)

from pptx import Presentation

prs = Presentation()
slide = prs.slides.add_slide(prs.slide_layouts[0])
slide.shapes.title.text = "PPT TITLE (PYTHON)"
prs.save("delft.pptx")
print("Saved delft.pptx")
安装该包后,运行脚本会将 delft.pptx 写入当前工作目录,并打印 Saved delft.pptx 作为确认。生成的文件可以在 PowerPoint、LibreOffice Impress 或 Google Slides 中打开,第一张幻灯片上带有标题。
从 PowerPoint 文件中提取文本
依次遍历 prs.slides 和 slide.shapes 可以访问幻灯片上的每个元素。只有部分形状带有文本,因此先检查 shape.has_text_frame,以跳过图片和其他非文本对象。读取 paragraph.text 可以让每个段落保持一行,比拼接各个 run 产生更干净的输出。关于 Python 中的其他文档转换,请参阅如何在 Python 中将 Docx 转换为 PDF。
下面的示例在临时文件夹中构建一个小的源文件以保持自包含;实际使用时,将 src 指向你自己的 .pptx 即可。
本节中的代码以及显示的标签或输出仍为英文。
import importlib.util
import os
import sys
import tempfile

if importlib.util.find_spec("pptx") is None:
    print("python-pptx is not installed; run: pip install python-pptx")
    sys.exit(0)

from pptx import Presentation

work = tempfile.mkdtemp()
src = os.path.join(work, "demo.pptx")
out_path = os.path.join(work, "demo.txt")

prs = Presentation()
slide = prs.slides.add_slide(prs.slide_layouts[0])
slide.shapes.title.text = "Quarterly results"
slide = prs.slides.add_slide(prs.slide_layouts[1])
slide.shapes.title.text = "Next steps"
slide.placeholders[1].text = "Ship the report"
prs.save(src)

doc = Presentation(src)
lines = []
for slide in doc.slides:
    for shape in slide.shapes:
        if not shape.has_text_frame:
            continue
        for paragraph in shape.text_frame.paragraphs:
            if paragraph.text.strip():
                lines.append(paragraph.text)
with open(out_path, "w", encoding="utf-8") as fh:
    fh.write("\n".join(lines) + "\n")
print("\n".join(lines))
安装该包后,脚本会打印 Quarterly results、Next steps 和 Ship the report,并将同样的内容写入 demo.txt,每个段落一行。表格和图表需要通过 shape.has_table 和 shape.has_chart 专门处理,因为它们的内容位于 text_frame 之外。
向幻灯片添加图片
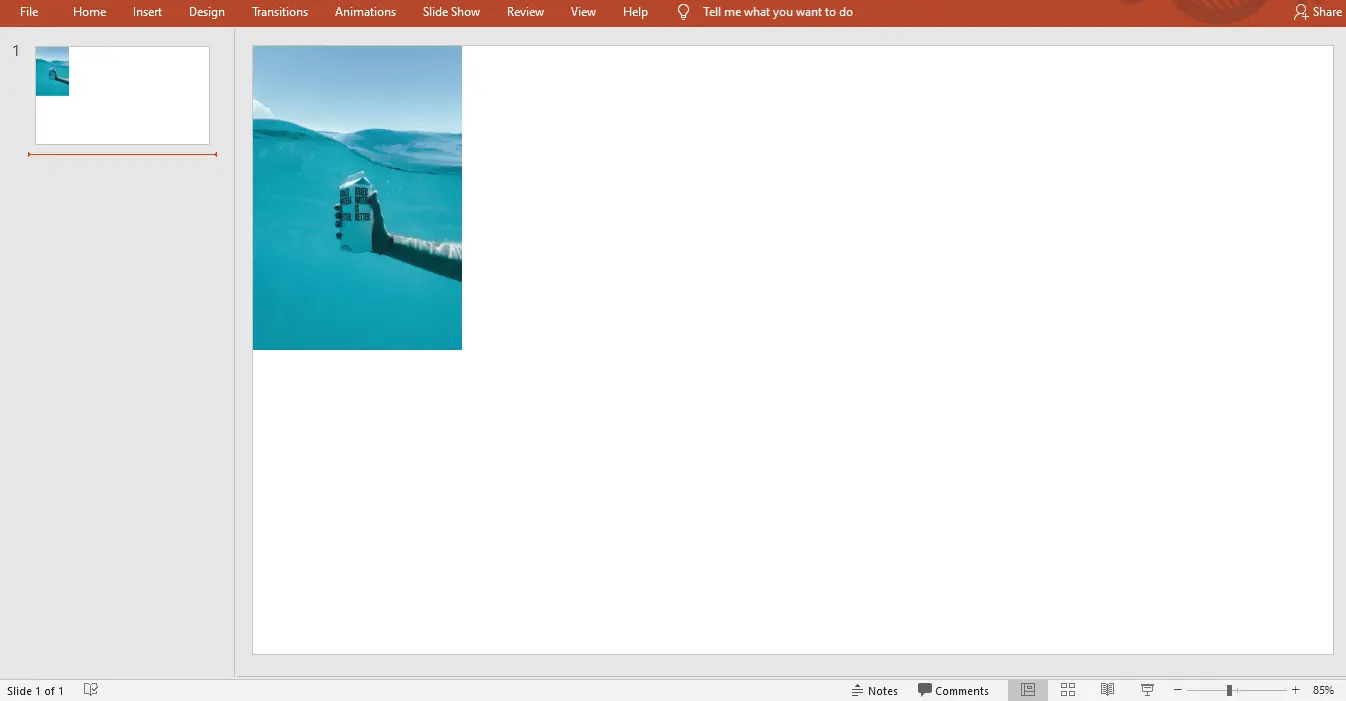
slide.shapes.add_picture 接受图片路径以及相对于幻灯片左上角的 left 和 top 距离。pptx.util 中的 Inches 辅助函数负责转换为该格式使用的 EMU 单位。传入 width 或 height 可以在保持宽高比的情况下缩放图片,两个都传则得到精确尺寸。prs.slide_layouts[6] 是空白版式,当幻灯片只需要图片时是一个干净的起点。
下面的示例将一个微型 PNG 解码到临时文件中以保持自包含;实际使用时,将 img_path 替换为你自己的文件,例如 logo.png。
本节中的代码以及显示的标签或输出仍为英文。
import base64
import importlib.util
import os
import sys
import tempfile

if importlib.util.find_spec("pptx") is None:
    print("python-pptx is not installed; run: pip install python-pptx")
    sys.exit(0)

from pptx import Presentation
from pptx.util import Inches

png = base64.b64decode("iVBORw0KGgoAAAANSUhEUgAAAAEAAAABCAYAAAAfFcSJAAAADUlEQVR42mP8z8BQDwAEhQGAhKmMIQAAAABJRU5ErkJggg==")
img_path = os.path.join(tempfile.mkdtemp(), "logo.png")
with open(img_path, "wb") as fh:
    fh.write(png)

prs = Presentation()
slide = prs.slides.add_slide(prs.slide_layouts[6])
slide.shapes.add_picture(img_path, Inches(1), Inches(1), width=Inches(3))
prs.save("with_image.pptx")
print("Saved with_image.pptx")
安装该包后,脚本会打印 Saved with_image.pptx,保存的文件包含一张幻灯片,图片锚定在距顶部和左侧边缘各一英寸的位置。使用一张完整尺寸照片时的典型效果如下:
同样的对象模型还涵盖表格、图表和其他形状,因此这些模式可以扩展到大多数日常幻灯片生成任务。