Angular 中的路由导航

我们将介绍 Angular 中的路由服务 navigate 方法,并讨论如何在 Angular 应用程序中使用它进行导航。
Angular 中的路由导航
导航是任何 Web 应用程序中最重要的部分之一。即使在构建没有多个页面的单页面应用程序 (SPA) 时,我们仍然使用导航从一个部分移动到另一个部分。
导航使用户可以轻松地在 Web 应用程序上找到他们要查找的内容。如果我们提供清晰易懂的导航,我们的 Web 应用程序就会成功。
Angular 提供了许多导航方法,可以轻松实现从简单到复杂的路由。Angular 提供了一个单独的模块来在我们的 Web 应用程序中设置导航。
路由 navigate() 方法用于以编程方式将用户从一个页面导航到另一个页面。
我们将通过一个示例,在该示例中,我们将使用 navigate() 浏览不同的组件。因此,让我们使用以下命令创建一个新应用程序。
# angular
ng new my-app
在 Angular 中创建我们的新应用程序后,我们将使用此命令转到我们的应用程序目录。
# angular
cd my-app
现在,让我们运行我们的应用程序来检查所有依赖项是否安装正确。
# angular
ng serve --open
我们将使用命令生成组件。首先,我们将生成我们的 home 组件。
# angular
ng generate component home
一旦我们生成了我们的 home 组件,我们将生成我们的 about 组件。
# angular
ng generate component about
最后,我们使用以下命令生成我们的 services 组件。
# angular
ng generate component services
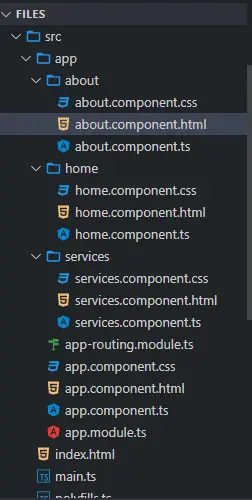
生成我们的组件后,我们将在单独的文件夹中拥有三个组件,其中包含 3 个文件。
输出:
一旦我们生成了我们的组件,我们将为它们创建视图。我们将从 about 文件夹打开 about.component.html 并添加以下代码。
# angular
<div class="container" >
  <h1> This is About component </h1>
  <h3> Try navigating to other components </h3>
</div>
我们将打开 home 文件夹中的 home.component.html 文件并添加以下代码。
# angular
<div class="container">
 <h1> This is Home component </h1>
 <h3> Try navigating to other components </h3>
</div>
接下来,我们将打开 services 文件夹中的 services.component.html 文件并添加以下代码。
# angular
<div class="container">
 <h1> This is Services component </h1>
 <h3> Try navigating to other components </h3>
</div>
一旦我们准备好我们的组件和视图,我们将在 app-routing.module.ts 中定义我们的路由。如下所示,我们将从 router 导入 ngModule、Routes 和 RouterModule 并导入我们创建的组件。
# angular
import { NgModule } from '@angular/core';
import { Routes, RouterModule } from '@angular/router';
import { AboutComponent}  from './about/about.component';
import { HomeComponent} from './home/home.component';
import { ServicesComponent } from './services/services.component';

@NgModule({
  imports: [RouterModule.forRoot(routes)],
  exports: [RouterModule]
})
export class AppRoutingModule { }
导入所有内容后,我们将在下面定义组件的路由。
# angular
const routes: Routes = [

    { path: 'about', component: AboutComponent },
    { path: 'home', component: HomeComponent},
    { path: 'services', component: ServicesComponent },
 ];
我们将在 app.component.html 中创建导航菜单。每个链接都将使用 (click) 方法调用一个函数。
我们将使用 router-outlet 显示组件数据,如下所示。
# angular
<ul class="nav navbar-nav">
  <li>
    <a (click)="goToHome()">Home</a>
  </li>
  <li>
    <a (click)="goToAbout()">About</a>
  </li>
  <li>
    <a (click)="goToServices()">Services</a>
  </li>
</ul>

<router-outlet> </router-outlet>
我们将创建函数 goToHome()、goToAbout() 和 goToServices()。我们将打开 app.component.ts 并从 router 导入 Router 并使用 router.navigate 我们将创建这些函数以在组件之间导航,如下所示。
# angular
import { Component } from '@angular/core';
import { Router } from '@angular/router';

@Component({
  selector: 'my-app',
  templateUrl: './app.component.html',
  styleUrls: ['./app.component.css'],
})
export class AppComponent {
  constructor(private router: Router) {}

  goToHome() {
    this.router.navigate(['/', 'home']);
  }
  goToAbout() {
    this.router.navigate(['/', 'about']);
  }
  goToServices() {
    this.router.navigate(['/', 'services']);
  }
}
输出:
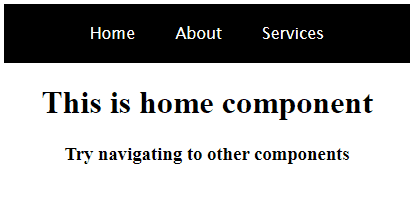
正如你从上面的示例中看到的那样,我们可以使用 navigate() 并定义路由轻松地从一个组件导航到另一个组件。
所以在本教程中,我们学习了如何创建组件和定义路由以及如何使用 navigate() 在组件之间轻松导航。

Rana is a computer science graduate passionate about helping people to build and diagnose scalable web application problems and problems developers face across the full-stack.
LinkedIn