HOWTO · Java
JavaFX 中的網格和子節點對齊
本教程將討論 JavaFX 中的網格和子節點對齊。
本頁內容
在 JavaFX 中,有一個名為 GridPane 的 UI 元件。通過這個 UI 元件,所有子節點都以列和行的網格形式排列。
該元件所需的包是 javafx.scene.layout。
在本文中,我們將討論對齊並解釋有關此主題的示例,以便更好地理解。
JavaFX 中的網格和子節點對齊
在下面的示例中,我們建立了一個帶有標籤的網格窗格。下面給出了我們示例的程式碼。
import javafx.application.Application;
import javafx.geometry.HPos;
import javafx.geometry.Insets;
import javafx.geometry.Pos;
import javafx.scene.Scene;
import javafx.scene.control.Button;
import javafx.scene.control.Label;
import javafx.scene.control.TextField;
import javafx.scene.layout.GridPane;
import javafx.scene.text.Text;
import javafx.stage.Stage;

public class FxGrid extends Application {
  @Override
  public void start(Stage stage) {
    Label lbl = new Label("Simple grid example ..."); // Creating a label with text
    GridPane gridPane = new GridPane(); // Creating a Grid Pane

    gridPane.setPadding(new Insets(10, 10, 10, 10)); // Set the padding of the gridpane

    // Set the vertical and horizontal gaps between the columns
    gridPane.setVgap(15);
    gridPane.setHgap(15);

    gridPane.add(lbl, 0, 1); // Adding the label to the grid pane
    gridPane.setAlignment(Pos.CENTER); // Align the grid pane
    GridPane.setHalignment(lbl, HPos.RIGHT); // Setting the alignment for the child node of grid
                                             // pane

    Scene scene = new Scene(gridPane, 300, 300); // Creating a scene  with necessary size

    stage.setTitle("Grid Alignment Example"); // Setting title to the Application

    stage.setScene(scene); // Adding scene to the stage

    stage.show(); // Displaying the contents of the stage
  }
  public static void main(String args[]) {
    launch(args); // Launching the application
  }
}
我們已經在上面評論了每一行程式碼的目的。現在,我們將在這裡討論該主題的主要部分。
通過線 gridPane.setVgap(15); gridPane.setHgap(15);,我們為每一列建立了垂直和水平間隙。我們還通過 gridPane.setPadding(new Insets(10, 10, 10, 10)); 行新增了填充。
最重要的部分是分別對齊網格窗格和子節點。在程式碼中,通過 gridPane.setAlignment(Pos.CENTER); 行對齊網格窗格,並通過 GridPane.setHalignment(lbl, HPos.RIGHT); 行對齊網格窗格的子節點網格。
在我們的例子中,只有一個子節點有標籤。編譯上述示例程式碼並在你的環境中執行後,你將獲得以下輸出。
輸出:
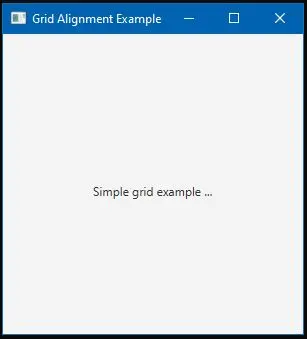
可用的 Hbox 對齊
下面列出了網格窗格子項的所有可用對齊方式。你需要在 setHalignment() 方法中設定它們。
這個方法的一般格式是 setHalignment( ChildNode, Alignment)。
| 對齊方式 | 描述 |
|---|---|
HPos.BASELINE_LEFT |
垂直對齊基線,水平對齊左 |
HPos.BASELINE_CENTER |
垂直對齊基線,水平對齊中心 |
HPos.BASELINE_RIGHT |
垂直對齊基線,水平對齊右 |
HPos.BOTTOM_LEFT |
垂直對齊底部,水平對齊左 |
HPos.BOTTOM_CENTER |
垂直對齊底部,水平對齊中心 |
HPos.BOTTOM_RIGHT |
垂直對齊底部,水平對齊右 |
HPos.CENTER_LEFT |
垂直居中,水平居左 |
HPos.CENTER |
垂直居中,水平居中 |
HPos.CENTER_RIGHT |
垂直居中,水平居右 |
HPos.TOP_LEFT |
垂直對齊頂部,水平對齊左 |
HPos.TOP_CENTER |
垂直對齊頂部,水平對齊中心 |
HPos.TOP_RIGHT |
垂直對齊頂部,水平對齊右 |
請記住,如果你的 IDE 不支援自動包含庫和包。然後,你可能需要在編譯之前手動包含這些必要的庫和包。