Angular의 객체 배열
이 기사에서는 예제와 작동 방식을 통해 Angular의 객체 배열에 대해 설명합니다.
Angular의 객체 배열
Angular 애플리케이션에서 작업하는 동안 객체 배열을 생성해야 하는 많은 상황이 있습니다. TypeScript에 있는 객체 배열의 예부터 시작하겠습니다.
객체의 배열을 유지하기 위해 Array의 값과 유형을 제공하여 객체의 배열을 선언해야 합니다. 개체 배열이 채워지고 라디오 버튼 디스플레이 또는 드롭다운에 표시됩니다.
배열의 객체를 만드는 방법에는 여러 가지가 있습니다. 선언된 객체 유형을 사용하여 배열을 선언하고 재설정할 수 있습니다.
개체에는 키와 값을 포함하는 속성이 있습니다. 주어진 구문에서 문자열 배열을 선언하고 재설정하는 방법을 보여줍니다.
# Angular
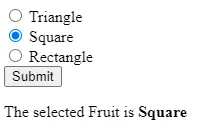
shapes:Array<string> = ['Triangle','Square','Rectangle'];
출력:
typescript에서는 모든 유형을 사용하여 Object를 요청할 수 있습니다. 다음 예제에서 fruits 객체를 생성해 보겠습니다.
# Angular

public fruits: Array<any> = [
    { title: "Banana", color: "Yellow" },
    { title: "Apple", color: "Red" },
    { title: "Guava", color: "Green" },
    { title: "Strawberry", color: "Red" }
  ];
개체(<any>) 유형을 대체할 수 있습니다.
# Angular

public fruits: Array<object> = [
    { title: "Banana", color: "Yellow" },
    { title: "Apple", color: "Red" },
    { title: "Guava", color: "Green" },
    { title: "Strawberry", color: "Red" }
  ];
Angular의 Alias 객체 유형 배열
typescript에서 type 키워드를 작동하면 사용자 정의 유형에 대한 새 별칭을 만들 수 있습니다. Fruit 개체 별칭을 설계하고 별칭 유형의 배열을 조합했습니다.
# AngularJs

type Fruit = Array<{ id: number; name: string }>;
다음 예에서는 배열 유형의 Fruit 별칭을 만들고 개체 값으로 Array를 초기화합니다.
코드 - app.component.ts:
# Angular
import { Component } from '@angular/core';

type Fruit = Array<{ id: number; name: string }>;

@Component({
  selector: 'my-app',
  templateUrl: './app.component.html',
  styleUrls: ['./app.component.css'],
})

export class AppComponent {
  fruits: Fruit = [
    { id: 1, name: "Apple" },
    { id: 2, name: "Banana" },
    { id: 3, name: "Guava" },
    { id: 4, name: "Strawberry" }
  ];
  constructor() {}
  ngOnInit() {}
}
이제 프런트 엔드 파일에 개체를 표시합니다.
코드 - app.component.html:
# angular
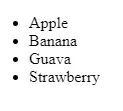
<ul>
<li *ngFor="let fruit of fruits">{{fruit.name}}</li>
</ul>
출력:
인터페이스 유형을 사용하여 객체 배열을 선언할 수 있습니다. 오버헤드 접근 방식은 객체가 여러 속성을 갖고 처리해야 하는 장애물인 경우 몇 가지 결함이 있으며 이 접근 방식은 Angular 및 typescript에서 객체 데이터를 보유하는 인터페이스를 만듭니다.
REST API(RESTful API)를 통해 백엔드/데이터베이스에서 도달하는 데이터를 처리하는 것이 유용합니다. 아래와 같은 명령어를 사용하여 인터페이스를 만들 수 있습니다.
# Angular

ng g interface Fruit
fruit.ts 파일을 개발합니다.
# Angular

export interface fruits {
  id: number;
  name: string;

  constructor(id,name) {
      this.id = id;
      this.name = name;
    }
}
Angular TypeScript 컴포넌트에서 우리는 과일을 위한 인터페이스를 만들 수 있습니다.
# Angular
import { Component, OnInit } from "@angular/core";
import {Fruit} from './Fruit'
@Component({
selector: "my-app",
templateUrl: "./app.component.html",
styleUrls: ["./app.component.css"]
})
export class appComponent implements OnInit {
public fruits: Fruit[] = [
{ id: 1, name: "Apple" },
{ id: 2, name: "Banana" },
{ id: 3, name: "Guava" },
{ id: 4, name: "Strawberry" }
];
constructor() {}
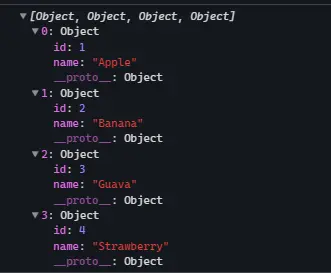
ngOnInit() {
console.log(this.fruits)
}
}
출력:

Rana is a computer science graduate passionate about helping people to build and diagnose scalable web application problems and problems developers face across the full-stack.
LinkedIn