React 中的 Refs 与 TypeScript

本教程提供了有关在 React 中使用 Refs 和 TypeScript 的指南。我们还将讨论 React Hooks 的用途以及哪些 Hooks 帮助我们获取元素的 Refs。
首先,让我们看看 React Hooks 是什么以及为什么要使用它们。
React 中的钩子
Hooks 是在 React 版本 16.8 中引入的。Hooks 允许在不编写类的情况下使用状态和其他功能,并且它在类中不起作用。
考虑以下使用 useState() 的示例,允许在功能组件中使用状态变量。初始状态被传递给函数,它返回一个当前状态值和另一个函数来更新这个值。
代码示例:
import React, { useState } from 'react';

function Counter() {
  // Declare a new state variable, which we'll call "counter"
  const [counter, setCounter] = useState(0);

  return (
    <div>
      <p>You clicked {counter} times</p>
      <button onClick={() => setCounter(counter + 1)}>
        Add
      </button>
    </div>
  );
}
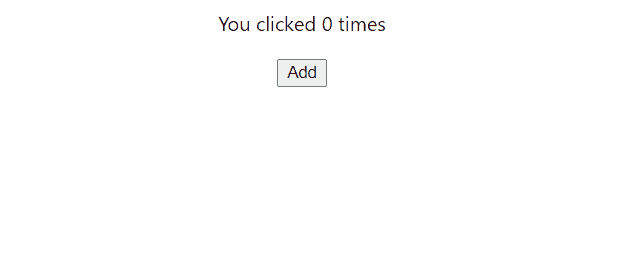
上面的代码有一个初始状态变量 counter 和一个函数 setCounter,它在按钮点击事件上设置它的值。每当单击按钮时,counter 值都会增加一。
输出:
在 React 中使用 Hook useRef 与 TypeScript
Hook useRef 允许在渲染之间保持值。useRef 存储一个可变值,在更新时不会导致重新渲染。
useRef 允许直接访问 DOM 元素。这允许你直接在功能组件中创建对 DOM 元素的引用。
下面的代码示例中,有一个带有图像的滑块,每个滑块都有一个 radio 按钮来控制它的运动,我们需要一个引用,因此我们使用名为 useRef 的 React Hook,它创建了在功能中控制的那些 radio 按钮。
代码 - React(应用程序):
import React from "react";
import "./slider.css";
import Cover from "../src/assets/back.png";
import {useRef} from "react";

const Slider = () => {
  const input1 = useRef();
  const input2 = useRef();
  const input3 = useRef();
  var counter = 1;


  setInterval(function () {
    const myInput = eval("input"+counter).current;
    if(myInput){
      myInput.checked = true;
    }
    counter++;
    if (counter > 3) {
      counter = 1;
    }
  }, 4000);
  return (
      <div className="slider">
        <div className="slides">
          <input type="radio" name="radio-btn" id="radio1" ref={input1}/>
          <input type="radio" name="radio-btn" id="radio2" ref={input2}/>
          <input type="radio" name="radio-btn" id="radio3" ref={input3}/>
          <div className="slide first">
            <img src={Cover} alt="" />
          </div>
          <div className="slide">
            <img src={Cover} alt="" />
          </div>
          <div className="slide">
            <img src={Cover} alt="" />
          </div>
        </div>
        <div className="navigation-manual flex center-1">
          <label htmlFor="radio1" className="manual-btn"></label>
          <label htmlFor="radio2" className="manual-btn"></label>
          <label htmlFor="radio3" className="manual-btn"></label>
        </div>
      </div>
  );
};
export default Slider;
代码 - CSS:
.slider{
    position: relative;
    border-radius: 5px;
    height: 250px;
    border-radius: 10px;
    overflow: hidden;
    margin: 30px auto;
  }
.slides{
    width: 500%;
    height: 280px;
    display: flex;
  }
.slides input{
    display: none;
  }
.slide{
    width: 20%;
    transition: 2s;
}
.slide img{
    width: 100%;
    height: 100%;
}
  /*css for manual slide navigation*/
.navigation-manual{
    position: absolute;
    width: 100%;
    bottom: 20px;
    display: flex;
    justify-content: center;
}
.manual-btn{
    border: 2px solid #40D3DC;
    padding: 5px;
    border-radius: 10px;
    cursor: pointer;
    transition: 1s;
}
.manual-btn:not(:last-child){
    margin-right: 40px;
}
.manual-btn:hover{
    background: #40D3DC;
}
#radio1:checked ~ .first{
    margin-left: 0;
}
#radio2:checked ~ .first{
    margin-left: -20%;
}
#radio3:checked ~ .first{
    margin-left: -40%;
}
#radio4:checked ~ .first{
    margin-left: -60%;
}
/*css for automatic navigation*/
.navigation-auto{
    position: absolute;
    display: flex;
    width: 800px;
    justify-content: center;
  }
.navigation-auto div{
    border: 2px solid #40D3DC;
    padding: 5px;
    border-radius: 10px;
    transition: 1s;
}
.navigation-auto div:not(:last-child){
    margin-right: 40px;
}
#radio1:checked ~ .navigation-auto .auto-btn1{
    background: #40D3DC;
}
#radio2:checked ~ .navigation-auto .auto-btn2{
    background: #40D3DC;
}
#radio3:checked ~ .navigation-auto .auto-btn3{
    background: #40D3DC;
}
#radio4:checked ~ .navigation-auto .auto-btn4{
    background: #40D3DC;
}
代码 - React(主要):
import './App.css';
import Slider from './Slider';
function App() {

  return (
    <div className="App">
    <Slider/>
    </div>
  );
}

export default App;
另一个文件是用于设置滑块样式的 .css 文件。上面的组件在渲染后会是这样的:

在 React 的 React.createRef() 与 TypeScript 一起使用
在获取输入字段引用的类组件中,我们使用了 createRef() 方法,该方法用于访问组件中的任何 DOM 元素并返回一个可变的 ref 对象。
在以下示例中,单击按钮时,该字段会被聚焦。
代码:
class CustomTextInput extends React.Component {
  constructor(props) {
    super(props);
    // creates a ref to store the element textInput DOM
    this.textInput = React.createRef();
    this.focusTextInput = this.focusTextInput.bind(this);
  }

  focusTextInput() {
    //Focus the input text using the raw DOM API
    // Note: we access "current" to get the node DOM
    this.textInput.current.focus();
  }

  render() {
    // tell React, we want to associate the <input> ref
    // with `textInput` that was created in the constructor
    return (
      <div>
        <input
          type="text"
          ref={this.textInput} />
        <input
          type="button"
          value="Focus the text input"
          onClick={this.focusTextInput}
        />
      </div>
    );
  }
}
输出:
-in-React-With-TypeScript.webp)

Ibrahim is a Full Stack developer working as a Software Engineer in a reputable international organization. He has work experience in technologies stack like MERN and Spring Boot. He is an enthusiastic JavaScript lover who loves to provide and share research-based solutions to problems. He loves problem-solving and loves to write solutions of those problems with implemented solutions.
LinkedIn