使用 OpenCV solvepnp() 函数解决 PnP 问题

OpenCV 库是一个开源库,旨在帮助完成计算机视觉任务。该库与 Python 兼容,可用于实现和解决不同的图像处理问题。
本教程将演示如何在 Python 中使用 OpenCV 库中的 solvepnp() 函数。该函数用于解决姿态估计问题。
了解 PnP 问题
PnP 问题在计算机视觉中非常常见,代表 Perspective n-Points 问题。在这个问题中,我们无法在提供 2D 和 3D 坐标后确定物体相对于相机的位姿。
这可以通过在线考试期间的面部跟踪示例来理解。物体的姿态可以随着方向的改变而改变。
以下两种类型的运动促进了这种变化:
- 第一种运动是平移运动,可以沿三个轴中的任何一个发生。物体沿任何特定方向匀速运动,从而改变其坐标。
- 第二种运动是旋转运动,物体可以围绕三个轴中的任何一个旋转。
使用 opencv.solvepnp() 函数解决 PnP 问题
OpenCV 库中的 solvepnp() 函数用于给定对象相对于相机的位姿估计,从而解决 PnP 问题。它返回旋转和平移向量。
它使用相机矩阵的对象的 2D 和 3D 坐标。提供的坐标是面部的不同特征。
这些特征是鼻子、嘴角、下巴和双眼。
让我们讨论使用此功能所需的所有参数。
objectPoints参数采用前面提到的所有特征的 3D 点。imagePoints参数用于指定对象特征的 2D 点。cameraMatrix用于指定相机的内在价值。该矩阵是使用相机的中心点和焦距创建的。- 为了解决相机引起的失真,我们使用了
distCoeffs参数。如果相机中的失真可以忽略不计,则该向量可以为 NULL。 - 我们可以使用
useExtrinsicGuess参数将输出结果用于初始计算,该参数可以为真或假。除此之外,只有flags参数。
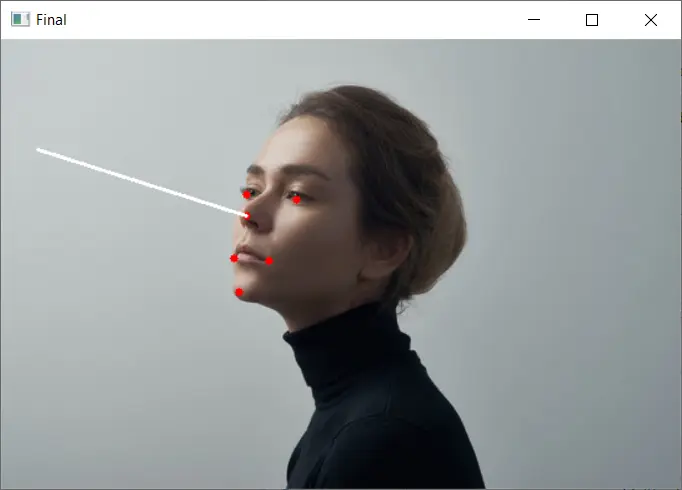
此函数返回的旋转和平移向量可用于绘制对象姿势的线。
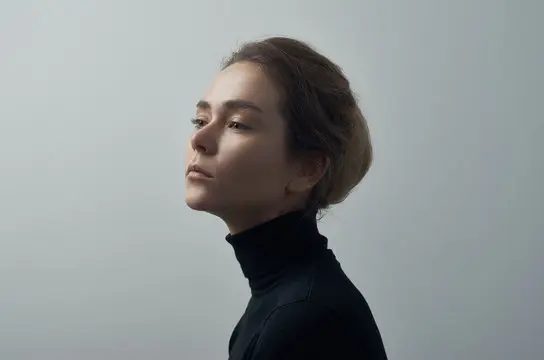
例如,我们将确定下图的位姿。
确定此图像姿势的代码如下所示。
import cv2
import numpy as np

img = cv2.imread("img.jpg")
size = img.shape
image_points_2D = np.array(
    [
        (196, 141),  # Nose tip
        (190, 202),  # Chin
        (196, 124),  # Left eye corner
        (236, 128),  # Right eye corner
        (186, 175),  # Left mouth
        (214, 177),  # Right mouth
    ],
    dtype="double",
)

figure_points_3D = np.array(
    [
        (0.0, 0.0, 0.0),  # Nose tip
        (0.0, -330.0, -65.0),  # Chin
        (-225.0, 170.0, -135.0),  # Left eye left corner
        (225.0, 170.0, -135.0),  # Right eye right corne
        (-150.0, -150.0, -125.0),  # Left Mouth corner
        (150.0, -150.0, -125.0),  # Right mouth corner
    ]
)

distortion_coeffs = np.zeros((4, 1))
focal_length = size[1]
center = (size[1] / 2, size[0] / 2)
matrix_camera = np.array(
    [[focal_length, 0, center[0]], [0, focal_length, center[1]], [0, 0, 1]],
    dtype="double",
)
success, vector_rotation, vector_translation = cv2.solvePnP(
    figure_points_3D, image_points_2D, matrix_camera, distortion_coeffs, flags=0
)
nose_end_point2D, jacobian = cv2.projectPoints(
    np.array([(0.0, 0.0, 1000.0)]),
    vector_rotation,
    vector_translation,
    matrix_camera,
    distortion_coeffs,
)
for p in image_points_2D:
    cv2.circle(img, (int(p[0]), int(p[1])), 3, (0, 0, 255), -1)
point1 = (int(image_points_2D[0][0]), int(image_points_2D[0][1]))

point2 = (int(nose_end_point2D[0][0][0]), int(nose_end_point2D[0][0][1]))

cv2.line(img, point1, point2, (255, 255, 255), 2)

cv2.imshow("Final", img)
cv2.waitKey(0)
cv2.destroyAllWindows()
输出:
上面提到的代码中发生了很多事情。让我们一步一步来理解它。
首先,我们使用 imread() 函数读取所需的图像。面部特征的点在 2D 和 3D 中提到。
点和相机矩阵被提供给 solvepnp() 函数,该函数返回姿势 3D 坐标的旋转和平移向量。
在我们直观地绘制姿势线之后。首先,我们绘制面部特征。
我们使用 2D 点并使用 circle() 函数绘制每个点。
projectPoints() 用于确定 solvepnp() 函数返回的向量在图像平面上的投影。我们还需要在这个函数中传递相机参数来获取投影。
我们使用 line() 函数从面部鼻子绘制一条与投影点对齐的线,以可视化由 solvepnp() 方法确定的姿势。
结论
本教程教我们如何使用 solvepnp() 函数来解决计算机视觉中的 PnP 问题。我们需要了解使用此方法所需的参数。
主要参数是图像的人脸特征的 2D 和 3D 点以及相机矩阵。使用这些值,它返回确定姿势的 3D 点的向量。
我们使用 projectPoints() 函数获得这些点相对于相机的 2D 投影。最后,我们使用这些点绘制一条线来表示图像中确定的姿势。

Manav is a IT Professional who has a lot of experience as a core developer in many live projects. He is an avid learner who enjoys learning new things and sharing his findings whenever possible.
LinkedIn