React Native의 Axios GET 헤더

Axios는 주로 HTTP 요청을 만드는 데 사용됩니다. 가장 흥미로운 점은 XMLHttpRequest와 HTTP 요청을 모두 만들 수 있다는 것입니다.
주로 사용되는 두 가지 HTTP 요청이 있습니다. 이들은 GET 및 POST입니다.
PATCH, DELETE 등과 같은 다른 요청 방법을 사용할 수 있습니다. 그러나 이 문서에서는 GET 방법에 대해서만 설명합니다.
axios.get() 메서드는 주로 React-Native 앱에서 GET 요청을 수행하는 데 사용됩니다. URL을 매개변수로 사용합니다.
GET 요청을 성공적으로 수행하면 응답을 받게 됩니다. 요청을 할 때 Authorization 헤더를 사용할 수 있습니다.
이 기사에서는 React-Native 앱에서 Authorization 헤더와 함께 axios.get() 메서드를 사용하는 방법을 살펴봅니다. 또한 주제를 쉽게 이해할 수 있도록 예제와 설명을 볼 것입니다.
React-Native에서 Authorization 헤더와 함께 Axios GET 메서드 사용
아래 예제에서는 React-Native 앱에서 axios.get() 메서드를 사용하는 방법을 보여줍니다. 예제의 코드는 다음과 같습니다.
// Import necessary packages
import axios from 'axios';

export default function App() {
  // Creating an axios GET request
  axios.get('https://example.com', {headers: {'Authorization': 'My token'}})
      .then((response) => {
        console.log(response.data);  // Processing the response text
      })
}
예제에서 위에서 공유한 단계와 관련된 각 코드 블록의 목적은 주석으로 남습니다.
위 예제에서는 axios.get('https://example.com')을 사용하여 example.com의 데이터를 가져오고, 이후 response로 저장된 데이터를 받습니다.
마지막으로 console.log(response.data)로 받은 데이터를 콘솔에 출력합니다. 또한 아래와 같은 Authorization 헤더를 적용했습니다.
headers: {'Authorization': 'My token'}
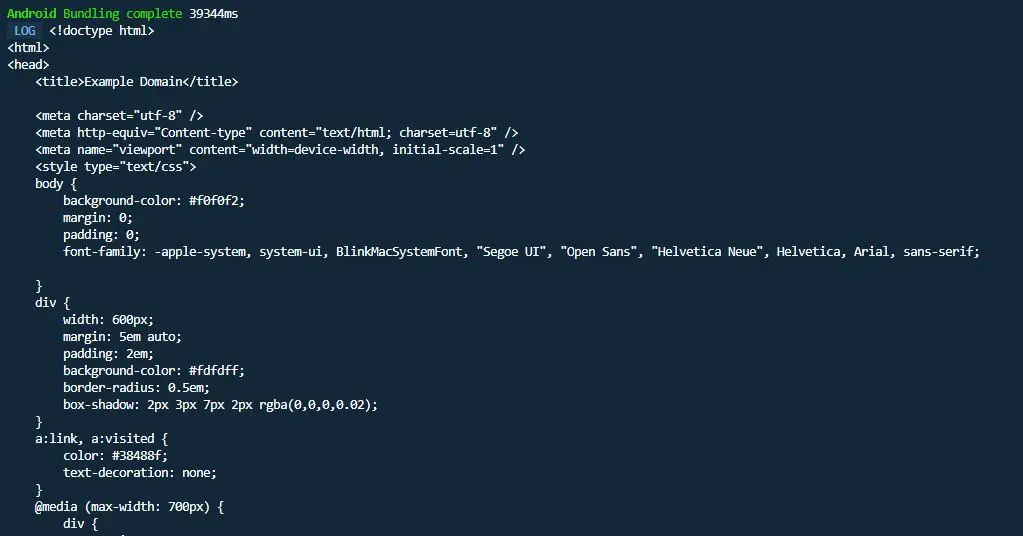
앱을 실행하면 터미널 콘솔에 아래와 같은 출력이 표시됩니다.
위에서 공유한 코드는 React-Native에서 생성되었으며 Expo-CLI를 사용하여 앱을 실행했습니다. 또한 최신 버전의 Node.js가 필요합니다.
환경에 Expo-CLI가 없는 경우 설치하십시오.

Aminul Is an Expert Technical Writer and Full-Stack Developer. He has hands-on working experience on numerous Developer Platforms and SAAS startups. He is highly skilled in numerous Programming languages and Frameworks. He can write professional technical articles like Reviews, Programming, Documentation, SOP, User manual, Whitepaper, etc.
LinkedIn