Tkinter 버튼 크기를 변경하는 방법
-
height및width옵션을 지정하여버튼크기 설정 -
Tkinter 의 Pixel
Button에서width와height설정 -
초기화 후 Tkinter
Button크기 변경
Tkinter Button 위젯의 height 및 width 옵션은 초기화 중 생성 된 버튼의 크기를 지정합니다. 초기화 후에도 configure 메소드를 사용하여 Tkinter Button 위젯의 크기를 프로그래밍 방식으로 변경하도록 height 및 width 옵션을 구성 할 수 있습니다.
height 및 width 옵션을 지정하여버튼크기 설정
tk.Button(self, text="", height=20, width=20)
‘높이’와 ‘너비’는 텍스트 단위로 20으로 설정되어 있습니다. 가로 텍스트 단위는 기본 시스템 글꼴에서 문자 0 의 너비와 같고 세로 텍스트 단위는 0 의 높이와 같습니다.
완전한 작업 코드
import tkinter as tk
import tkinter.font as tkFont

app = tk.Tk()
app.geometry("400x200")


buttonExample1 = tk.Button(app, text="Button 1", width=10, height=10)
buttonExample2 = tk.Button(app, text="Button 2", width=10, height=10)

buttonExample1.pack(side=tk.LEFT)
buttonExample2.pack(side=tk.RIGHT)

app.mainloop()
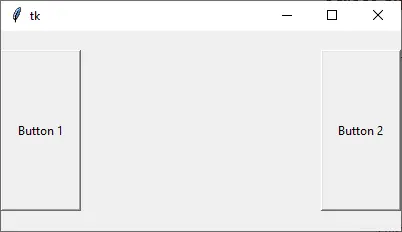
보시다시피, 버튼의 높이와 너비는 픽셀에서 동일하지 않습니다. 너비와 옵션은 모두 10으로 설정되어 있습니다.
Tkinter 의 Pixel Button 에서 width 와 height 설정
픽셀 단위로 Tkinter Button 위젯의 너비 및 / 또는 높이를 지정해야하는 경우 가상의 보이지 않는 1x1 픽셀 이미지를 Button 에 추가 할 수 있습니다. 그러면 ‘너비’와 ‘높이’가 ‘픽셀’단위로 측정됩니다.
tk.Button(app, text="Button 1", image=pixelVirtual, width=100, height=100, compound="c")
보이지 않는 이미지와 텍스트가 버튼 중앙에 오도록하려면 compound 옵션을 c 또는 동일하게 tk.CENTER 로 설정해야합니다. compound 가 구성되어 있지 않으면 text 가 버튼에 표시되지 않습니다.
import tkinter as tk
import tkinter.font as tkFont

app = tk.Tk()
app.geometry("300x100")
fontStyle = tkFont.Font(family="Lucida Grande", size=20)

labelExample = tk.Label(app, text="20", font=fontStyle)

pixelVirtual = tk.PhotoImage(width=1, height=1)

buttonExample1 = tk.Button(
    app, text="Increase", image=pixelVirtual, width=100, height=100, compound="c"
)
buttonExample2 = tk.Button(
    app, text="Decrease", image=pixelVirtual, width=100, height=100, compound="c"
)

buttonExample1.pack(side=tk.LEFT)
buttonExample2.pack(side=tk.RIGHT)
app.mainloop()
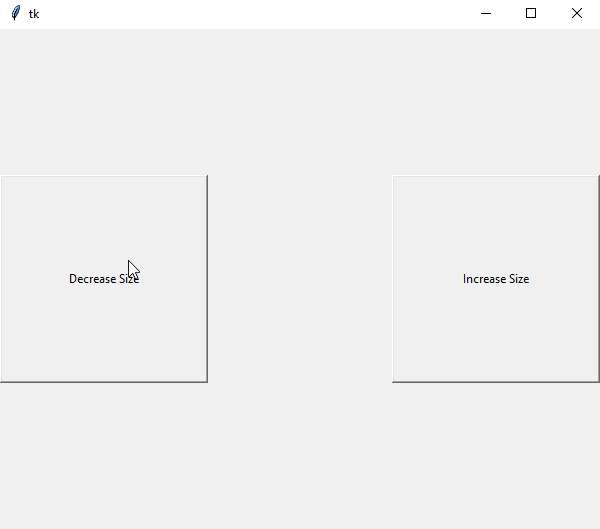
초기화 후 Tkinter Button 크기 변경
Button 위젯이 작성된 후 configure 메소드는 width 및 / 또는 height 옵션을 설정하여 Button 크기를 변경할 수 있습니다.
buttonExample1.configure(height=100, width=100)
buttonExample1 의 height 와 width 는 100 으로 설정됩니다.
초기화 후 ‘버튼’크기를 변경하는 완전한 작업 예
import tkinter as tk
import tkinter.font as tkFont

app = tk.Tk()
app.geometry("600x500")


def decreaseSize():
    buttonExample1.configure(height=100, width=100)


def increaseSize():
    buttonExample2.configure(height=400, width=400)


pixelVirtual = tk.PhotoImage(width=1, height=1)

buttonExample1 = tk.Button(
    app,
    text="Decrease Size",
    image=pixelVirtual,
    width=200,
    height=200,
    compound="c",
    command=decreaseSize,
)
buttonExample2 = tk.Button(
    app,
    text="Increase Size",
    image=pixelVirtual,
    width=200,
    height=200,
    compound=tk.CENTER,
    command=increaseSize,
)

buttonExample1.pack(side=tk.LEFT)
buttonExample2.pack(side=tk.RIGHT)
app.mainloop()

Founder of DelftStack.com. Jinku has worked in the robotics and automotive industries for over 8 years. He sharpened his coding skills when he needed to do the automatic testing, data collection from remote servers and report creation from the endurance test. He is from an electrical/electronics engineering background but has expanded his interest to embedded electronics, embedded programming and front-/back-end programming.
LinkedIn Facebook