Ajax 로드 버튼에 JavaScript MDCRipple 추가

이 튜토리얼은 AJAX로 로드된 HTML 버튼에 MDCRipple을 추가하는 방법을 알려줍니다. UNPKG CDN의 CSS 및 JavaScript 파일을 통해 MDC를 사용합니다.
Ajax 로드 버튼에 JavaScript MDCRipple 추가
AJAX 요청은 서버에서 작동하므로 라이브 서버에 액세스할 수 있는 경우 이 섹션을 건너뛸 수 있습니다. 그러나 라이브 서버에 대한 액세스 권한이 없으면 XAMPP 다운로드.
XAMPP를 설치한 후 XAMPP 설치에서 htdocs 폴더를 찾고 작업 디렉토리를 만듭니다. 이 디렉토리에는 이 문서의 코드 샘플 프로젝트가 포함됩니다.
우리의 HTML 코드는 UNPKG CDN에서 MDC CSS 및 JavaScript 파일을 로드합니다. 또한 HTML <button>으로 구성된 <main> 요소를 포함합니다.
이 버튼에는 값이 함수인 onclick 이벤트 속성이 있습니다. 이 함수는 사용자가 버튼을 클릭하고 AJAX 요청을 시작할 때 호출됩니다.
따라서 다음 코드는 HTML입니다.
<head>
<meta charset="utf-8">
<title>MDC with Ajax</title>
<script src="https://unpkg.com/material-components-web@latest/dist/material-components-web.min.js"></script>
<link rel="stylesheet" href="https://unpkg.com/material-components-web@latest/dist/material-components-web.min.css">
</head>
<body>
<main id="mdc-button-container">
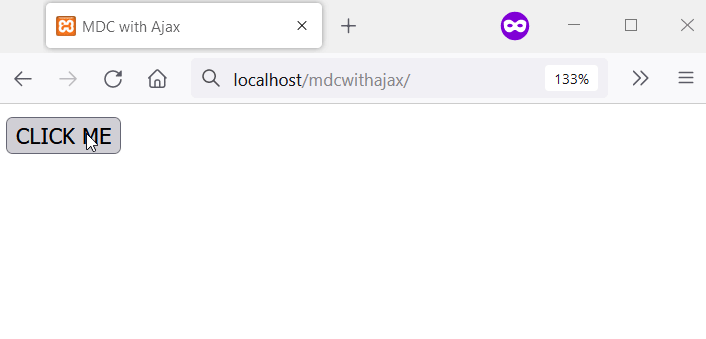
<button type="button" onclick="loadMDCButton()">CLICK ME</button>
</main>
</body>
</html>
다음으로 작업 디렉토리에 다른 HTML 파일을 생성하고 저장합니다. mdc-button.html 파일 이름을 지정할 수 있습니다.
이 파일에는 HTML 버튼에 대한 코드가 포함됩니다. 또한 버튼에는 MDC 클래스 이름이 있습니다.
따라서 JavaScript를 통해 MDCRipple을 쉽게 연결할 수 있습니다. 다음은 mdc-button.html에 대한 코드입니다.
<button class="mdc-button mdc-button--raised">
  <span class="mdc-button__ripple"></span>
  <span class="mdc-button__label">Click for Ripple</span>
</button>
JavaScript 코드는 AJAX 연결을 생성하고 다음과 같이 작동합니다.
- 새
XMLHttpRequest를 만듭니다. XMLHttpRtouest의onload메소드를 사용하여 다음을 수행하십시오.
2.1<main>요소의 ID를 가져옵니다.
2.2innerHTML속성을XMLHttpRequest의 응답 텍스트로 설정합니다.
2.3mdc-button.html의 버튼에 MDCRipple을 연결합니다.mdc-button.html파일에 대한GET요청을 엽니다.<main>요소의 버튼 대신mdc-button.html을 전송합니다.
다음은 JavaScript 함수의 코드입니다.
function loadMDCButton() {
  const xhttp = new XMLHttpRequest();
  xhttp.onload = function() {
    document.getElementById('mdc-button-container').innerHTML =
        this.responseText;
    mdc.ripple.MDCRipple.attachTo(document.querySelector('.mdc-button'));
  } xhttp.open('GET', 'mdc-button.html', true);
  xhttp.send();
}
다음은 샘플 프로젝트의 전체 코드입니다.
<head>
	<meta charset="utf-8">
	<title>MDC with Ajax</title>
	<script src="https://unpkg.com/material-components-web@latest/dist/material-components-web.min.js"></script>
	<link rel="stylesheet" href="https://unpkg.com/material-components-web@latest/dist/material-components-web.min.css">
</head>
<body>
	<main id="mdc-button-container">
		<button type="button"  onclick="loadMDCButton()">CLICK ME</button>
	</main>
	<script type="text/javascript">
		function loadMDCButton() {
			const xhttp = new XMLHttpRequest();
			xhttp.onload = function() {
				document.getElementById("mdc-button-container").innerHTML = this.responseText;
				mdc.ripple.MDCRipple.attachTo(document.querySelector('.mdc-button'));
			}
			xhttp.open("GET", "mdc-button.html", true);
			xhttp.send();
		}
	</script>
</body>
출력:

Habdul Hazeez is a technical writer with amazing research skills. He can connect the dots, and make sense of data that are scattered across different media.
LinkedIn