Java에서 KeyListener 사용
이 자습서에서는 Java에서 KeyListener를 사용하는 방법을 소개하고 주제를 이해하기 위한 몇 가지 예제 코드를 나열합니다.
KeyListener는 키보드의 키 상태 변경을 처리하는 인터페이스입니다. 인터페이스 이름에서 알 수 있듯이 키를 수신하고 그에 따라 작동합니다.
이 자습서에서는 이 인터페이스를 구현하고 주요 이벤트로 작업하는 방법을 배웁니다.
KeyEvent 클래스
키보드 키를 누를 때마다 KeyEvent 클래스의 개체는 KeyListener에 알립니다. KeyEvent 클래스에는 키 이벤트에 대한 추가 정보를 얻는 데 사용되는 몇 가지 메서드가 있습니다. 이 클래스의 가장 중요한 세 가지 방법이 아래에 요약되어 있습니다.
getKeyChar()메서드는 이벤트와 관련된 키 문자를 가져옵니다. 이 방법은 특정 키에 일부 기능을 추가하려는 경우 매우 유용합니다. 예를 들어e를 누르면 응용 프로그램이 종료됩니다.getKeyCode()메소드는getKeyChar()메소드와 매우 유사합니다. 누른 키와 관련된 정수 키 코드를 반환합니다.isActionKey()메소드는 동작 키(Caps Lock과 같은)가 눌렸는지 여부를 알 수 있습니다. 부울 true 또는 false를 반환합니다.
KeyListener 인터페이스 구현
KeyListener 인터페이스는 주요 이벤트를 수신하고 일부 작업을 수행합니다. 이 인터페이스의 선언은 아래와 같습니다.
public interface KeyListener extends EventListener
클래스에서 이 인터페이스의 다음 세 가지 메서드를 재정의해야 합니다.
- 키를 눌렀을 때
keyPressed(KeyEvent e)메소드가 호출됩니다. - 키를 놓으면
keyReleased(KeyEvent e)메서드가 호출됩니다. - 키가 문자를 입력할 때
keyTyped(KeyEvent e)메소드가 호출됩니다.
addKeyListener() 메서드도 사용합니다. KeyListener 인터페이스를 구현하는 클래스의 개체를 이 메서드에 전달해야 합니다. 키 이벤트를 듣고 반응하도록 객체를 등록하는 방식입니다.
KeyListener의 간단한 응용
주요 이벤트를 수신하고 콘솔에 무언가를 출력하는 간단한 애플리케이션을 만들어 보겠습니다. 프레임을 만들고 레이블을 추가합니다. 우리 프로그램은 키 문자와 키 동작을 콘솔에 출력해야 합니다. 누른 키가 동작 키이면 프로그램이 종료되어야 합니다.
import java.awt.FlowLayout;
import java.awt.Frame;
import java.awt.Label;
import java.awt.event.KeyEvent;
import java.awt.event.KeyListener;
public class KeyListenerExample implements KeyListener {
  @Override
  public void keyTyped(KeyEvent e) {
    System.out.println("The key Typed was: " + e.getKeyChar());
  }
  @Override
  public void keyPressed(KeyEvent e) {
    if (e.isActionKey())
      System.exit(0);
    System.out.println("The key Pressed was: " + e.getKeyChar());
  }
  @Override
  public void keyReleased(KeyEvent e) {
    System.out.println("The key Released was: " + e.getKeyChar());
  }
  public static void main(String[] args) {
    // Setting the Frame and Labels
    Frame f = new Frame("Demo");
    f.setLayout(new FlowLayout());
    f.setSize(500, 500);
    Label l = new Label();
    l.setText("This is a demonstration");
    f.add(l);
    f.setVisible(true);

    // Creating and adding the key listener
    KeyListenerExample k = new KeyListenerExample();
    f.addKeyListener(k);
  }
}
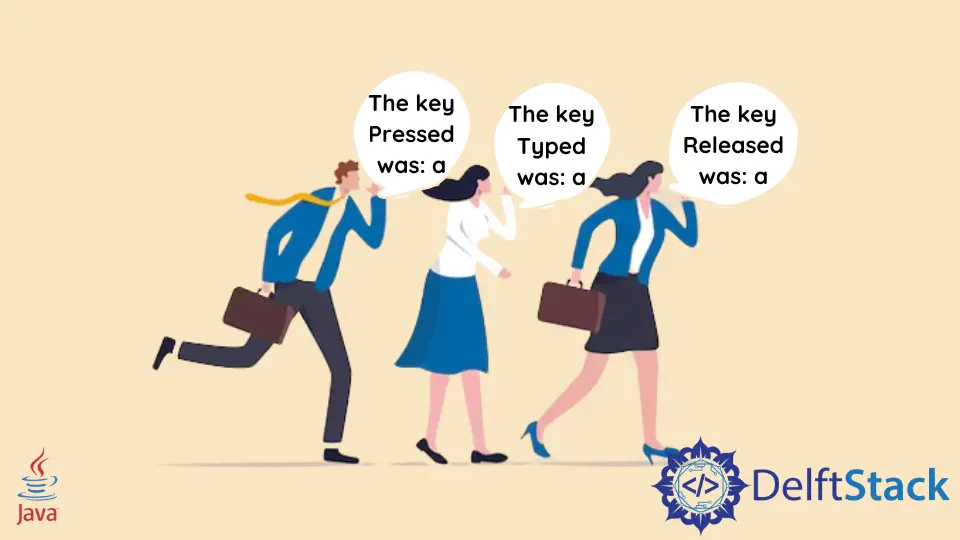
출력:
The key Pressed was: a
The key Typed was: a
The key Released was: a
The key Pressed was: b
The key Typed was: b
The key Released was: b
KeyListener를 사용한 간단한 게임 애플리케이션
화살표 키를 입력으로 사용하는 다른 프로그램을 만들어 보겠습니다. 이 프로그램은 누른 키에 따라 숫자 0을 행렬의 다른 위치로 이동합니다. 출력이 콘솔에 인쇄됩니다.
import java.awt.FlowLayout;
import java.awt.Frame;
import java.awt.Label;
import java.awt.event.KeyEvent;
import java.awt.event.KeyListener;
import java.util.Arrays;
public class KeyListenerExample implements KeyListener {
  // Matrix and x, y coordinates of 0
  int[][] matrix;
  int x;
  int y;
  KeyListenerExample() {
    // Initializing the Matrix
    matrix = new int[3][3];
    matrix[0] = new int[] {1, 1, 1};
    matrix[1] = new int[] {1, 0, 1};
    matrix[2] = new int[] {1, 1, 1};

    x = 1;
    y = 1;

    // Printing the Matrix
    for (int i = 0; i < 3; i++) System.out.println(Arrays.toString(matrix[i]));
    System.out.println();
  }
  // keyPressed() method takes care of moving the zero according to the key pressed
  @Override
  public void keyPressed(KeyEvent e) {
    if (e.getKeyCode() == KeyEvent.VK_RIGHT) {
      if (x != 2) {
        x += 1;
        System.out.println("Moving Right");
      } else
        System.out.println("Cannot Move Right");
    }
    if (e.getKeyCode() == KeyEvent.VK_LEFT) {
      if (x != 0) {
        x -= 1;
        System.out.println("Moving Left");
      } else
        System.out.println("Cannot Move Left");
    }
    if (e.getKeyCode() == KeyEvent.VK_DOWN) {
      if (y != 2) {
        y += 1;
        System.out.println("Moving Down");
      } else
        System.out.println("Cannot Move Down");
    }
    if (e.getKeyCode() == KeyEvent.VK_UP) {
      if (y != 0) {
        y -= 1;
        System.out.println("Moving Up");
      } else
        System.out.println("Cannot Move Up");
    }
    matrix[0] = new int[] {1, 1, 1};
    matrix[1] = new int[] {1, 1, 1};
    matrix[2] = new int[] {1, 1, 1};
    matrix[y][x] = 0;
    for (int i = 0; i < 3; i++) System.out.println(Arrays.toString(matrix[i]));
    System.out.println();
  }
  // We don't need the other two methods
  @Override
  public void keyReleased(KeyEvent e) {}
  @Override
  public void keyTyped(KeyEvent e) {}
  public static void main(String[] args) {
    // Setting the frame and labels
    Frame f = new Frame("Demo");
    f.setLayout(new FlowLayout());
    f.setSize(200, 200);
    Label l = new Label();
    l.setText("This is a Game");
    f.add(l);
    f.setVisible(true);

    // Creating and adding the key listener
    KeyListenerExample k = new KeyListenerExample();
    f.addKeyListener(k);
  }
}
출력:
[1, 1, 1]
[1, 0, 1]
[1, 1, 1]

Moving Right
[1, 1, 1]
[1, 1, 0]
[1, 1, 1]

Cannot Move Right
[1, 1, 1]
[1, 1, 0]
[1, 1, 1]

Moving Left
[1, 1, 1]
[1, 0, 1]
[1, 1, 1]

Moving Left
[1, 1, 1]
[0, 1, 1]
[1, 1, 1]

Cannot Move Left
[1, 1, 1]
[0, 1, 1]
[1, 1, 1]

Moving Up
[0, 1, 1]
[1, 1, 1]
[1, 1, 1]

Cannot Move Up
[0, 1, 1]
[1, 1, 1]
[1, 1, 1]

Moving Down
[1, 1, 1]
[0, 1, 1]
[1, 1, 1]

Moving Down
[1, 1, 1]
[1, 1, 1]
[0, 1, 1]

Cannot Move Down
[1, 1, 1]
[1, 1, 1]
[0, 1, 1]
요약
클래스는 키 이벤트를 수신하고 반응하기 위해 KeyListener 인터페이스를 구현합니다. 이 튜토리얼에서는 KeyEvent 클래스의 몇 가지 중요한 메소드를 배웠습니다. 또한 KeyListener 인터페이스를 구현하는 방법과 keyPressed(), keyReleased() 및 keyTyped() 메서드를 재정의하는 방법도 배웠습니다. 우리는 또한 이 인터페이스의 사용을 보여주는 몇 가지 예를 보았습니다.