addEventListener と JavaScript の Onclick
この記事では、JavaScript addEventListener と onclick の違いについて説明します。
JavaScript でのaddEventListenerとonclickの比較
addEventListener と onclick はどちらも同じ目的を果たすことができますが、知っておくべきニュアンスがいくつかあります。
それで、それがこの記事のすべてです。 さらに、コード例を使用して説明を行います。
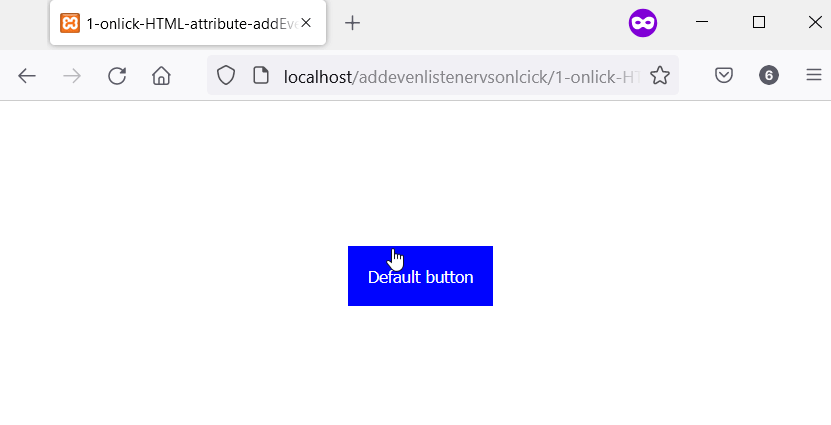
onclick は HTML 属性です。 addEventListener は <Script> 要素でのみ機能する
onclick は HTML 属性であるため、HTML 要素に直接追加するか、<script> 要素内に追加できます。 一方、<script> 要素内では addEventListener しか使用できません。
たとえば、次のコードでは button 要素の属性として onclick を追加しています。 それだけでなく、onclick の値は JavaScript アラート メッセージです。
したがって、ボタンをクリックすると、Web ブラウザーで JavaScript アラートが表示されます。 ただし、addEventListener を HTML 属性として追加することはできません。
コード例:
<head>
    <meta charset="utf-8">
    <title>1-onlick-HTML-attribute-addEventlistener-Via-Script-Element</title>
    <style>
        body {
            display: grid;
            justify-content: center;
            align-items: center;
            height: 100vh;
        }

        button {
            padding: 1.2em;
            background-color: #0004ff;
            color: #ffffff;
            border: none;
            cursor: pointer;
        }
    </style>
</head>
<body>
    <main id="main">
        <!-- Add onclick as an attribute of the button -->
        <button id="button" onclick="alert('Perform click actions with onclick attribute.')">Default button</button>
    </main>
</body>
出力:
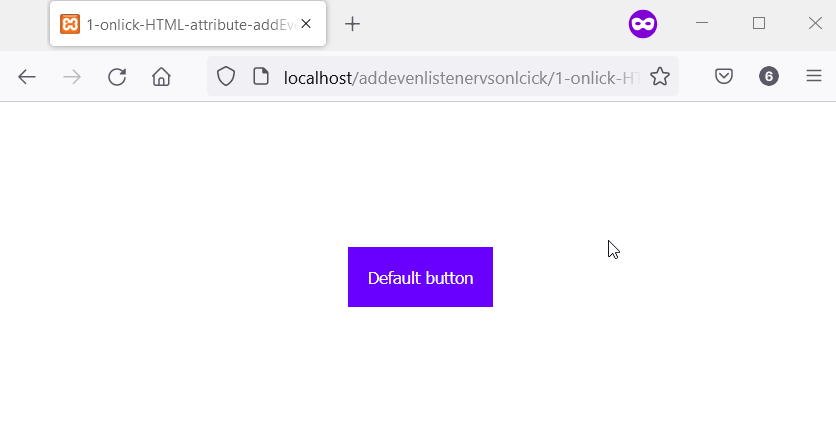
<script> 要素では、ボタンを選択し、その属性として onclick を追加できます。 同時に、addEventListener を使用してボタンにクリック イベント リスナーを追加することもできます。
したがって、次の HTML ボタンには onclick 属性と addEventListener があります。 その結果、ボタンをクリックすると、2つの JavaScript 警告メッセージが表示されます。
コード例:
<head>
    <meta charset="utf-8">
    <title>1-onlick-HTML-attribute-addEventlistener-Via-Script-Element-V2</title>
    <style>
        body {
            display: grid;
            justify-content: center;
            align-items: center;
            height: 100vh;
        }

        button {
            padding: 1.2em;
            background-color: #6800ff;
            color: #ffffff;
            border: none;
            cursor: pointer;
        }
    </style>
</head>
<body>
    <main id="main">
        <button id="button">Default button</button><br/>
    </main>

    <script>
        let button = document.getElementById('button');

        // Here, we are in the <script> element, we can
        // also add onclick to the button
        button.onclick = function() {
            alert("Perform click actions with onclick.")
        }

        // Also add click event via addEventListener
        button.addEventListener("click", function() {
            alert("Perform click actions with addEventListener");
        }, false);
    </script>
</body>
出力:
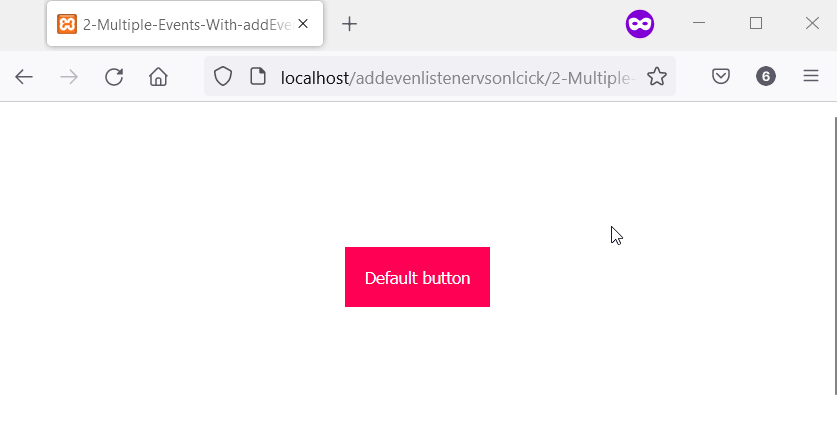
要素に複数の addEventListener を持つことができますが、onclick は 1つだけです
addEventListener を使用すると、要素に複数のクリック イベントを追加できます。 ただし、単一の onclick 属性のみを要素に付けることができます。
一方、要素は addEventListener を介して追加されたすべてのクリック イベントを実行します。 そのため、要素に addEventListener を介して 3つのクリック イベントがある場合、要素をクリックするとすべてが実行されます。
HTML ボタンには、以下のコードで addEventListener を介して 2つのクリック イベントがあります。 ボタンをクリックすると、すべてのクリック イベントが実行されます。
その結果、Web ブラウザーに 2つの JavaScript 警告メッセージが表示されます。
コード例:
<head>
    <meta charset="utf-8">
    <title>2-Multiple-Events-With-addEventListener-One-with-Onclick</title>
    <style>
        body {
            display: grid;
            justify-content: center;
            align-items: center;
            height: 100vh;
        }

        button {
            padding: 1.2em;
            background-color: #ff0054;
            color: #ffffff;
            border: none;
            cursor: pointer;
        }
    </style>
</head>
<body>
    <main id="main">
        <button id="button">Default button</button><br/>
    </main>

    <script>
        let button = document.getElementById('button');

        // Also add click event via addEventListener
        button.addEventListener("click", function () {
            alert("Perform First click action with addEventListener");
        }, false);

        // Yet another click event via addEventListener
        button.addEventListener("click", function () {
            alert("Perform Second click action with addEventListener");
        }, false);
    </script>
</body>
出力:
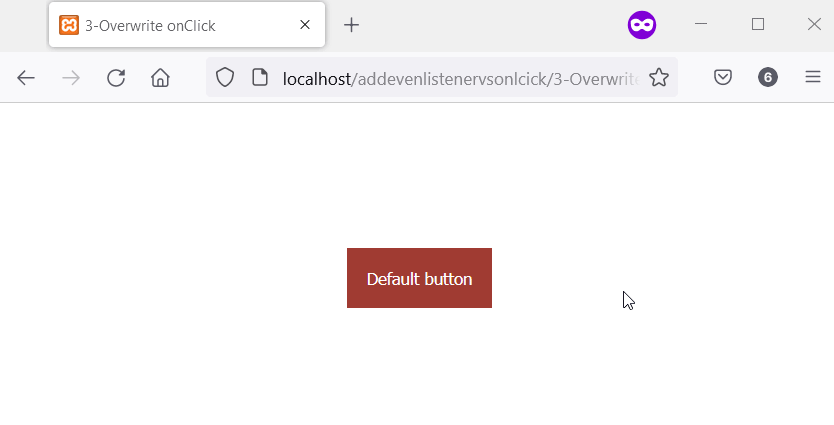
要素には 1つの onclick しか持てないことを述べました。 ただし、複数ある場合はどうなりますか? どの onclick が実行されますか?
複数の onclick 属性が互いに上書きする
単一の要素に複数の onclick がある場合、最後のものだけが機能します。 これは、onclick が要素の属性であるため、要素に存在できるのは 1つだけです。
したがって、要素に複数の onclick を追加すると、Web ブラウザは最後のものだけを実行します。
そのため、次のコードで onclick を介して 2つのクリック イベントを追加しました。 一方、Web ブラウザーでコードを実行すると、最後の onclick の JavaScript アラートに気付くでしょう。
コード例:
<head>
    <meta charset="utf-8">
    <title>3-Overwrite onClick</title>
    <style>
        body {
            display: grid;
            justify-content: center;
            align-items: center;
            height: 100vh;
        }

        button {
            padding: 1.2em;
            background-color: #a03c32;
            color: #ffffff;
            border: none;
            cursor: pointer;
        }
    </style>
</head>
<body>
    <main id="main">
        <button id="button">Default button</button><br/>
    </main>

    <script>
        let button = document.getElementById('button');

        // Define a first click event with onclick
        button.onclick = function () {
            alert("Perform First click action with addEventListener");
        }

        // Define another click event with onclick.
        // Meanwhile, this one overwrites the first one.
        button.onclick = function () {
            alert("The second onclick runs, not the first!!!");
        }
    </script>
</body>
出力:
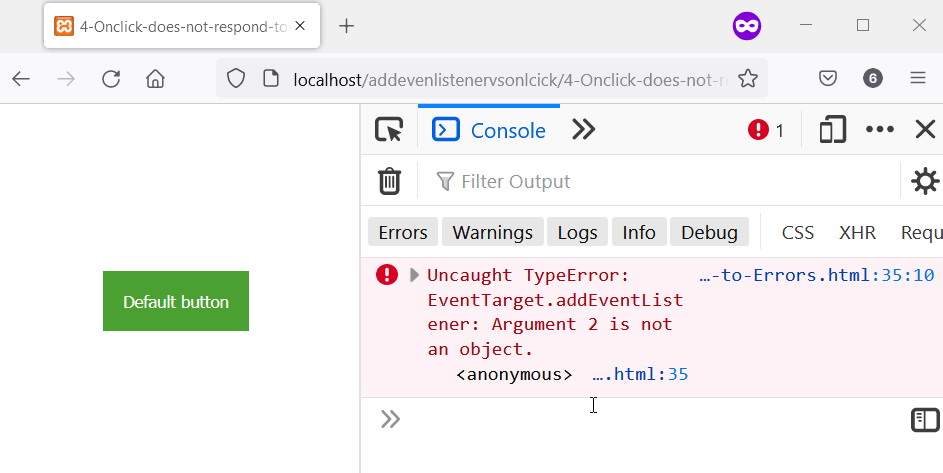
Element.onclick の文字列値はサイレントに失敗します。 addEventListener はエラーをスローする
<script> 要素の onclick の関数値が文字列の場合、暗黙のうちに失敗します。 ただし、addEventListener の関数の代わりに文字列を指定すると、エラーが発生します。
次の例では、Say what? という文字列があります。 button.onclick の値として。 一方、同じ文字列 Say what? は、addEventListener の関数の位置にもあります。
コードを実行すると、コンソールに TypeError が表示されます。 その上、ボタンをクリックしても何も起こらず、エラーは一切ありません。
これは、onclick が関数ではなく文字列値を持っているためです。 一方、addEventListener は、コードの最初の実行時にすでにエラーをスローしています。
コード例:
<head>
    <meta charset="utf-8">
    <title>4-Onclick-does-not-respond-to-Errors</title>
    <style>
        body {
            display: grid;
            justify-content: center;
            align-items: center;
            height: 100vh;
        }

        button {
            padding: 1.2em;
            background-color: #4aa032;
            color: #ffffff;
            border: none;
            cursor: pointer;
        }
    </style>
</head>
<body>
    <main id="main">
        <button id="button">Default button</button><br/>
    </main>

    <script>
        let button = document.getElementById('button');

        // This will not throw an error.
        button.onclick = "Say what?";

        // This throws an error.
        button.addEventListener("click", "Say what?")
    </script>
</body>
出力:
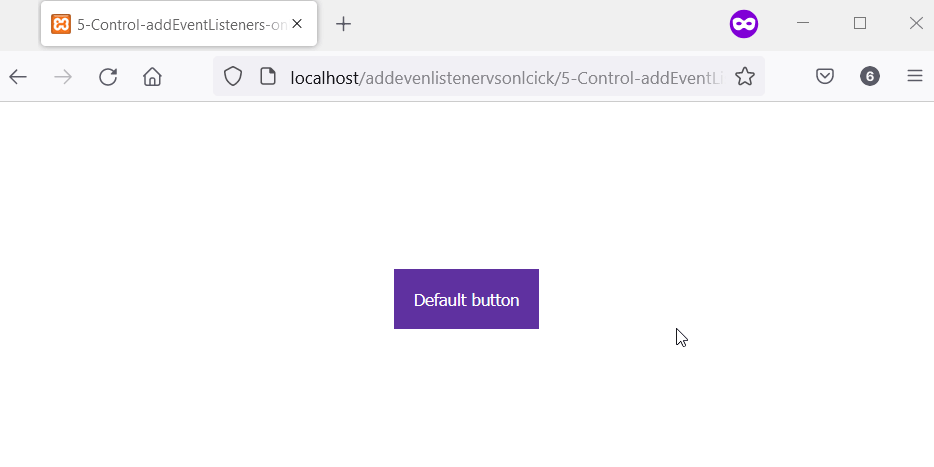
addEventListener を使用すると、クリック数を制御できます。 Onclick は常に利用可能
addEventListener は、once というブール値を受け入れます。 この値は、リスナーが実行される回数を決定します。
そのため、once を true と指定すると、イベント リスナーは最初の実行後に自動的に削除されます。 次のコードでは、ボタンに onclick と addEventListener によるクリック イベントがあります。
一方、addEventListener では、ブール値 once が true に設定されています。 その結果、ボタンを初めてクリックすると、2つの JavaScript 警告メッセージが表示されます。
ただし、その後のクリックでは、onclick のクリック イベントのみが表示されます。 これは、addEventListener が存在しないためです。
コード例:
<head>
    <meta charset="utf-8">
    <title>5-Control-addEventListeners-onlclick-always-run</title>
    <style>
        body {
            display: grid;
            justify-content: center;
            align-items: center;
            height: 100vh;
        }

        button {
            padding: 1.2em;
            background-color: #5f32a0;
            color: #ffffff;
            border: none;
            cursor: pointer;
        }
    </style>
</head>
<body>
    <main id="main">
        <button id="button">Default button</button><br/>
    </main>

    <script>
        let button = document.getElementById('button');

        // Attach click event via onclick that'll always
        // run every time you click the button.
        button.onclick = function () {
            alert("I always run. Click OK and click the button again.")
        }

        // We'll execute this function one time, with addEventListener
        function sayOnce () {
            alert("This is the only time you'll see me. Good Bye.");
        }

        // You can pass a third Boolean value to addEventListener
        // This boolean value defines the number of times you
        // the event listener can work on the element. Here,
        // the event listener will work once.
        button.addEventListener("click", sayOnce, { once: true })
    </script>
</body>
出力:
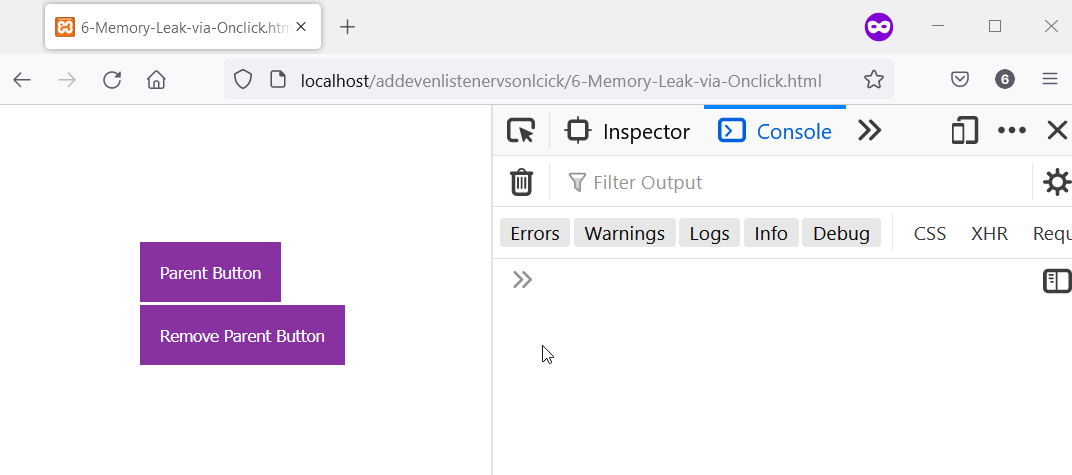
onclick はメモリ リークを引き起こす可能性があります。 addEventListener は要素とともに削除されます
onclick を介してクリック イベントで要素を削除すると、onclick とその値がメモリに残ります。 MutationObserver の削除されたノード配列内の element.onclick を確認してください。
element は、onclick が添付された削除されたノードです。 さらに、これを実行するには MutationObserver をセットアップする必要があります。
2つの HTML ボタンには、次のコードの onclick を介してクリック イベントがあります。 一方、Remove Parent Button をクリックすると、Parent Button が削除されます。
ただし、MutationObserver では、Parent Button の onclick をコンソールに記録します。 これは、Parent Button を削除した後でも onclick がまだ存在していることを証明しています。
<head>
    <meta charset="utf-8">
    <title>6-Memory-Leak-via-Onclick.html</title>
    <style>
        body {
            display: grid;
            justify-content: center;
            align-items: center;
            height: 100vh;
        }

        button {
            padding: 1.2em;
            background-color: #8832a0;
            color: #ffffff;
            border: none;
            cursor: pointer;
            margin-top: 0.2em;
        }
    </style>
</head>
<body>
    <main id="main">
        <button id="parent_button">Parent Button</button><br/>
        <button id="remove_parent_button">Remove Parent Button</button>
    </main>

    <script>
        let main = document.getElementById('main');
        let parent_button = document.getElementById('parent_button');
        let remove_parent_button = document.getElementById('remove_parent_button');

        // Add a function via onclick
        parent_button.onclick = function amIleaking() {
            alert("This onclick function exist after the Parent button dies. \n Remove the Parent button, and Check the console!.");
        }

        // Setup a mutation observer to observe changes
        // in the DOM.
        const observer = new MutationObserver(function(mutations_list) {
            mutations_list.forEach(function(mutation) {
                mutation.removedNodes.forEach(function(removed_node) {
                    if (removed_node.id === 'parent_button') {
                        console.log('#parent_button has been removed');
                        observer.disconnect();
                    }
                    // Even after removal, the onclick function
                    // is available in the removedNodes. Here, [0]
                    // represents the first element of the removed
                    // node, which the parent_button.
                    console.log(mutation.removedNodes[0].onclick);
                    /*To see the function details in Firefox
                    console.log(mutation.removedNodes[0].onclick.toString());*/
                });
            });
        });
        // Observe changes in the main element. Meanwhile,
        // the main element consists of the parent button
        // and the button that removes it.
        observer.observe(document.querySelector("#main"), { subtree: false, childList: true });

        // Setup onclick to remove the parent button
        remove_parent_button.onclick = function () {
            document.querySelector("#parent_button").remove();
        }
    </script>
</body>
出力:
addEventListener は IE<9 では機能しません。 onclick は IE<9 で動作する
IE<9 をサポートしたい場合、addEventListener は機能しません。 これは、IE<9 が非標準の attachEvent をサポートしているためです。
それでも、IE<9 をサポートしたい場合は、ユーティリティ関数を作成できます。 この関数は、Web ブラウザが attachEvent または addEventListener をサポートしているかどうかをチェックします。
したがって、ブラウザが attachEvent をサポートしている場合は、attachEvent を使用します。 それ以外の場合は、addEventListener を使用します。 その間、いつでも onclick が IE<9 で動作することを期待できます。
したがって、IE<9 をサポートする場合は、次のコードを使用できます。
コード例:
// Define an addEvent function and check if
// the element supports attachEvent. Otherwise
// we use addEventListner.
function add_event(element, evnt, funct) {
  if (element.attachEvent) {  // element supports attachEvent
    return element.attachEvent('on' + evnt, funct);
  } else {  // Element does not support attachEvent
    // Use addEventListnere instead
    return element.addEventListener(evnt, funct, false);
  }
}

// How you can use it
add_event(document.getElementById('HTMLElement'), 'click', function() {
  alert('Hello World!');
});

Habdul Hazeez is a technical writer with amazing research skills. He can connect the dots, and make sense of data that are scattered across different media.
LinkedIn