Angular で Excel にデータをエクスポート

この記事では、Angular でデータを Excel にエクスポートする方法について説明します。
Angular で Excel にデータをエクスポート
Angular アプリケーションでエクスポート機能を使用する必要がある状況はたくさんあります。アプリケーションのボタンとして、顧客またはクライアントがデータをテーブルから Excel シートに、または JSON から Excel シートにエクスポートするためのオプションを提供したい場合があります。
このチュートリアルでは、例を使用して、アプリケーションから Excel 形式にデータをエクスポートする方法について説明します。この目的のために、Angular の xlsx ライブラリを使用できます。これにより、JSON データを Excel 形式に変換するオプションが提供されます。
その年の天気の季節の JSON データを作成する例を見てみましょう。まず、システムに AngularCLI をインストールする必要があります。
まず、コマンドラインで次のコマンドを実行して、Angular で新しいプロジェクトを作成します。
ng new angular-app
新しいアプリケーションが正常に作成されたら、次のコマンドを使用してアプリケーションフォルダに移動します。
cd ./angular-app
npm モジュールを使用して xlsx ライブラリをインストールします。次のコマンドを使用してインストールします。
npm i xlsx --save
次に、1 年間の気象シーズンのダミーリストを作成します。この例ではダミーの JSON データを作成しますが、データベースまたは一部の API を介してフェッチできます。
ダミーデータを以下に示します。
Seasons = [
{ 	"id": 1,
	"name": "Spring",
	"Fruit": "Orange" },
{	"id": 2,
	"name": "Summer",
	"Fruit": "Mango"},
{	"id": 3,
	"name": "Winter",
	"Fruit": "Apple"},
{	"id": 4,
	"name": "Autumn",
	"Fruit": "Banana"}]
次に、JSON データを表示するテーブルを作成するフロントエンドアプリケーションを作成します。app.component.html ファイルの更新されたコードを以下に示します。
<div>
  <button (click)="exportToExcel()">Export to Excel</button>
  <table id="season-tble">
    <tr>
      <th>Id</th>
      <th>name</th>
      <th>Fruit</th>
    </tr>
    <tr *ngFor="let season of Seasons">
      <td>{{ season.id }}</td>
      <td>{{ season.name }}</td>
      <td>{{ season.fruit }}</td>
    </tr>
  </table>
</div>
次に、以下に示すように、app.component.ts ファイルにデータを Excel 形式にエクスポートする関数を作成します。
import { Component, VERSION } from '@angular/core';
import * as XLSX from 'xlsx';

@Component({
  selector: 'my-app',
  templateUrl: './app.component.html',
  styleUrls: ['./app.component.css'],
})
export class AppComponent {
  Seasons = [
    { id: 1, name: 'Spring', fruit: 'Orange' },
    { id: 2, name: 'Summer', fruit: 'Mango' },
    { id: 3, name: 'Winter', fruit: 'Apple' },
    { id: 4, name: 'Autumn', fruit: 'Banana' },
  ];

  name = 'ExcelSheet.xlsx';
  exportToExcel(): void {
    let element = document.getElementById('season-tble');
    const worksheet: XLSX.WorkSheet = XLSX.utils.table_to_sheet(element);

    const book: XLSX.WorkBook = XLSX.utils.book_new();
    XLSX.utils.book_append_sheet(book, worksheet, 'Sheet1');

    XLSX.writeFile(book, this.name);
  }
}
以下に示すように、フロントエンドの見栄えを良くするためにいくつかの CSS コードを追加します。
td{
  border: 1px solid black;
  padding: 10px;
}
button{
  background: black;
  padding: 10px;
  color: white;
  margin-bottom: 50px;
}
次に、以下に示すコマンドを使用してアプリケーションを実行します。
npm start
出力:
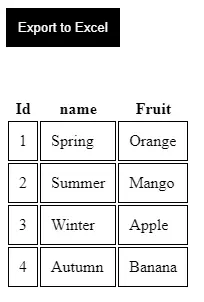
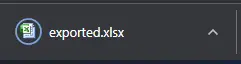
次に、export ボタンをクリックして、プログラムが機能するかどうかを確認します。ボタンをクリックすると、以下に示すように、保存した名前のファイルがダウンロードされます。
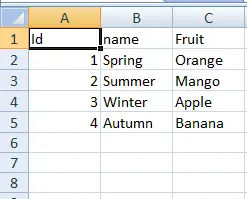
次に、このファイルを開いて、次のように表示されることを確認します。

Rana is a computer science graduate passionate about helping people to build and diagnose scalable web application problems and problems developers face across the full-stack.
LinkedIn