Modifica la dimensione del pulsante Tkinter
-
Specificare le opzioni
heightewidthper impostare la dimensione delButton -
Imposta
heightewidthin Pixel di TkinterButton -
Modifica la dimensione del
Buttondi Tkinter dopo l’inizializzazione

Le opzioni height e width del widget Tkinter Button specificano la dimensione del pulsante creato durante l’inizializzazione. Dopo l’inizializzazione, potremmo ancora usare il metodo configure per configurare le opzioni height e width per cambiare la dimensione del widget Button di Tkinter a livello di programmazione.
Specificare le opzioni height e width per impostare la dimensione del Button
tk.Button(self, text="", height=20, width=20)
height e width sono impostate su 20 nell’unità di unità di testo. L’unità di testo orizzontale è uguale alla larghezza del carattere 0 e l’unità di testo verticale è uguale all’altezza di 0, entrambi nel carattere di sistema predefinito.
Codici di lavoro completi
import tkinter as tk
import tkinter.font as tkFont

app = tk.Tk()
app.geometry("400x200")


buttonExample1 = tk.Button(app, text="Button 1", width=10, height=10)
buttonExample2 = tk.Button(app, text="Button 2", width=10, height=10)

buttonExample1.pack(side=tk.LEFT)
buttonExample2.pack(side=tk.RIGHT)

app.mainloop()

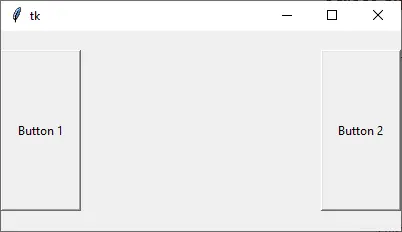
Come puoi vedere, l’altezza e la larghezza del pulsante non sono le stesse nei pixel, sebbene la sua height e width siano entrambe impostate su 10.
Imposta height e width in Pixel di Tkinter Button
Se dobbiamo specificare la larghezza e / o l’altezza del widget Button di Tkinter nell’unità di pixel, potremmo aggiungere un’immagine pixel virtuale invisibile 1x1 al Button. Quindi la height e l’width saranno misurate nell’unità di pixel.
tk.Button(app, text="Button 1", image=pixelVirtual, width=100, height=100, compound="c")
Dobbiamo anche impostare l’opzione composto in modo che sia c o ugualmente tk.CENTER se l’immagine e il testo invisibili devono essere centrati nel pulsante. Se compound non è configurato, il text non verrà visualizzato nel pulsante.
import tkinter as tk
import tkinter.font as tkFont

app = tk.Tk()
app.geometry("300x100")
fontStyle = tkFont.Font(family="Lucida Grande", size=20)

labelExample = tk.Label(app, text="20", font=fontStyle)

pixelVirtual = tk.PhotoImage(width=1, height=1)

buttonExample1 = tk.Button(
    app, text="Increase", image=pixelVirtual, width=100, height=100, compound="c"
)
buttonExample2 = tk.Button(
    app, text="Decrease", image=pixelVirtual, width=100, height=100, compound="c"
)

buttonExample1.pack(side=tk.LEFT)
buttonExample2.pack(side=tk.RIGHT)
app.mainloop()
Modifica la dimensione del Button di Tkinter dopo l’inizializzazione
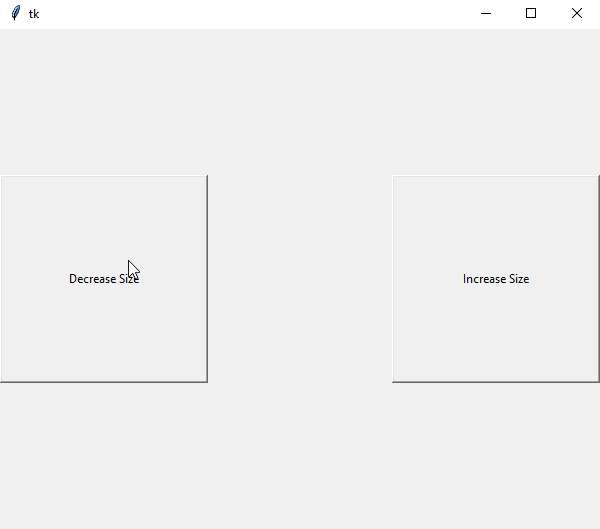
Dopo che il widget Button è stato creato, il metodo configure può impostare le opzioni width e / o height per modificare la dimensione del pulsante.
buttonExample1.configure(height=100, width=100)
Imposta l’height e la width di buttonExample1 su 100.
Esempi di lavoro completi per modificare le dimensioni del Button dopo l’inizializzazione
import tkinter as tk
import tkinter.font as tkFont

app = tk.Tk()
app.geometry("600x500")


def decreaseSize():
    buttonExample1.configure(height=100, width=100)


def increaseSize():
    buttonExample2.configure(height=400, width=400)


pixelVirtual = tk.PhotoImage(width=1, height=1)

buttonExample1 = tk.Button(
    app,
    text="Decrease Size",
    image=pixelVirtual,
    width=200,
    height=200,
    compound="c",
    command=decreaseSize,
)
buttonExample2 = tk.Button(
    app,
    text="Increase Size",
    image=pixelVirtual,
    width=200,
    height=200,
    compound=tk.CENTER,
    command=increaseSize,
)

buttonExample1.pack(side=tk.LEFT)
buttonExample2.pack(side=tk.RIGHT)
app.mainloop()

Founder of DelftStack.com. Jinku has worked in the robotics and automotive industries for over 8 years. He sharpened his coding skills when he needed to do the automatic testing, data collection from remote servers and report creation from the endurance test. He is from an electrical/electronics engineering background but has expanded his interest to embedded electronics, embedded programming and front-/back-end programming.
LinkedIn Facebook