Cómo cambiar el tamaño del botón Tkinter
-
Especifica las opciones
heightywidthpara configurar el tamaño deButton -
Ponga el
widthy laheighten los píxeles delButtonde Tkinter -
Cambiar el tamaño del
Buttonde Tkinter después de la inicialización
Las opciones height y width del widget Tkinter Button especifican el tamaño del botón creado durante la inicialización. Después de la inicialización, todavía podemos usar el método configure para configurar las opciones height y width para cambiar el tamaño del widget Button de Tkinter programáticamente.
Especifica las opciones height y width para configurar el tamaño de Button
tk.Button(self, text="", height=20, width=20)
La height y el width están fijados en 20 en la unidad de unidades de texto. La unidad de texto horizontal es igual al ancho del carácter 0, y la unidad de texto vertical es igual a la altura de 0, ambas en la fuente del sistema por defecto.
Códigos de trabajo completos
import tkinter as tk
import tkinter.font as tkFont

app = tk.Tk()
app.geometry("400x200")


buttonExample1 = tk.Button(app, text="Button 1", width=10, height=10)
buttonExample2 = tk.Button(app, text="Button 2", width=10, height=10)

buttonExample1.pack(side=tk.LEFT)
buttonExample2.pack(side=tk.RIGHT)

app.mainloop()
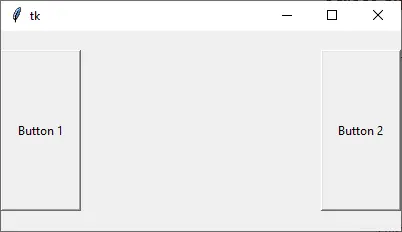
Como puedes ver, la altura y el ancho del botón no son los mismos en los píxeles aunque su width y height están configurados para ser ambos 10.
Ponga el width y la height en los píxeles del Button de Tkinter
Si necesitamos especificar el ancho y/o alto del widget Botón de Tkinter en la unidad de píxeles, podríamos añadir una imagen virtual invisible de 1x1 píxel al Botón. Entonces el width y la height se medirán en la unidad de píxeles.
tk.Button(app, text="Button 1", image=pixelVirtual, width=100, height=100, compound="c")
También necesitamos establecer la opción compound como c o igualmente tk.CENTER si la imagen y el texto invisibles deben ser centrados en el botón. Si compuesto no está configurado, el text no se mostrará en el botón.
import tkinter as tk
import tkinter.font as tkFont

app = tk.Tk()
app.geometry("300x100")
fontStyle = tkFont.Font(family="Lucida Grande", size=20)

labelExample = tk.Label(app, text="20", font=fontStyle)

pixelVirtual = tk.PhotoImage(width=1, height=1)

buttonExample1 = tk.Button(
    app, text="Increase", image=pixelVirtual, width=100, height=100, compound="c"
)
buttonExample2 = tk.Button(
    app, text="Decrease", image=pixelVirtual, width=100, height=100, compound="c"
)

buttonExample1.pack(side=tk.LEFT)
buttonExample2.pack(side=tk.RIGHT)
app.mainloop()
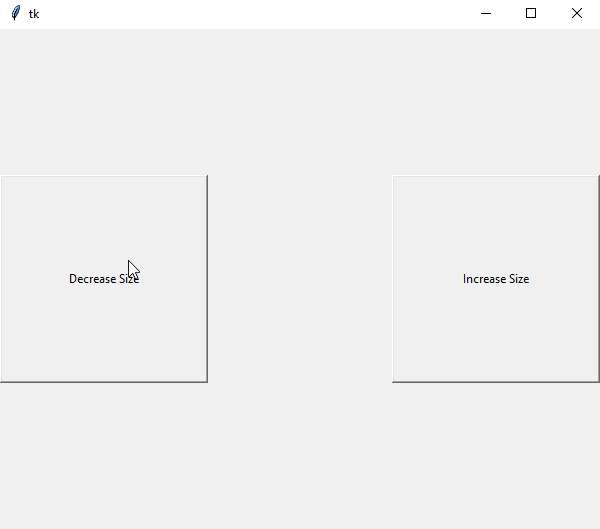
Cambiar el tamaño del Button de Tkinter después de la inicialización
Después de que el widget Button ha sido creado, el método configure podría establecer las opciones width y/o height para cambiar el tamaño del Button.
buttonExample1.configure(height=100, width=100)
Establece la height y el width del buttonExample1 en 100.
Ejemplos completos de trabajo para cambiar el tamaño de Button después de la inicialización
import tkinter as tk
import tkinter.font as tkFont

app = tk.Tk()
app.geometry("600x500")


def decreaseSize():
    buttonExample1.configure(height=100, width=100)


def increaseSize():
    buttonExample2.configure(height=400, width=400)


pixelVirtual = tk.PhotoImage(width=1, height=1)

buttonExample1 = tk.Button(
    app,
    text="Decrease Size",
    image=pixelVirtual,
    width=200,
    height=200,
    compound="c",
    command=decreaseSize,
)
buttonExample2 = tk.Button(
    app,
    text="Increase Size",
    image=pixelVirtual,
    width=200,
    height=200,
    compound=tk.CENTER,
    command=increaseSize,
)

buttonExample1.pack(side=tk.LEFT)
buttonExample2.pack(side=tk.RIGHT)
app.mainloop()

Founder of DelftStack.com. Jinku has worked in the robotics and automotive industries for over 8 years. He sharpened his coding skills when he needed to do the automatic testing, data collection from remote servers and report creation from the endurance test. He is from an electrical/electronics engineering background but has expanded his interest to embedded electronics, embedded programming and front-/back-end programming.
LinkedIn Facebook