使用 Python Matplotlib 绘制矢量
-
使用
matplotlib.axes.Axes.arrow()函数使用 Pythonmatplotlib绘制向量 -
在 Python 中使用
matplotlib.pyplot.quiver()函数使用matplotlib绘制向量

向量是向量空间中具有大小和方向的对象。我们可以在 Python 中使用数组来表示向量。
我们需要在图表上指定它的方向,以便像箭头一样绘制矢量。我们可以使用 matplotlib 库,该库高度用于在 Python 中创建不同的图形和绘图向量。
让我们了解如何使用 Python 的 matplotlib 库绘制向量。
使用 matplotlib.axes.Axes.arrow() 函数使用 Python matplotlib 绘制向量
我们将使用 ax.axes() 函数向当前图形添加一个轴以绘制一个简单的单个向量。
要在这些轴上绘制矢量,我们将使用 Axes.arrow() 函数。它从给定的 x 和 y 坐标创建一个箭头,指向指定的开始到结束值。
我们将在下图中实现这一点。
import matplotlib.pyplot as plt

ax = plt.axes()
ax.arrow(1, 2, 5, 5, head_width=0.5, head_length=0.5)
plt.ylim(0, 10)
plt.xlim(0, 10)
plt.show()
输出:
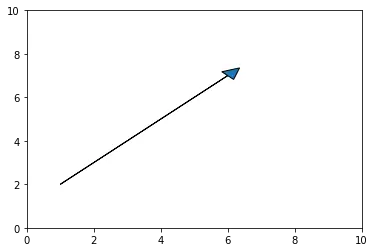
在上面的例子中,我们绘制了从坐标 (1,2) 到 (5,5) 的所需向量。
head_width 和 head_length 参数分别用于指定箭头的宽度和长度。我们还可以使用 shape 和 overhang 等其他参数自定义最终绘图。
在 Python 中使用 matplotlib.pyplot.quiver() 函数使用 matplotlib 绘制向量
pyplot.quiver() 函数可以在 2D 图形中创建一个箭头区域的图。我们可以使用它一次绘制多个向量。
我们需要从初始化向量的坐标和图形的原点开始。为此,我们将使用 numpy 数组。
然后,我们将使用 pyplot.quiver() 函数使用这些坐标创建绘图。
请参见下面的示例。
import numpy as np
import matplotlib.pyplot as plt

coordinates = np.array([[2, 5], [1, 4]])
o = np.array([[0, 0], [0, 0]])
plt.quiver(*o, coordinates[:, 0], coordinates[:, 1], color=["blue", "green"], scale=15)
plt.ylim(-10, 10)
plt.xlim(-10, 10)
plt.show()
输出:
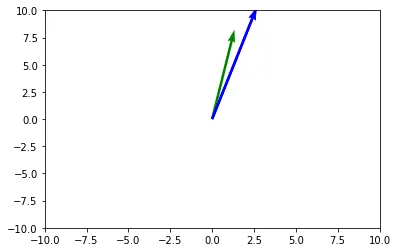
我们使用上面的 pyplot.quiver() 函数绘制了两个向量。
原点已使用 o 数组指定。我们使用 scale 参数将箭头的尺寸缩放到适当的大小。
我们可以自定义最终绘图并使用不同的参数(如 headlength、headwidth、headaxislength 等)更改箭头的形状和大小。

Manav is a IT Professional who has a lot of experience as a core developer in many live projects. He is an avid learner who enjoys learning new things and sharing his findings whenever possible.
LinkedIn