在 C++ 中使用 this 指针
在本教程中,我们将首先了解 this 指针的概念。
然后,我们将借助示例演示其用途。最后,我们将看到 this 与 *this 有何不同。
在 C++ 中使用 this 指针
this 指针只是一个隐式可用指针,在非静态类成员函数范围内,它引用或指向调用对象。如果你没有通过定义得到它,那么让我们看一些基础知识来理解这个概念。
我们知道所有非静态数据成员对每个对象都有一个单独的副本。但是,成员函数代码在所有对象之间共享。
同一类的所有对象在需要调用时都从代码段访问相同的函数定义。编译器需要知道调用对象(当前调用成员函数的对象)信息以访问或更新特定于该特定调用对象的正确数据成员。
那么,在函数定义相同的情况下,编译器如何获取调用对象信息呢?
简单的回答是,在程序的编译过程中,编译器会自动在成员函数中添加一个隐藏的隐式指针参数。这个隐式指针被称为 this 指针。
每当通过特定类对象调用成员函数时,调用对象会自动作为隐藏参数提供给 this 指针。现在,编译器可以使用这个指针来访问或修改特定于调用对象的正确数据成员。
this 指针,因为这些成员(函数和数据成员)在所有对象之间共享。对静态成员的更新或访问并不特定于任何对象。我们甚至可以在不创建类对象的情况下访问这些成员。
因此,编译器不会对这些成员使用 this 运算符。
让我们看一下代码示例,以了解为什么我们说编译器隐式使用 this 指针以及何时使用它很方便。
#include <iostream>
#include <string>
using namespace std;

class Person {
 private:
  string Name;

 public:
  Person(string Name) {
    this->Name = Name;  // this->Name is the private member for this object
  }
  void PrintName() { cout << this->Name << endl; }
  void PrintName1() { cout << Name << endl; }
};
int main() {
  Person P("Alexa");
  P.PrintName();
  P.PrintName1();
  return 0;
}
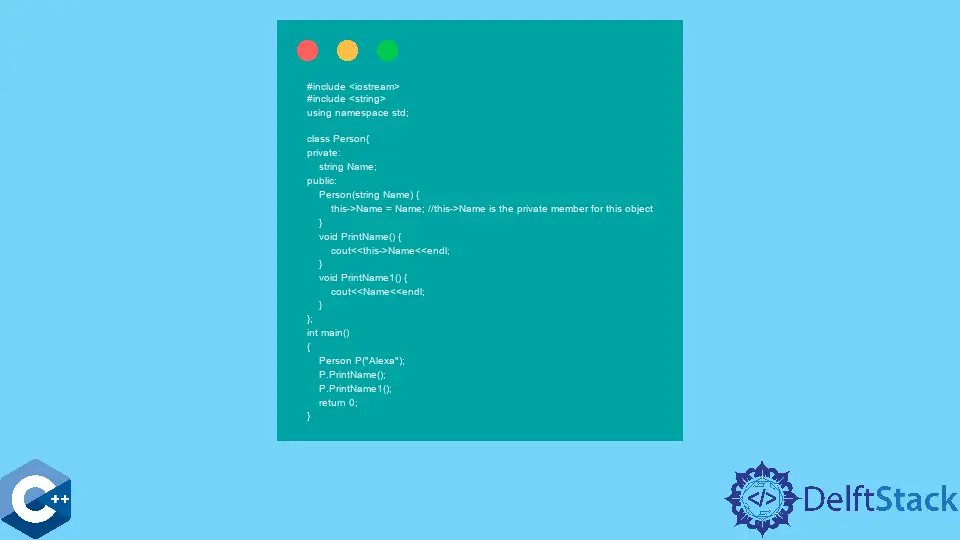
上面的代码示例定义了一个具有两个不同成员函数的 Person 类来打印私有数据成员 Name。main() 函数中的第一条语句生成一个 Person 对象并将 Alexa 作为参数传递给构造函数。
现在,构造函数中的 this->Name 帮助编译器区分本地参数 Name 和私有数据成员 Name。
main() 的后续代码通过 P 调用 printName() 和 printName1()(即 P 成为调用者对象)。
输出:
Alexa
Alexa
两个函数的输出是一样的。这是因为编译器在 PrintName1() 中隐含地在 this-> 前面加上 Name。
C++ 中 this 和*this 的区别
到目前为止,我们已经清楚 this 是指向对象的指针的概念。对于 Person 类型的 obj,this 是 Person*类型。
要记住的另一件事是 this 指针始终是一个 rvalue,不能修改。然而,*this 取消引用 this 指针。
在经历了足够的背景之后,让我们看一个示例代码来了解 this 和*this 之间的区别。
#include <iostream>
using namespace std;

class Counter {
 private:
  int Count;

 public:
  Counter() { this->Count = 0; }
  void IncreaseCount() { Count++; }
  void PrintCount() { cout << this->Count << endl; }
  Counter* GetCount_Pointer() { return this; }
  Counter GetCount_Copy() { return *this; }
  Counter& GetCount_Reference() { return *this; }
};
int main() {
  // Section-A
  cout << "Sectio-A" << endl;
  Counter C1;
  C1.IncreaseCount();
  Counter* CounterPtr =
      C1.GetCount_Pointer();  // CounterObj will be pointing to C1
  CounterPtr->IncreaseCount();
  C1.PrintCount();

  // Section-B
  cout << "Section-B" << endl;
  Counter C2;
  C2 = C1.GetCount_Copy();
  C1.IncreaseCount();
  C1.PrintCount();
  C2.PrintCount();

  // Section-C
  cout << "Section-B" << endl;
  Counter& CounterRef = C1.GetCount_Reference();
  CounterRef.PrintCount();

  return 0;
}
此代码片段创建了一个 Counter 类,其中包含多个 GetCount 方法的方法。第一个方法(即 GetCount_Pointer)返回 this 指针的值,它只是调用对象的地址。
GetCount_Copy 方法返回 *this 而返回类型是 Counter 类型的对象。因此,此函数将返回调用对象的深层副本,这意味着修改返回的副本不会影响原始副本。
最后一个 GetCount_Reference 方法也返回 *this,但此方法的返回类型是一个引用对象(即 Counter&)。编译器不会创建新的深层副本,而是返回对原始对象的别名或引用。
通过别名所做的任何更改也将反映在原始对象中。
在讨论主驱动代码之前,让我们看一下程序的输出。
输出:
Sectio-A
2
Section-B
3
2
Section-B
3
main 方法的 A 部分首先声明 Counter 类型的 C1 对象并通过 IncreaseCount() 递增其 Count。稍后,它用 C1.GetCount_Pointer() 返回的地址初始化一个 CounterPtr 指针。
现在,CounterPtr 将指向 C1。因此,通过 CounterPtr 调用增量函数也会修改 C1。
B 部分中的 C2 = C1.GetCount_Copy() 将 C1 的所有当前内容深度复制到 C2,因为 C1.GetCount_Copy() 被 C1 的副本替换。因此,增加 C1 的计数不会影响 C2。
C 部分声明了一个 Counter 类型的引用变量,并使用 C1.GetCount_Reference() 返回的任何内容对其进行初始化。由于 C1.GetCount_Reference() 返回 C1 的别名,因此 CounterRef 成为 C1 的另一个名称。
语句 Counter& CounterRef = C1.GetCount_Reference(); 逻辑上等价于 Counter& CounterRef = C1。

Husnain is a professional Software Engineer and a researcher who loves to learn, build, write, and teach. Having worked various jobs in the IT industry, he especially enjoys finding ways to express complex ideas in simple ways through his content. In his free time, Husnain unwinds by thinking about tech fiction to solve problems around him.
LinkedIn