Angular 2의 구성 요소 간에 데이터 전달
- 입력 데코레이터를 사용하여 Angular 2의 상위 구성 요소에서 하위 구성 요소로 데이터 전달
-
출력 및
EventEmitter를 사용하여 Angular 2의 자식 구성 요소에서 부모 구성 요소로 데이터 전달 - 서비스를 사용하여 Angular 2의 구성 요소 간에 데이터 전달
이 기사에서는 Angular 2의 두 구성 요소 간에 데이터를 전달하는 방법을 보여줍니다.
입력 데코레이터를 사용하여 Angular 2의 상위 구성 요소에서 하위 구성 요소로 데이터 전달
Input() 데코레이터를 통한 부모 대 자식은 부모 구성 요소가 자식 구성 요소와 통신해야 할 때 사용됩니다. 상위 구성 요소는 데이터를 보내거나 하위 구성 요소에 대한 작업을 수행합니다.
@Input() 데코레이터를 사용하여 템플릿을 통해 데이터를 제공함으로써 작동합니다. 구성 요소의 입력 설정을 수정하고 추적하는 데 사용됩니다.
다음 코드 예제에서는 Angular 2의 입력 데코레이터를 사용하여 두 구성 요소 간에 이러한 유형의 관계를 만드는 방법을 보여줍니다.
TypeScript 코드(App.component.ts):
import { Component } from '@angular/core';
import { Demo } from './Demo';
@Component({
    selector: 'my-app',
    templateUrl: './app.component.html',
    styleUrls: [ './app.component.css' ]
})
export class AppComponent  {
    DemoEx:Demo[] = [
        new Demo('First Example'),
        new Demo('SECOND Example')
    ];
}
TypeScript 코드(input.component.ts):
import { Component, OnInit, Input} from '@angular/core';
import { Demo } from '../Demo';
@Component({
    selector: 'app-demo',
    templateUrl: './input.component.html',
    styleUrls: ['./input.component.css']
})
export class inputCom implements OnInit {
    @Input() Demo: Demo;
    constructor() { }
    ngOnInit() {
    }
}
HTML 코드(app.component.html 및 input.component.html):
<main>
<section>
    <div class="card">
        <header>{{Demo.name}}</header>
    </div>
</section>
</main>
<h3>Parent to child Component Interaction in Angular</h3>
<app-demo *ngFor="let Demo of DemoEx" [Demo]="Demo"></app-demo>
여기를 클릭 위 코드의 라이브 데모를 확인하십시오.
출력 및 EventEmitter를 사용하여 Angular 2의 자식 구성 요소에서 부모 구성 요소로 데이터 전달
‘EventEmitter’는 커스텀 이벤트를 발생시킬 수 있는 클래스입니다. Angular 2 애플리케이션에서 관찰 가능한 패턴을 사용할 수 있게 해주는 Angular 2 구성 요소입니다.
이 구성 요소는 기존 콜백 패턴에 대한 대안을 제공하고 더 이상 필요하지 않을 때 관찰 가능 항목을 구독 취소하여 변경 감지를 트리거하는 프로세스를 단순화합니다.
다음 예제에서는 상위 구성 요소가 이벤트를 구독하고 그에 따라 동작을 변경하는 방법을 보여줍니다.
TypeScript 코드(parent.component.ts):
import { Component, Input, Output, EventEmitter } from '@angular/core';
@Component({
    selector: 'parent',
    template: '<button (click)="DemoEx()">Click here to go to the next component</button>',
})
export class ParentComponent  {
    @Input() name: string;
    @Output() SampleEx = new EventEmitter<string>();
    DemoEx() {
        this.SampleEx.emit(this.message)
    }
    message: string = "You are in Child Component";
}
TypeScript 코드(app.component.ts):
import { Component } from '@angular/core';
@Component({
    selector: 'my-app',
    templateUrl: './app.component.html',
    styleUrls: [ './app.component.css' ]
})
export class AppComponent  {
    name = 'Angular';
    message:string='';
    NextCom($event) {
        this.message = $event;
    }
}
HTML 코드(app.component.html):
<parent name="{{ name }}" (SampleEx)="NextCom($event)"></parent>
<br/>
<br/>
{{message}}
여기를 클릭 위 예제의 라이브 데모를 확인하십시오.
서비스를 사용하여 Angular 2의 구성 요소 간에 데이터 전달
서비스는 Injectable 인터페이스를 구현하는 클래스입니다. Injectable Decorator로 주석이 달린 메서드가 있어야 하고 필요한 경우 하나 이상의 인터페이스를 구현해야 합니다.
직접 링크가 없는 구성 요소 간에 데이터를 전송할 때는 공유 서비스를 사용해야 합니다. 데이터가 항상 sync 상태여야 하는 경우 RxJS BehaviorSubject가 유용합니다.
BehaviorSubject를 사용하여 the.next() 메서드를 사용하여 수정할 수 있는 관찰 가능 항목으로 이름을 설정할 수 있습니다. 그런 다음 getValue() 함수를 사용하여 마지막 값을 원시 데이터로 추출할 수 있습니다.
현재 값은 BehaviorSubject에 저장됩니다. 결과적으로 구성 요소는 BehaviorSubject에서 항상 최신 데이터 값을 읽습니다.
아래 예를 참조하십시오.
TypeScript 코드(first.component.ts):
import { Component, OnInit } from '@angular/core';
import { SharedService } from '../demo.service';
@Component({
    selector: 'app-demo1',
    templateUrl: './first.component.html',
    styleUrls: ['./first.component.css']
})
export class FirstComponent implements OnInit {
    sharedData: string;
data: any;
    constructor(private sharedService: SharedService) { }
    ngOnInit() {
        this.sharedService.sharedData$
        .subscribe(sharedData => this.sharedData = sharedData);
    }
    updateData() {
        this.sharedService.setData(this.data);
    }
}
TypeScript 코드(second.component.ts):
import { Component, OnInit } from '@angular/core';
import { SharedService } from '../demo.service';
@Component({
    selector: 'app-demo',
    templateUrl: './second.component.html',
    styleUrls: ['./second.component.css']
})
export class SecondComponent implements OnInit {
    sharedData: string;
data: any;
    constructor(private sharedService: SharedService) { }
    ngOnInit() {
        this.sharedService.sharedData$
        .subscribe(sharedData => this.sharedData = sharedData);
    }
    updateData() {
        this.sharedService.setData(this.data);
    }
}
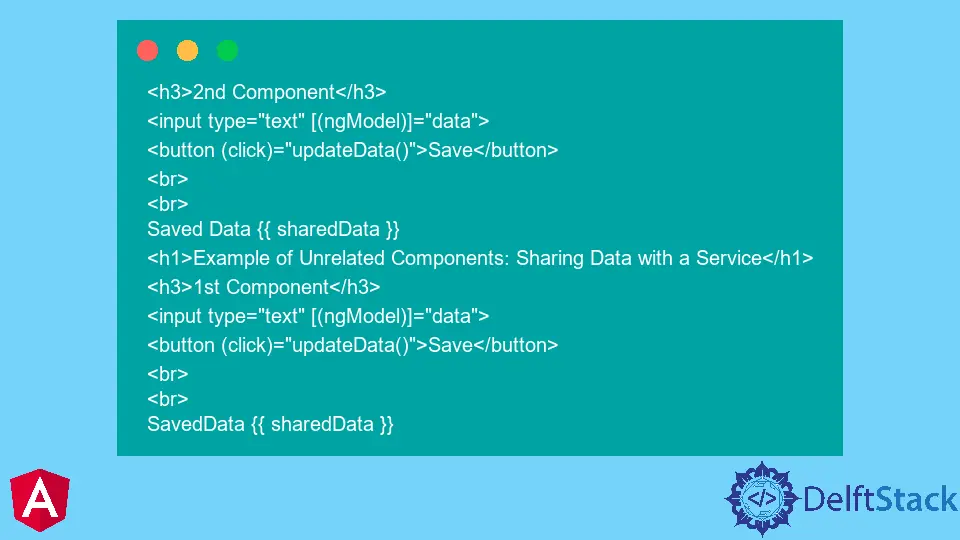
HTML 코드:
<h3>2nd Component</h3>
<input type="text" [(ngModel)]="data">
<button (click)="updateData()">Save</button>
<br>
<br>
Saved Data {{ sharedData }}
<h1>Example of Unrelated Components: Sharing Data with a Service</h1>
<h3>1st Component</h3>
<input type="text" [(ngModel)]="data">
<button (click)="updateData()">Save</button>
<br>
<br>
SavedData {{ sharedData }}
구성 요소 간에 데이터를 전달하는 이점은 프로젝트를 더 작은 부분으로 나누어 수백 개의 코드 라인에 부담을 주지 않고 집중할 수 있다는 점입니다.
또한 각 개발자가 별도의 구성 요소에서 작업하는 경우 팀은 보다 생산적으로 운영할 수 있습니다.
여기를 클릭 위 예제의 라이브 데모를 확인하십시오.

Muhammad Adil is a seasoned programmer and writer who has experience in various fields. He has been programming for over 5 years and have always loved the thrill of solving complex problems. He has skilled in PHP, Python, C++, Java, JavaScript, Ruby on Rails, AngularJS, ReactJS, HTML5 and CSS3. He enjoys putting his experience and knowledge into words.
Facebook