Exportar datos a un archivo de Excel usando C#
-
Exportar datos a Excel usando
C# -
Exportar datos de matriz a Excel usando
C# -
Exportar datos de DataTable a Excel usando
C# -
Exportar datos de JSON a Excel usando
C#

Este tutorial le enseñará cómo exportar datos a un archivo de Excel en C#.
Exportar datos a Excel usando C#
Agregar una referencia para construir un archivo de Excel y exportarlo es necesario para continuar con este proyecto.
Agregar el paquete de referencia
Para diferentes operaciones de Excel, agregaremos el paquete ExcelMapper. Para hacer eso, siga los pasos a continuación:
-
Abra Visual Studio, cree una aplicación de consola y asígnele un nombre.
-
Haga clic con el botón derecho en el panel Explorador de soluciones y seleccione Administrar paquetes NuGet.
-
Ahora haga clic en la opción Examinar, busque
ExcelMappere instálelo.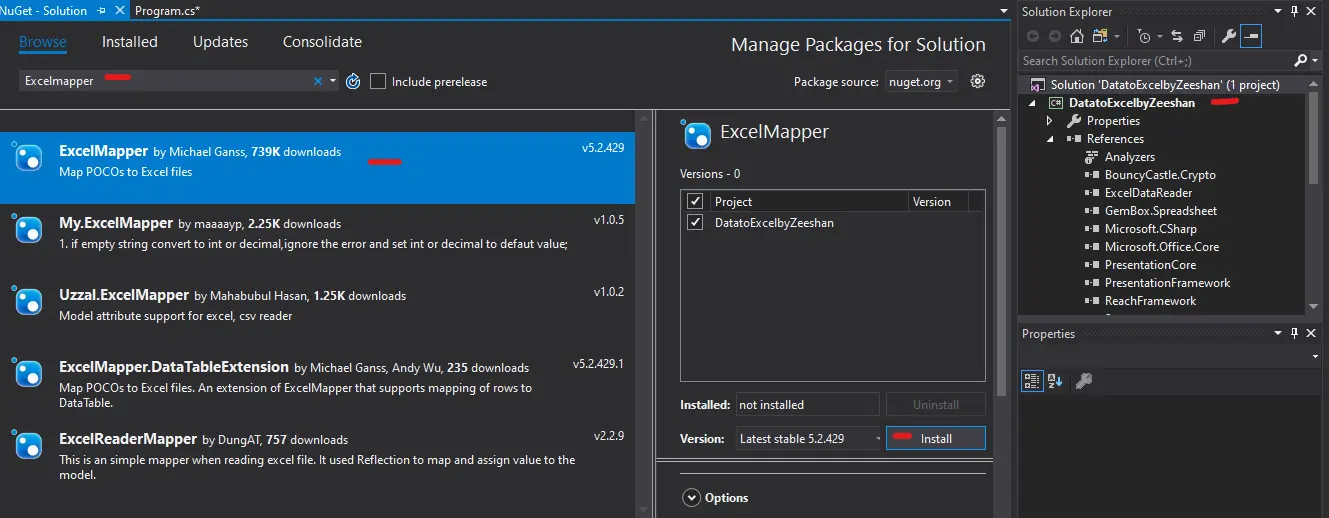
Después de agregar el paquete, escribiremos el código de un programa de ejemplo. En el siguiente ejemplo, usaremos datos aleatorios de los estudiantes.
Ejemplo:
-
Para comenzar, importe las siguientes bibliotecas:
using System; using System.Collections.Generic; using System.Linq; using System.Text; using System.Threading.Tasks; using Ganss.Excel; -
Ahora cree una clase
Estudianteque tenga miembros de datosnombreymarcas.public class Student { public String name { get; set; } public double marks { get; set; } } -
Cree otra clase llamada
Programay cree el métodoMain()en esa clase.public class Program { public static void Main(string[] args) {} } -
En el método
Main(), crearemos un objeto de tipoList<>de la claseStudent.var s = new List<Student> {} -
Este objeto se completará con algunos datos aleatorios de
Estudiantecomo se muestra a continuación:var s = new List<Student> { new Student { name = "M.Zeeshan", marks = 94.0 }, new Student { name = "Shani", marks = 84.0 }, new Student { name = "Saada g", marks = 74.0 }, new Student { name = "Haseeba", marks = 34.0 }, }; -
Luego, cree un objeto
ExcelMapperllamadomaper.ExcelMapper maper = new ExcelMapper(); -
Para guardar los datos que acabamos de crear, crearemos un archivo de muestra en la ruta o directorio requerido.
var newFile = @"D:\sample.xlsx"; -
Por último, guardaremos el archivo usando la función
maper.Save()de ExcelMapper.maper.Save(newFile, s, "ShaniData", true);
Código fuente completo:
using System;
using System.Collections.Generic;
using System.Linq;
using System.Text;
using System.Threading.Tasks;
using Ganss.Excel;
namespace DatatoExcelbyZeeshan {
public class Program {
public static void Main(string[] args) {
var s = new List<Student> {
new Student { name = "M.Zeeshan", marks = 94.0 },
new Student { name = "Shani", marks = 84.0 },
new Student { name = "Saada g", marks = 74.0 },
new Student { name = "Haseeba", marks = 34.0 },
};
ExcelMapper maper = new ExcelMapper();
var newFile = @"D:\sample.xlsx";
maper.Save(newFile, s, "ShaniData", true);
Console.ReadKey();
}
}
public class Student {
  public String name { get; set; }
  public double marks { get; set; }
}
}
Obtendrá el siguiente resultado en el archivo sample.xlsx:

Exportar datos de matriz a Excel usando C#
Pongamos un ejemplo para entenderlo de manera práctica.
Agregar el paquete de referencia
Para diferentes operaciones de Excel, agregaremos el paquete ExcelMapper. Para hacer eso, siga los pasos a continuación:
-
Primero, abra Visual Studio, cree una aplicación de consola y asígnele un nombre.
-
Haga clic con el botón derecho en el panel Explorador de soluciones y seleccione Administrar paquetes NuGet.
-
Ahora haga clic en la opción Examinar, busque
Spire.Xlse instálelo.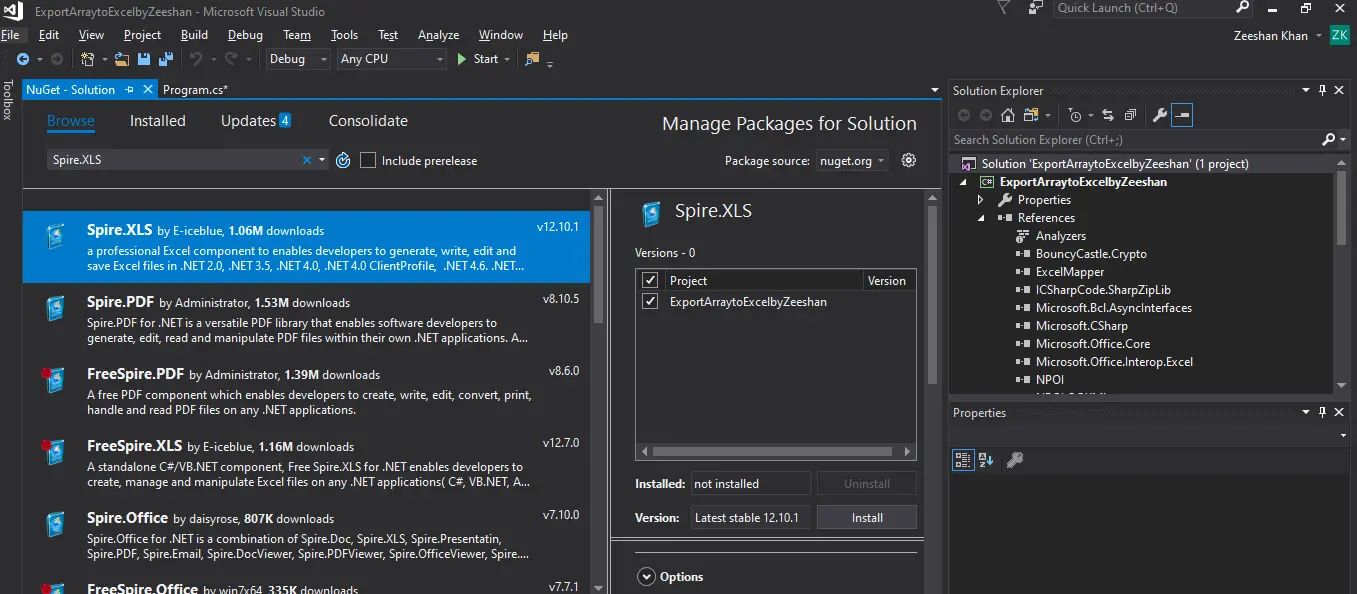
Ejemplo:
-
Para comenzar, importe las siguientes bibliotecas:
using System; using System.Collections.Generic; using System.Linq; using System.Text; using System.Threading.Tasks; using Spire.Xls; -
Ahora, cree una nueva instancia de
Libro de trabajoy asígnele el nombrewb.Workbook wb = new Workbook(); -
Incluya una nueva
Hoja de trabajoy asígnele el nombrews.Worksheet ws = wb.Worksheets.Add("ShaniArray"); -
Cree una nueva matriz y asígnele el nombre
ProgramSubjectResults, luego agregue algunos datos.string[,] ProgramSubjectResults = new string[,] { { "Name", "City", "Gpa", "Language" }, { "Zeeshan", "ISB", "3.7", "Flutter Development" }, { "Saad Jaan", "RWP", "4.0", "Full Stack" }, { "Haseeba", "FATA", "3.53", "Andriod Development" } }; -
Para incluir la matriz en la
Hoja de trabajo, comience con la celda.ws.InsertArray(ProgramSubjectResults, 2, 1); ws.AllocatedRange.AutoFitColumns(); -
Finalmente, asigne un nombre a la matriz que acaba de crear y guárdela como un archivo de Excel.
wb.SaveToFile(@"D:\ArraytoExcel.xlsx", ExcelVersion.Version2016);
Código fuente completo:
using System;
using System.Collections.Generic;
using System.Linq;
using System.Text;
using System.Threading.Tasks;
using Spire.Xls;
namespace ExportArraytoExcelbyZeeshan {
class Program {
static void Main(string[] args) {
Workbook wb = new Workbook();
wb.Worksheets.Clear();
Worksheet ws = wb.Worksheets.Add("ShaniArray");
string[,] ProgramSubjectResults =
    new string[,] { { "Name", "City", "Gpa", "Language" },
                    { "Zeeshan", "ISB", "3.7", "Flutter Development" },
                    { "Saad Jaan", "RWP", "4.0", "Full Stack" },
                    { "Haseeba", "FATA", "3.53", "Andriod Development" } };
ws.InsertArray(ProgramSubjectResults, 2, 1);
ws.AllocatedRange.AutoFitColumns();
wb.SaveToFile(@"D:\ArraytoExcel.xlsx", ExcelVersion.Version2016);
}
}
}
Producción:

Exportar datos de DataTable a Excel usando C#
Veamos cómo se puede hacer esto usando el siguiente ejemplo.
Agregar el paquete de referencia
Para exportar DataTable a Excel, agregaremos el paquete ExcelMapper. Para hacer eso, siga los pasos que discutimos antes.
Ejemplo:
-
Para comenzar, importe las siguientes bibliotecas:
using System; using System.Collections.Generic; using System.Linq; using System.Text; using System.Threading.Tasks; using System.Data; using Spire.Xls; -
Ahora, cree una nueva instancia de
Libro de trabajoy asígnele el nombrewb.Workbook wb = new Workbook(); wb.Worksheets.Clear(); -
Incluya una nueva instancia de
Hoja de trabajoy asígnele el nombrews.Worksheet ws = wb.Worksheets.Add("DataTableToExcel"); -
Construya un objeto de tipo
DataTabley asígnele el nombredt.DataTable dt = new DataTable(); -
Agregue
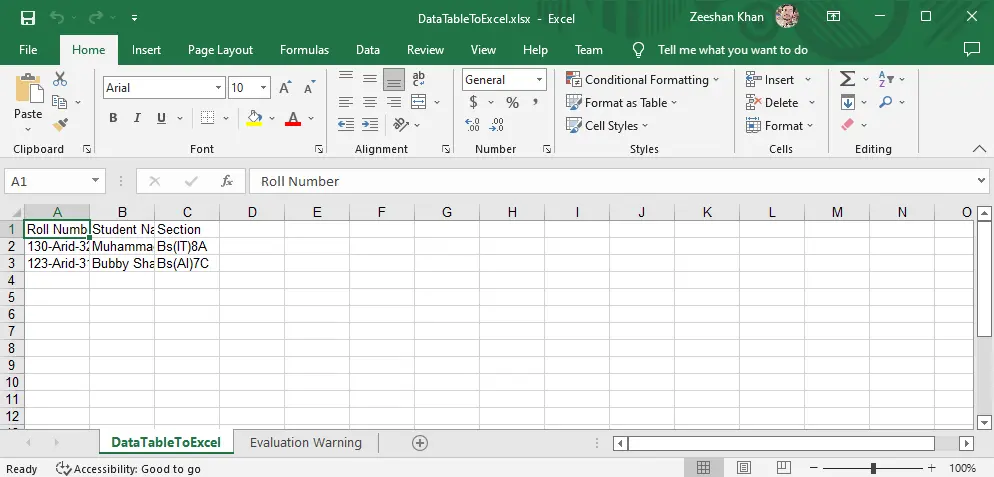
Número de lista,Nombre del estudianteySeccionescomo columnas.dt.Columns.Add("Roll Number", typeof(String)); dt.Columns.Add("Student Name", typeof(String)); dt.Columns.Add("Section", typeof(String)); -
Ahora necesitamos crear un objeto del tipo
DataRowy darle el nombredtr.DataRow dtr = dt.NewRow(); -
Inserte datos en la columna
DataRowcomo se muestra a continuación.dtr[0] = "130-Arid-3227"; dtr[1] = "Muhammad Zeeshan"; dtr[2] = "Bs(IT)8A"; dt.Rows.Add(dtr); dtr = dt.NewRow(); dtr[0] = "123-Arid-3156"; dtr[1] = "Bubby Shah"; dtr[2] = "Bs(AI)7C"; dt.Rows.Add(dtr); dtr = dt.NewRow(); -
Escriba la columna
DataTableen la hoja de cálculo que creamos.ws.InsertDataTable(dt, true, 1, 1, true); -
Finalmente, asigne un nombre al documento y guárdelo como un archivo de Excel.
wb.SaveToFile(@"C:\DataTableToExcel.xlsx", ExcelVersion.Version2016);
Código fuente completo:
using System;
using System.Collections.Generic;
using System.Linq;
using System.Text;
using System.Threading.Tasks;
using System.Data;
using Spire.Xls;
namespace ExportDataTableToExcelByZeeshan {
class Program {
static void Main(string[] args) {
Workbook wb = new Workbook();
wb.Worksheets.Clear();
Worksheet ws = wb.Worksheets.Add("DataTableToExcel");
DataTable dt = new DataTable();
dt.Columns.Add("Roll Number", typeof(String));
dt.Columns.Add("Student Name", typeof(String));
dt.Columns.Add("Section", typeof(String));
DataRow dtr = dt.NewRow();
dtr[0] = "130-Arid-3227";
dtr[1] = "Muhammad Zeeshan";
dtr[2] = "Bs(IT)8A";
dt.Rows.Add(dtr);
dtr = dt.NewRow();
dtr[0] = "123-Arid-3156";
dtr[1] = "Bubby Shah";
dtr[2] = "Bs(AI)7C";
dt.Rows.Add(dtr);
dtr = dt.NewRow();
ws.InsertDataTable(dt, true, 1, 1, true);
wb.SaveToFile(@"C:\DataTableToExcel.xlsx", ExcelVersion.Version2016);
}
}
}
Producción:
Exportar datos de JSON a Excel usando C#
El siguiente ejemplo nos ayudará a entender cómo exportar datos JSON a Excel usando C# de manera práctica.
Agregar el paquete de referencia
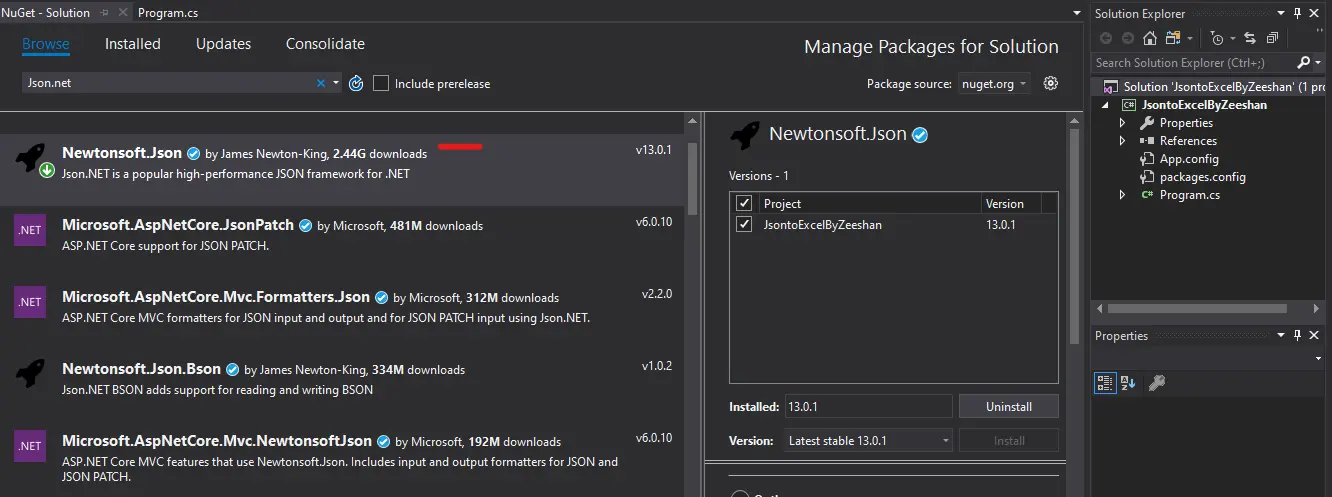
Para las operaciones Json de Excel, añadiremos los paquetes GemBox.Spreadsheet y Newtonsoft.Json. Para hacer eso, siga los pasos a continuación:
-
Primero, abra Visual Studio, cree una aplicación de consola y asígnele un nombre.
-
Haga clic con el botón derecho en el panel Explorador de soluciones y seleccione Administrar paquetes NuGet.
-
Ahora haga clic en la opción Examinar, busque
GemBox.SpreadsheetyNewtonsoft.Jsone instálelo.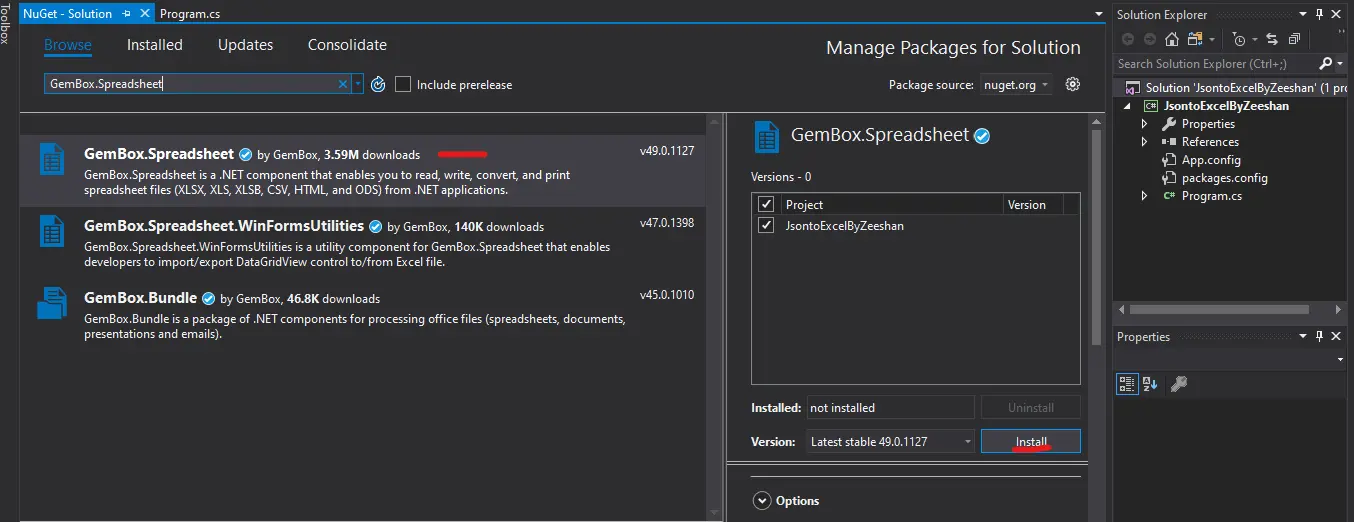
Ejemplo:
-
Para comenzar, importe las siguientes bibliotecas:
using System; using System.Collections.Generic; using GemBox.Spreadsheet; using Newtonsoft.Json; -
Antes de utilizar cualquier otra clase del paquete
GemBox.Spreadsheet, es necesario inicializar la licencia mediante la funciónSpreadsheetInfo.SetLicense().SpreadsheetInfo.SetLicense("FREE-LIMITED-KEY"); -
Ahora, crea un archivo JSON con el nombre
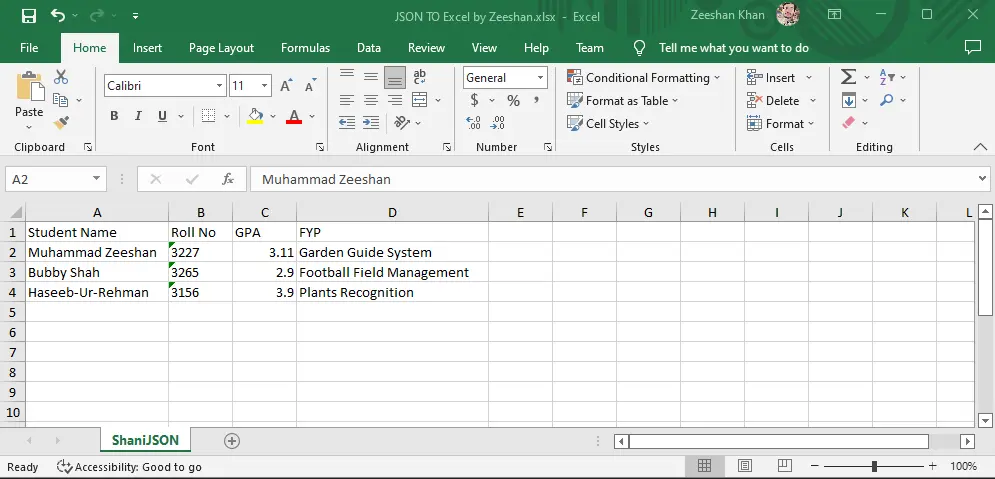
JsonDatay rellénalo con los datos deEstudiantes.string JsonData = @"{ ""0"": { ""Name"": ""Muhammad Zeeshan"", ""Roll"": ""3227"", ""GPA"": 3.11, ""Fyp"": ""Garden Guide System"" }, ""1"" : { ""Name"": ""Bubby Shah"", ""Roll"": ""3265"", ""GPA"": 2.9, ""Fyp"": ""Football Field Management"" }, ""2"" : { ""Name"": ""Haseeb-Ur-Rehman"", ""Roll"": ""3156"", ""GPA"": 3.9, ""Fyp"": ""Plants Recognition"" } }"; -
Deserializaremos la cadena JSON después de definir el archivo JSON.
Dictionary<string, Student> shani = JsonConvert.DeserializeObject<Dictionary<string, Student>>(JsonData); -
Cree una nueva hoja de trabajo en Excel y asígnele el nombre
ws. Después de eso, cree los valores de encabezado para la hoja de trabajo.ExcelWorksheet ws = wb.Worksheets.Add("ShaniJSON" + ""); ws.Cells[0, 0].Value = "Student Name"; ws.Cells[0, 1].Value = "Roll No"; ws.Cells[0, 2].Value = "GPA"; ws.Cells[0, 3].Value = "FYP"; -
Una vez creada la hoja de trabajo, escribiremos los datos deserializados en la hoja de trabajo.
int row = 0; foreach (Student user in shani.Values) { ws.Cells[++row, 0].Value = user.Fname; ws.Cells[row, 1].Value = user.Roll; ws.Cells[row, 2].Value = user.Gpa; ws.Cells[row, 3].Value = user.Fyp; } -
En el último paso, guardaremos el archivo como un archivo de Excel en el directorio especificado.
wb.Save(@"D:\JSON TO Excel by Zeeshan.xlsx");
Código fuente completo:
using System;
using System.Collections.Generic;
using GemBox.Spreadsheet;
using Newtonsoft.Json;
namespace JsontoExcelByZeeshan {
class Program {
static void Main(string[] args) {
SpreadsheetInfo.SetLicense("FREE-LIMITED-KEY");
string JsonData =
    @"{
  ""0"": {
	""Name"": ""Muhammad Zeeshan"",
	""Roll"": ""3227"",
	""GPA"": 3.11,
	""Fyp"": ""Garden Guide System""
	},
  ""1"" : {
	""Name"": ""Bubby Shah"",
	""Roll"": ""3265"",
	""GPA"": 2.9,
	""Fyp"": ""Football Field Management""
  },
  ""2"" : {
	""Name"": ""Haseeb-Ur-Rehman"",
	""Roll"": ""3156"",
	""GPA"": 3.9,
	""Fyp"": ""Plants Recognition""
	}
  }";
Dictionary<string, Student> shani =
    JsonConvert.DeserializeObject<Dictionary<string, Student>>(JsonData);
ExcelFile wb = new ExcelFile();
ExcelWorksheet ws = wb.Worksheets.Add("ShaniJSON" + "");
ws.Cells[0, 0].Value = "Student Name";
ws.Cells[0, 1].Value = "Roll No";
ws.Cells[0, 2].Value = "GPA";
ws.Cells[0, 3].Value = "FYP";
int row = 0;
foreach (Student user in shani.Values) {
  ws.Cells[++row, 0].Value = user.Fname;
  ws.Cells[row, 1].Value = user.Roll;
  ws.Cells[row, 2].Value = user.Gpa;
  ws.Cells[row, 3].Value = user.Fyp;
}
wb.Save(@"D:\JSON TO Excel by Zeeshan.xlsx");
}
}
class Student {
[JsonProperty("Name")]
public string Fname { get; set; }
[JsonProperty("Roll")]
public string Roll { get; set; }
[JsonProperty("GPA")]
public float Gpa { get; set; }
[JsonProperty("Fyp")]
public string Fyp { get; set; }
}
}
Producción:

I have been working as a Flutter app developer for a year now. Firebase and SQLite have been crucial in the development of my android apps. I have experience with C#, Windows Form Based C#, C, Java, PHP on WampServer, and HTML/CSS on MYSQL, and I have authored articles on their theory and issue solving. I'm a senior in an undergraduate program for a bachelor's degree in Information Technology.
LinkedIn